mount alberta - 11870' - Japanese Route Class 5.6
July 2023
For a year or so Sarah and I made plans to climb Mount Waddington, which I had also made plans now to climb a few times before over the years but never was able to even make the helicopter flight in for various reasons. But since Sarah is going after all the 50 classic climbs in North America, and I really just want to climb Waddington, we started scheming it shortly after our climb of Mount Hunter last year. As the time drew closer we made our final preparations, only to get an email from White Saddle that they were unable to fly us in due to their helicopter being used to fight forest fires in an unusually bad fire season throughout all of Canada. So alas, another attempt to climb Waddington failed before we could even fly in. Dismayed, Sarah and I scrambled to come up with other plans, and apparently there are a few of the 50 classics in the Canadian Rockies (which I was unaware of) and one of them happened to be a climb I was also interested in. So, our plan B ended up being the Japanese Route on Mount Alberta. How this route is supposedly a 50 classic is beyond me though.
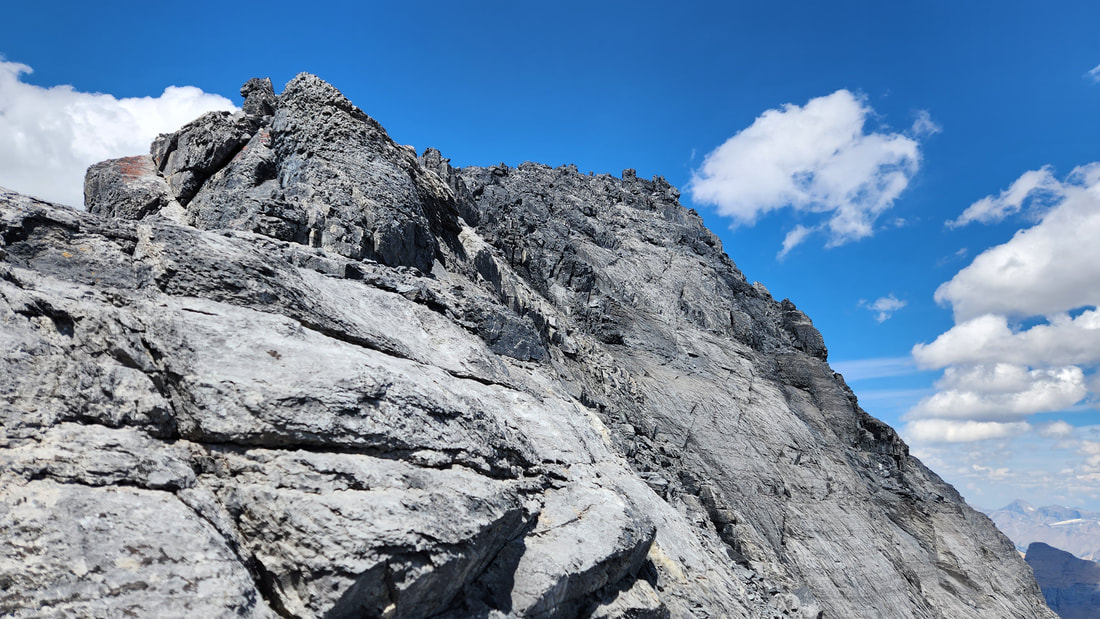
This mountain has a reputation for being many things...heinous, difficult, dangerous and rarely climbed. I was not completely aware of the history behind this mountain until I took a closer look at Steven's trip report from his September 2017 climb of this peak, where the route was completely dry for possibly the first time in centuries. There is a lot of cool history for this mountain, of which a Japanese team reached the summit in 1925 for the first ascent. They had left a ice axe on the summit that was later rumored to be made of solid silver and was a gift to the team from the emperor of Japan, but it took over 20 years for that rumor to be dispelled when the second ascent party composed of two Americans found the wooden axe at the summit (partially encased in ice) and carried it down where it now sits in the mountaineering museum in New York City. This mountain even to this day still has some years where not a single party reaches the summit.
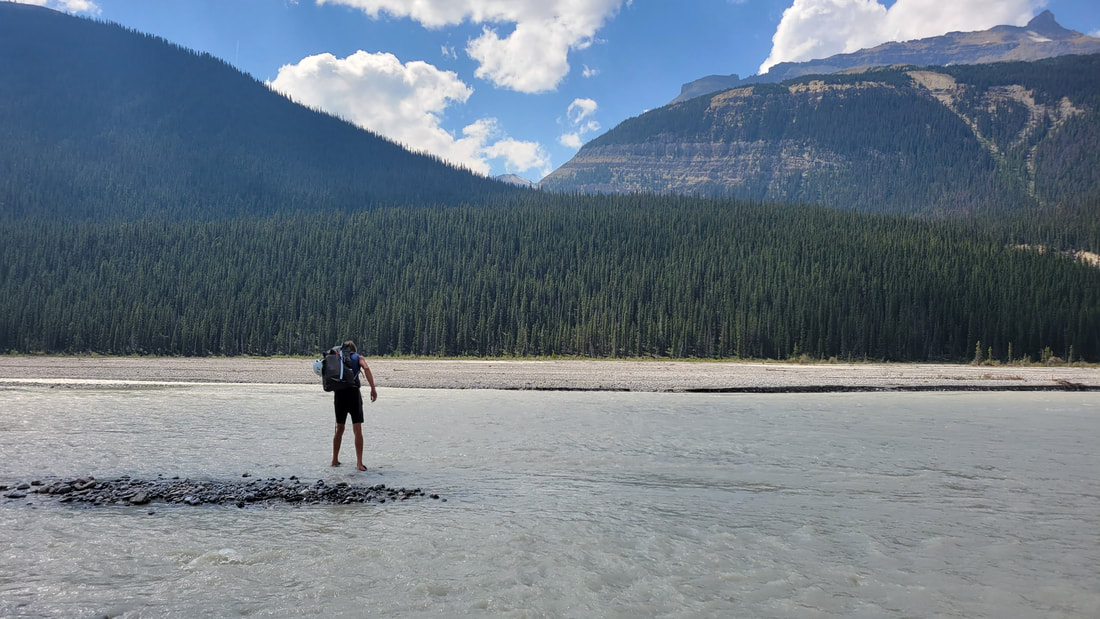
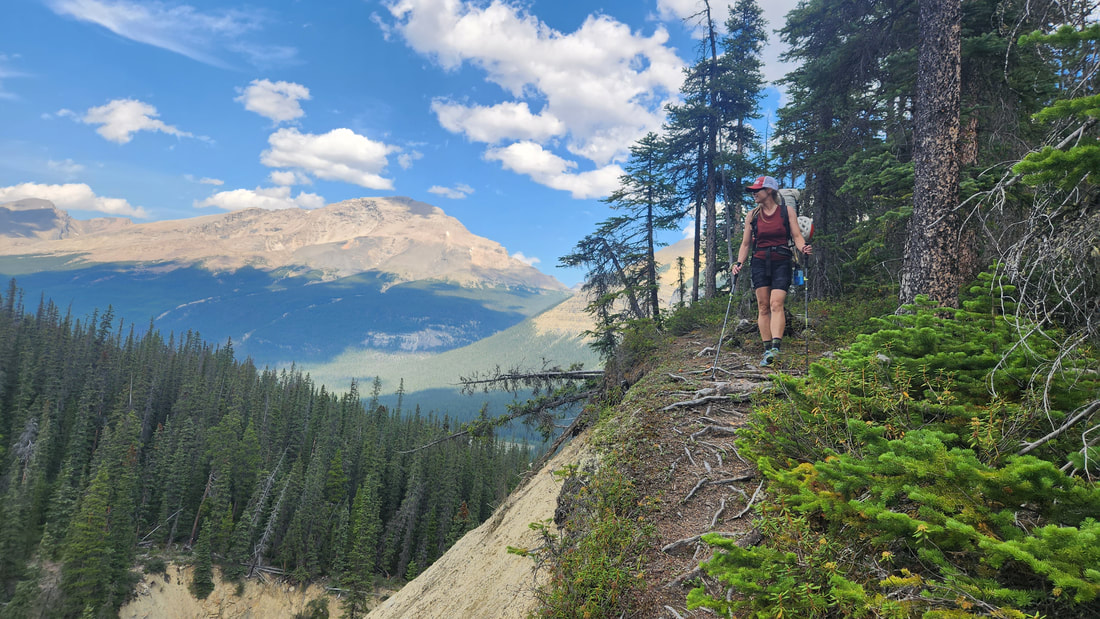
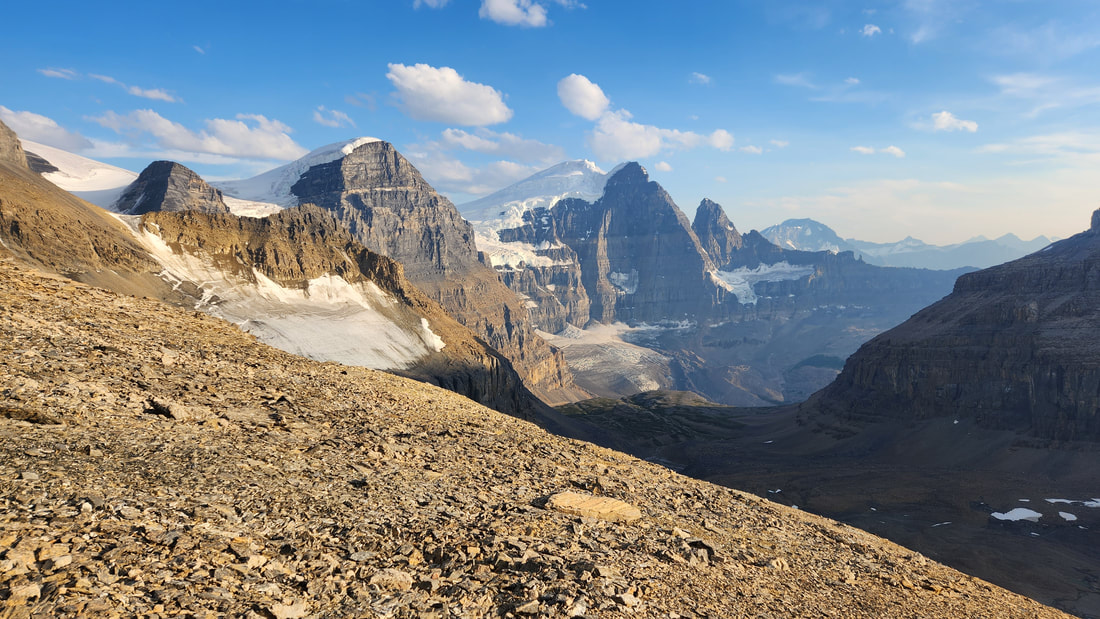
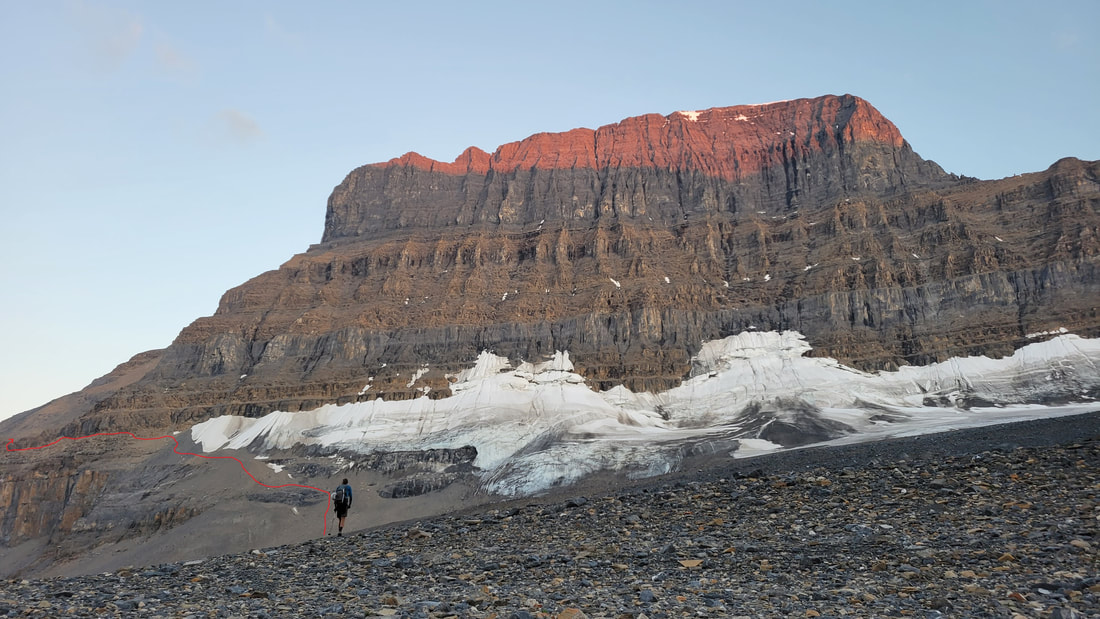
Now in 2023, I got word the route was completely dry again thanks to a very warm and dry winter in western Canada, so it made sense to go for this route. I doubt this route has ever been 100% dry in July before so we were stoked to get after it. Sarah and I made our battle plans but had to move fast since a 3 day weather window was ending just over 48 hours after her flight landed in Seattle. We immediately drove north after I picked her up at Seatac and and got to Hope BC late for a few hours sleep at a motel, then finished the long drive through Jasper. We continued south on the Icefields Parkway 88.7 kilometers from the junction with Highway 16 at the edge of the town to the pullout on the east side of Highway 93 where climbers park for the Wooley Shoulder approach. This pullout is large and hard to miss. We shouldered our packs and started fording the river right at 3pm. Wading through the water was fairly uneventful and since the temperatures had been very warm the past few days, the water didn't have that biting cold mane others have mentioned. There was only two larger channels that had thigh deep water but it was passable. On the opposide side of the wide river bar we located the climbers trail heading up the valley in a westward direction. The approach to the Wooley Shoulder is well documented and a very nice cairned path is easy to follow all the way to the Wooley Bivy at the glacial lakes with an elevaton of 7500 feet (2300 feet above the river ford). There are quite a few sections where boulder hopping is necessary along the moraines but the cairns lead the way. The only crucial piece to not miss is when you emerge out of the trees after a long section right along the river, an open talus field is crossed, and when you reach the terminus of the huge rocky moraine cut sharply right and traverse around the base to catch the trail that continues up the right side of the valley.
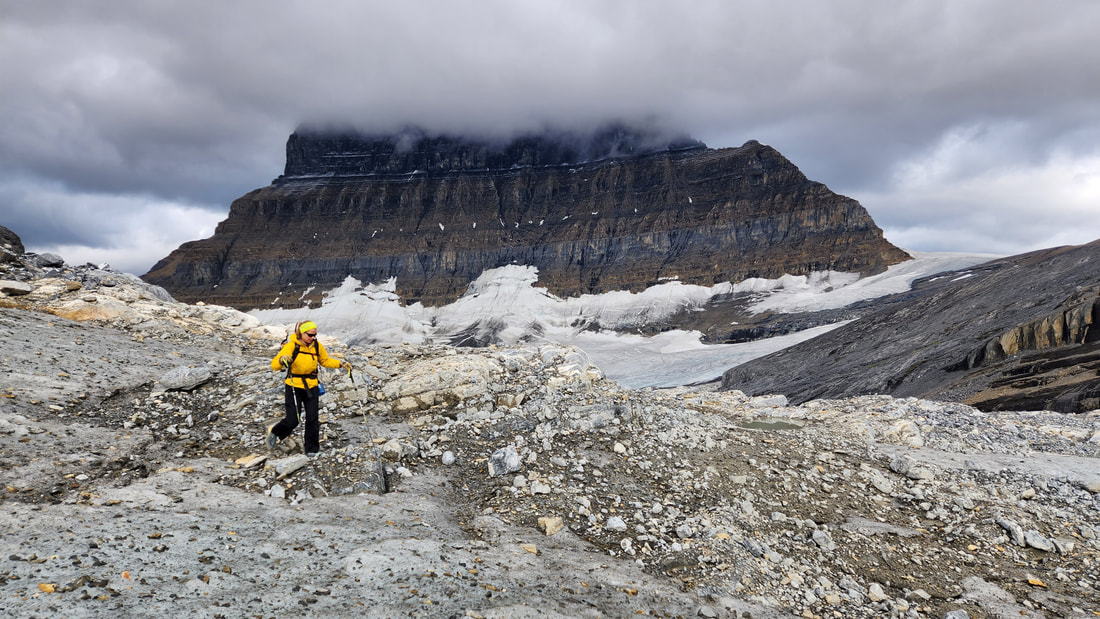
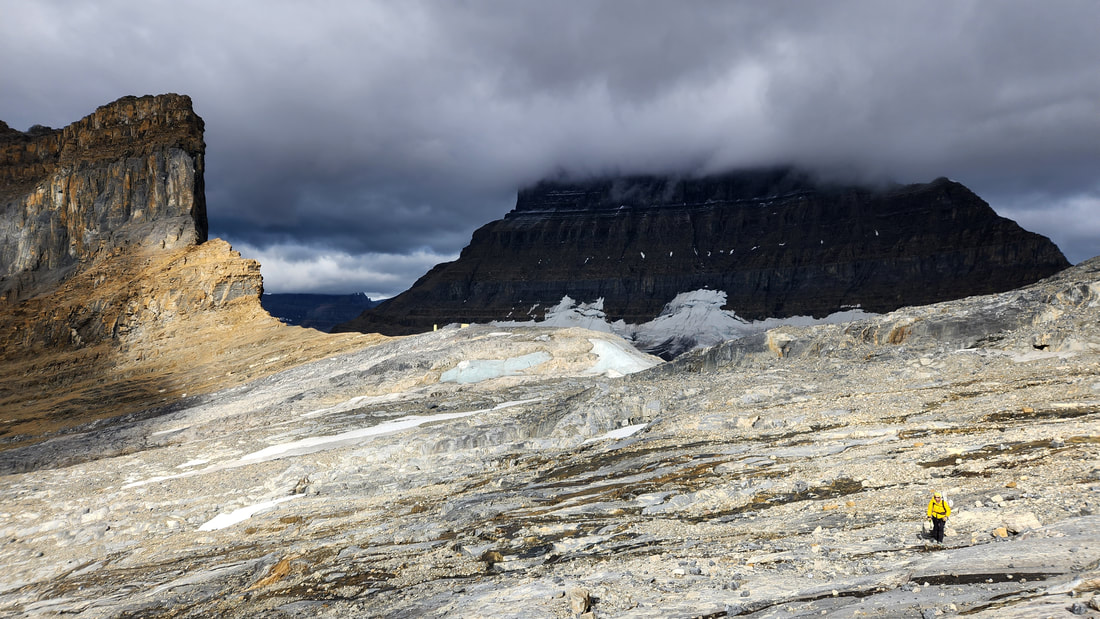
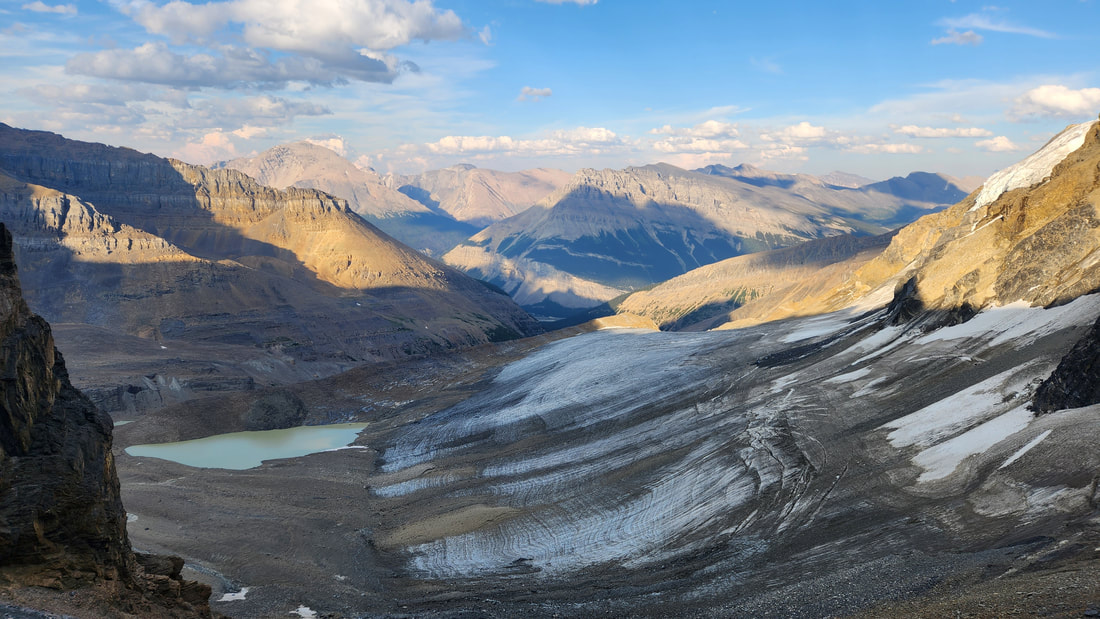
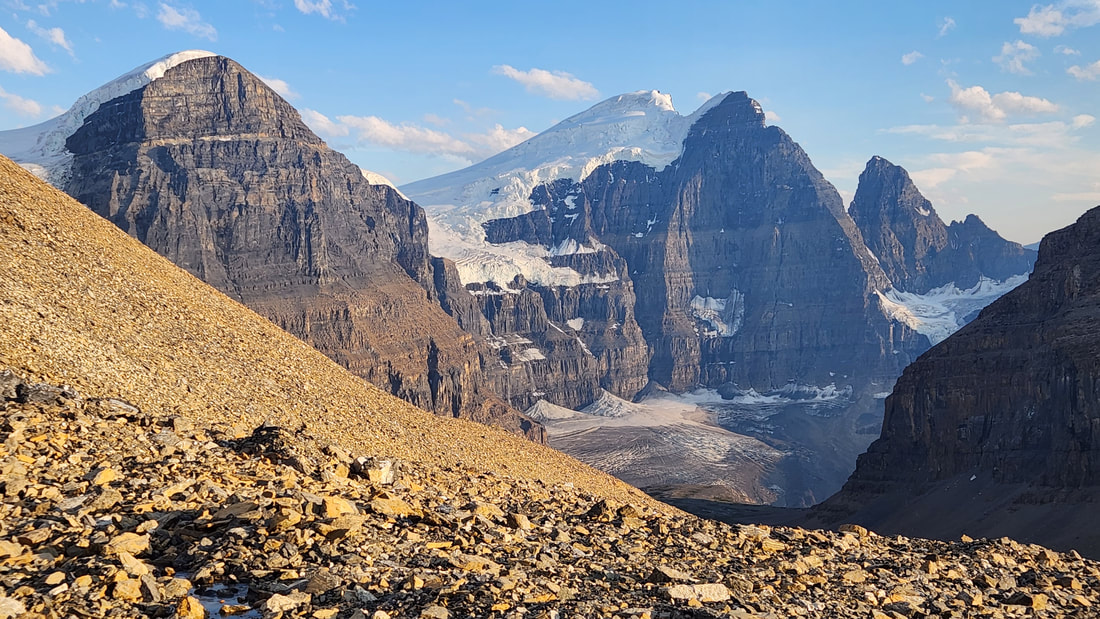
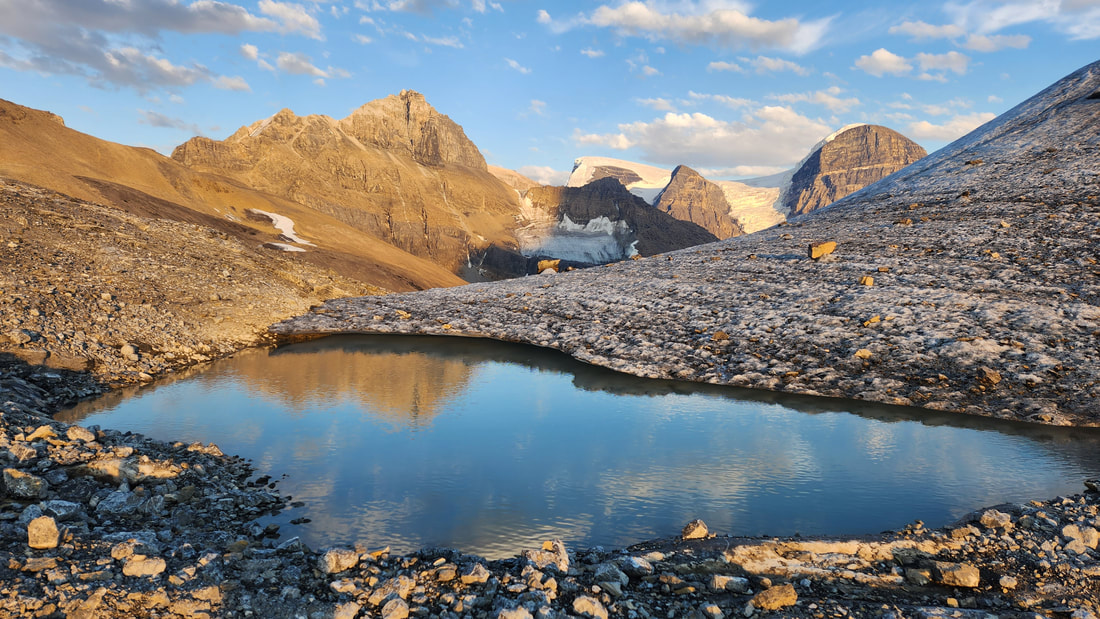
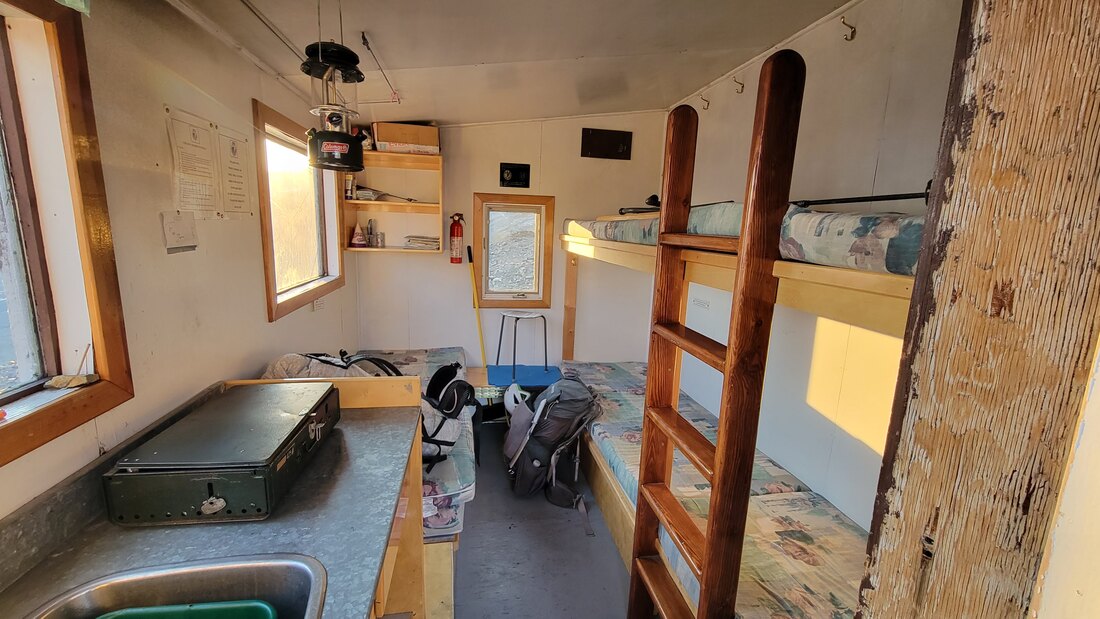
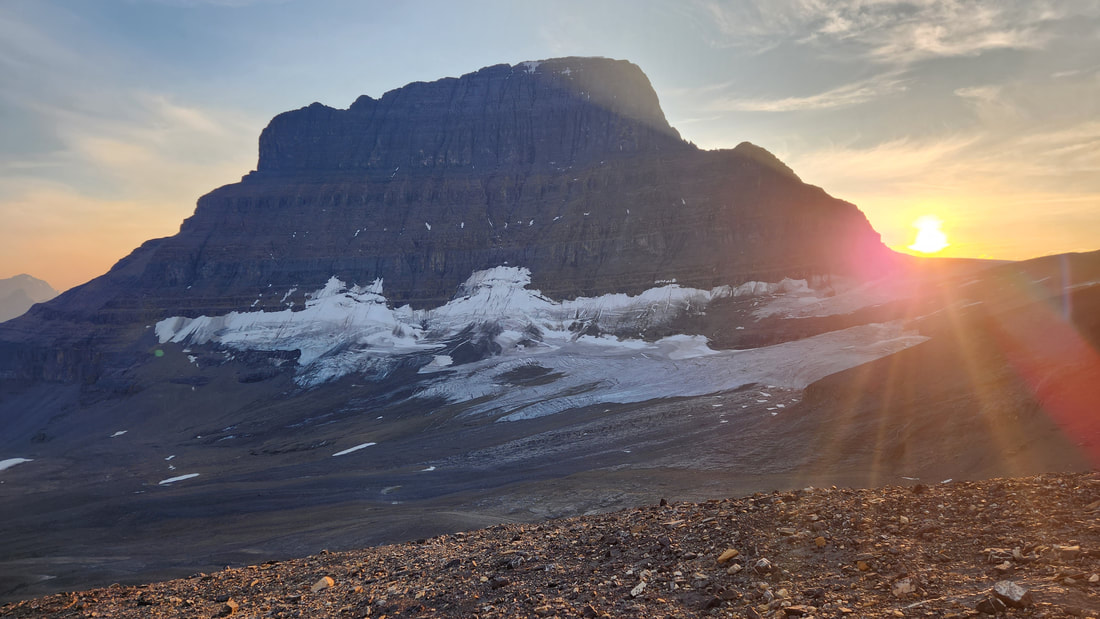
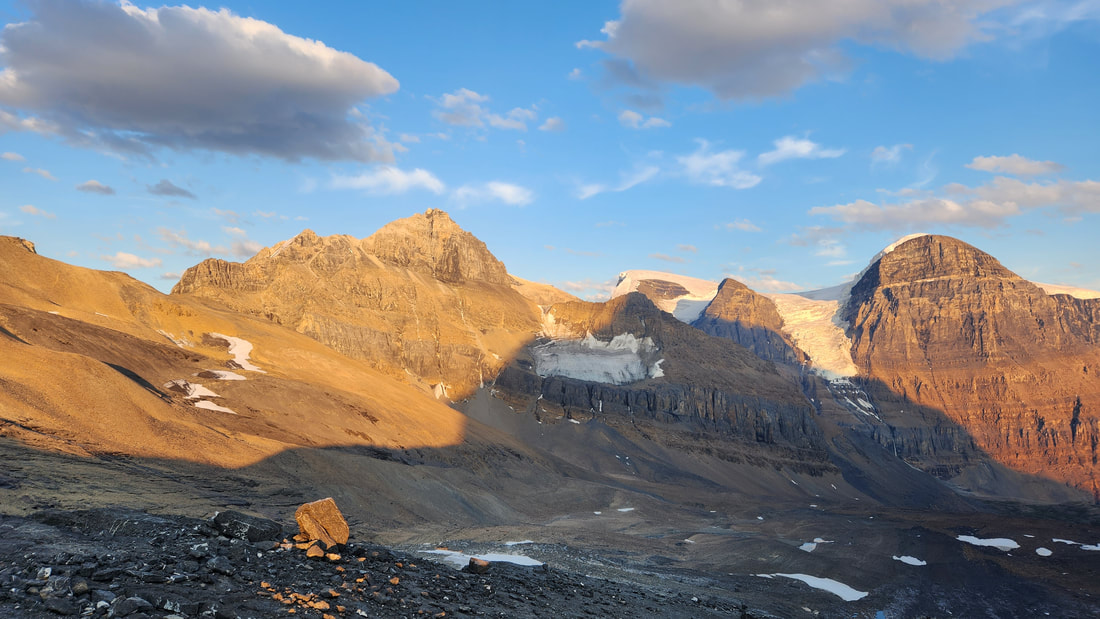
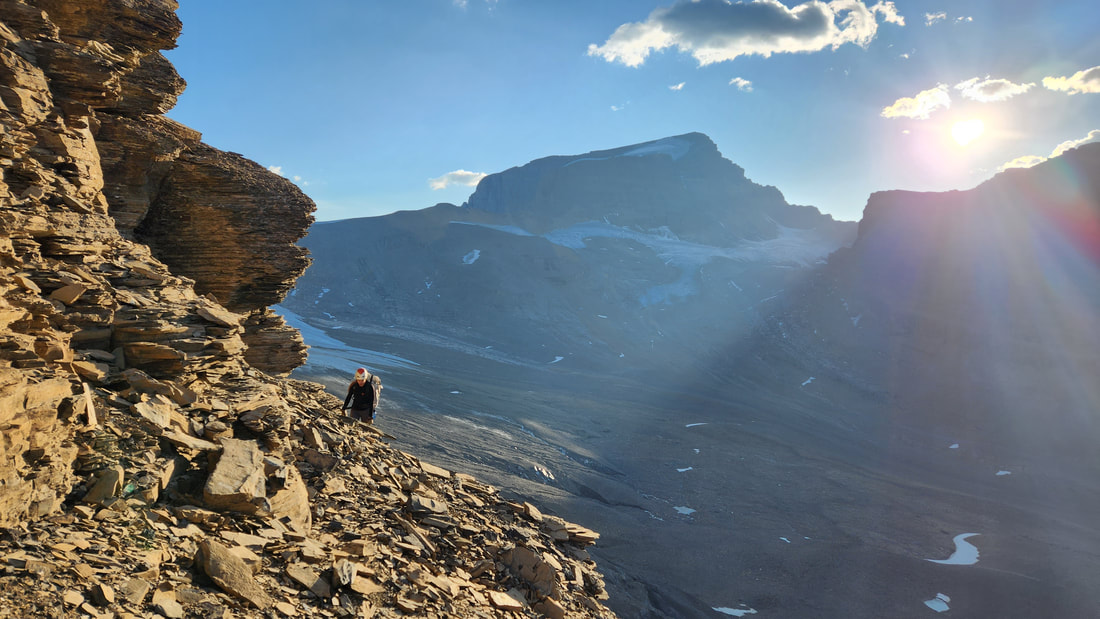
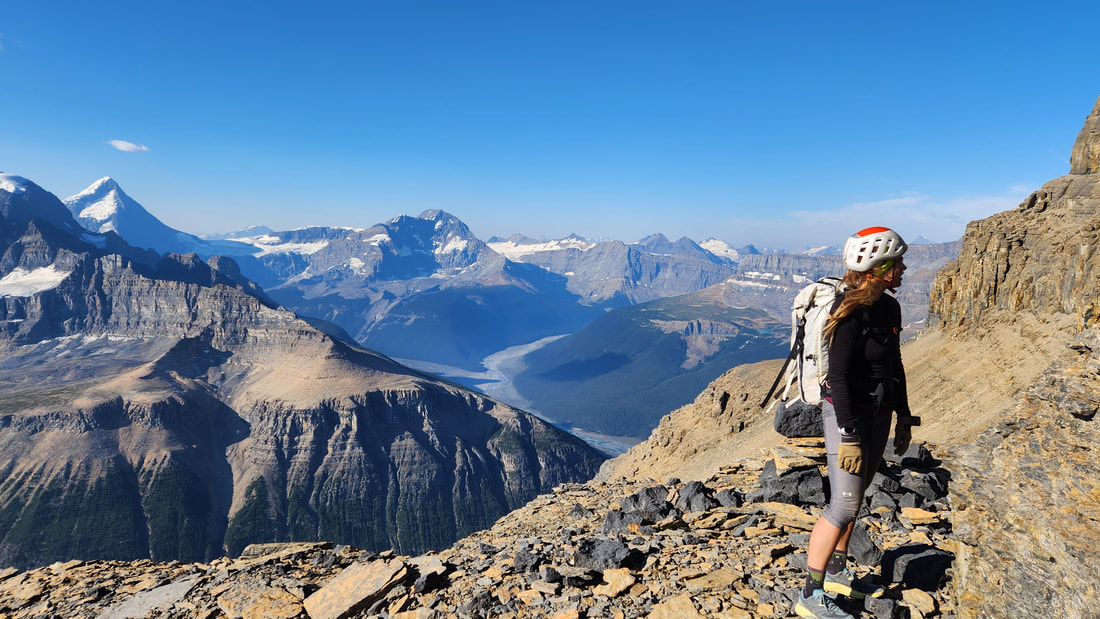
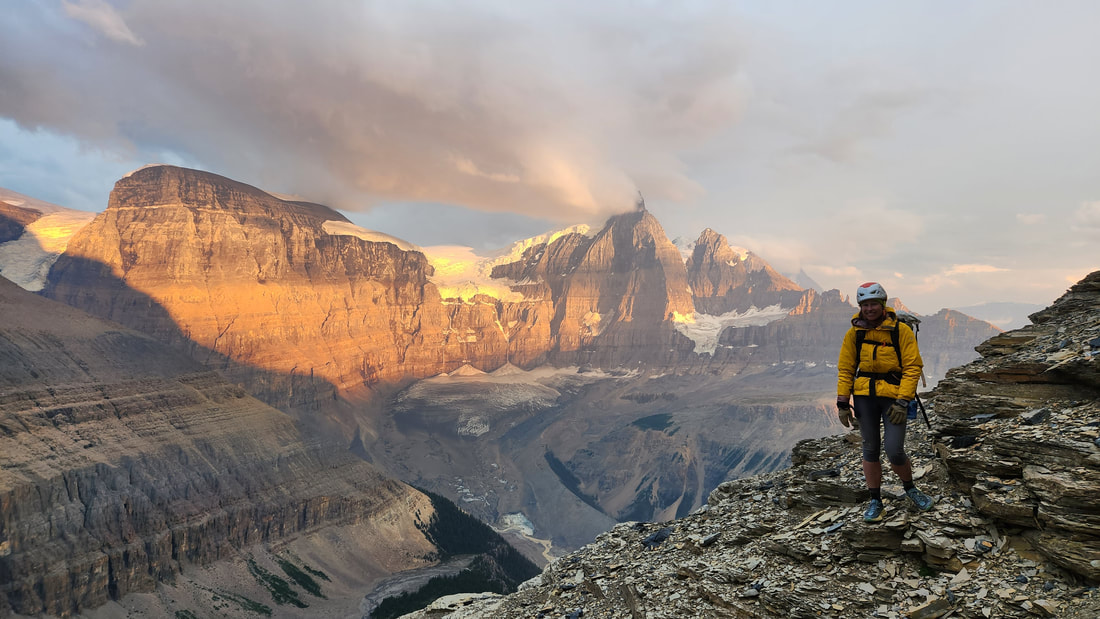
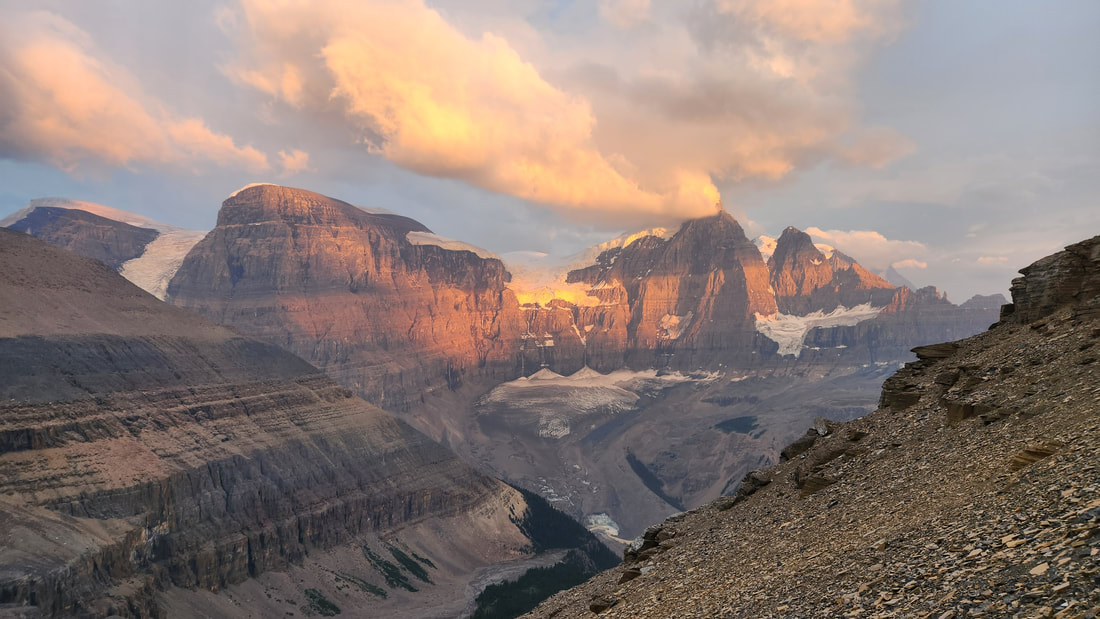
Once at the Wooley Bivy, we found the continuation of the path going west up the talus slopes towards the Wooley Shoulder. Another small glacial lake presented itself in the higher basin at 8250 feet before a long scree and talus slope continueed up. As the scree steepened and an impossible looking headwall loomed above, we ascended to the right to weave through the cliffs utilizing hidden scree slopes to gain the shoulder at 9500 feet. Evidence of other people was also found. From the shoulder, insane views of North Twin and Mount Alberta greeted us in the late afternoon sunlight. We were so lucky to have all the smoke get blown well off to the north and we had clear air to see everything. We then dropped down the west side and circled around the basin to the hut sitting at the north end of Little Alberta and arrived about 9pm. We were the only ones there and quickly settled in for the night as we had a 5am wake up call to hopefully reach the summit before the weather turned sour late the next day. Watching the evening sunset behind Mount Alberta gave us hope for a successful ascent, and since we could see the entire route was dry, we had a good feeling.
This mountain has a reputation for being many things...heinous, difficult, dangerous and rarely climbed. I was not completely aware of the history behind this mountain until I took a closer look at Steven's trip report from his September 2017 climb of this peak, where the route was completely dry for possibly the first time in centuries. There is a lot of cool history for this mountain, of which a Japanese team reached the summit in 1925 for the first ascent. They had left a ice axe on the summit that was later rumored to be made of solid silver and was a gift to the team from the emperor of Japan, but it took over 20 years for that rumor to be dispelled when the second ascent party composed of two Americans found the wooden axe at the summit (partially encased in ice) and carried it down where it now sits in the mountaineering museum in New York City. This mountain even to this day still has some years where not a single party reaches the summit.
Now in 2023, I got word the route was completely dry again thanks to a very warm and dry winter in western Canada, so it made sense to go for this route. I doubt this route has ever been 100% dry in July before so we were stoked to get after it. Sarah and I made our battle plans but had to move fast since a 3 day weather window was ending just over 48 hours after her flight landed in Seattle. We immediately drove north after I picked her up at Seatac and and got to Hope BC late for a few hours sleep at a motel, then finished the long drive through Jasper. We continued south on the Icefields Parkway 88.7 kilometers from the junction with Highway 16 at the edge of the town to the pullout on the east side of Highway 93 where climbers park for the Wooley Shoulder approach. This pullout is large and hard to miss. We shouldered our packs and started fording the river right at 3pm. Wading through the water was fairly uneventful and since the temperatures had been very warm the past few days, the water didn't have that biting cold mane others have mentioned. There was only two larger channels that had thigh deep water but it was passable. On the opposide side of the wide river bar we located the climbers trail heading up the valley in a westward direction. The approach to the Wooley Shoulder is well documented and a very nice cairned path is easy to follow all the way to the Wooley Bivy at the glacial lakes with an elevaton of 7500 feet (2300 feet above the river ford). There are quite a few sections where boulder hopping is necessary along the moraines but the cairns lead the way. The only crucial piece to not miss is when you emerge out of the trees after a long section right along the river, an open talus field is crossed, and when you reach the terminus of the huge rocky moraine cut sharply right and traverse around the base to catch the trail that continues up the right side of the valley.
Once at the Wooley Bivy, we found the continuation of the path going west up the talus slopes towards the Wooley Shoulder. Another small glacial lake presented itself in the higher basin at 8250 feet before a long scree and talus slope continueed up. As the scree steepened and an impossible looking headwall loomed above, we ascended to the right to weave through the cliffs utilizing hidden scree slopes to gain the shoulder at 9500 feet. Evidence of other people was also found. From the shoulder, insane views of North Twin and Mount Alberta greeted us in the late afternoon sunlight. We were so lucky to have all the smoke get blown well off to the north and we had clear air to see everything. We then dropped down the west side and circled around the basin to the hut sitting at the north end of Little Alberta and arrived about 9pm. We were the only ones there and quickly settled in for the night as we had a 5am wake up call to hopefully reach the summit before the weather turned sour late the next day. Watching the evening sunset behind Mount Alberta gave us hope for a successful ascent, and since we could see the entire route was dry, we had a good feeling.
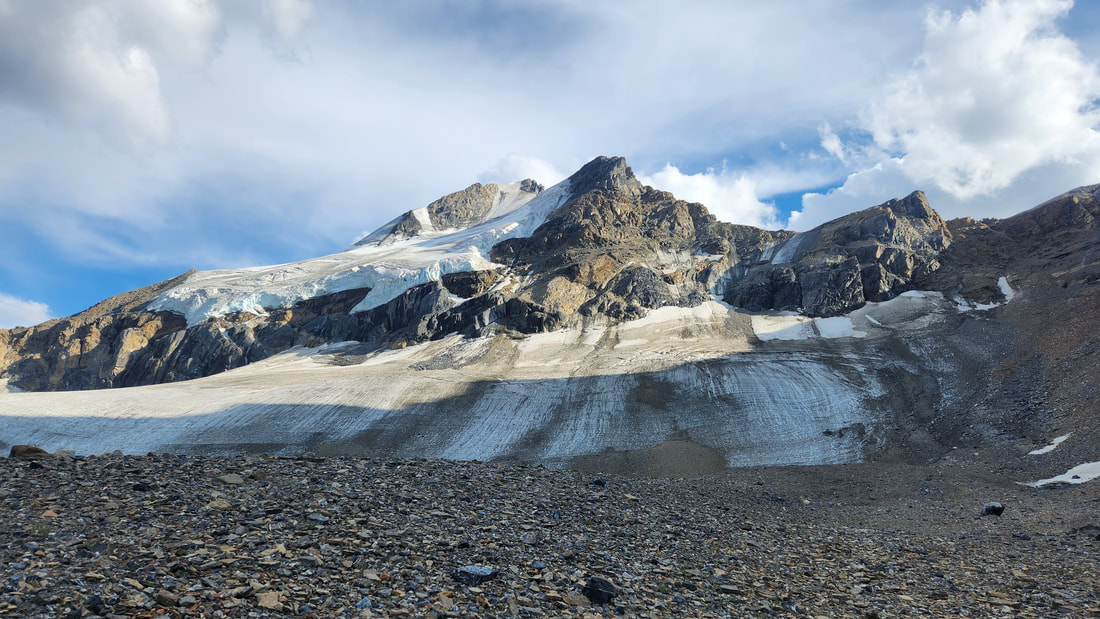

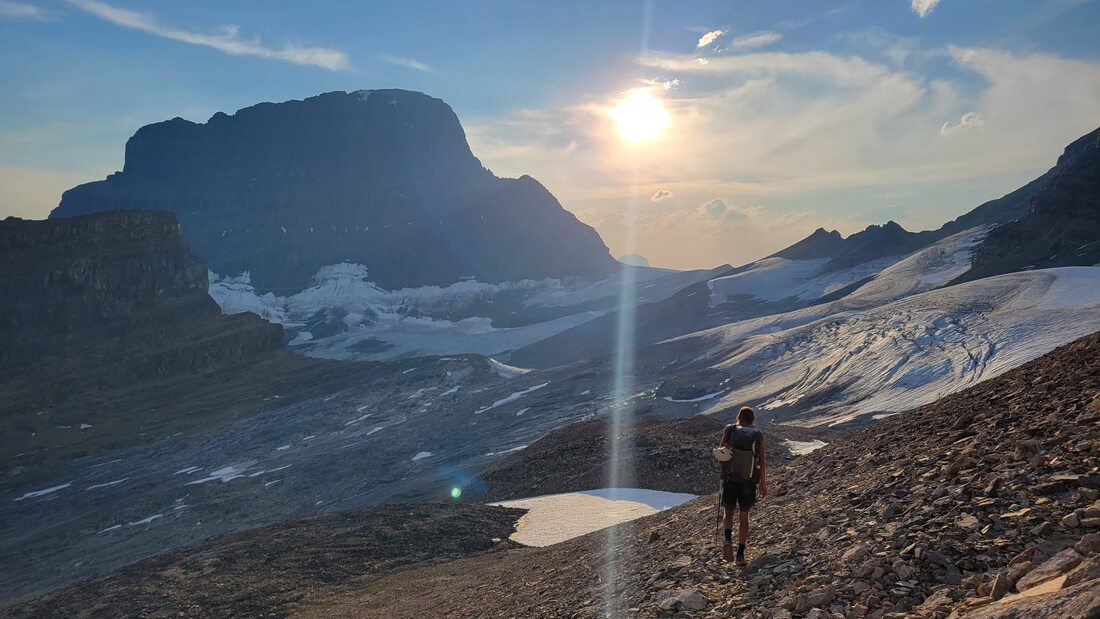

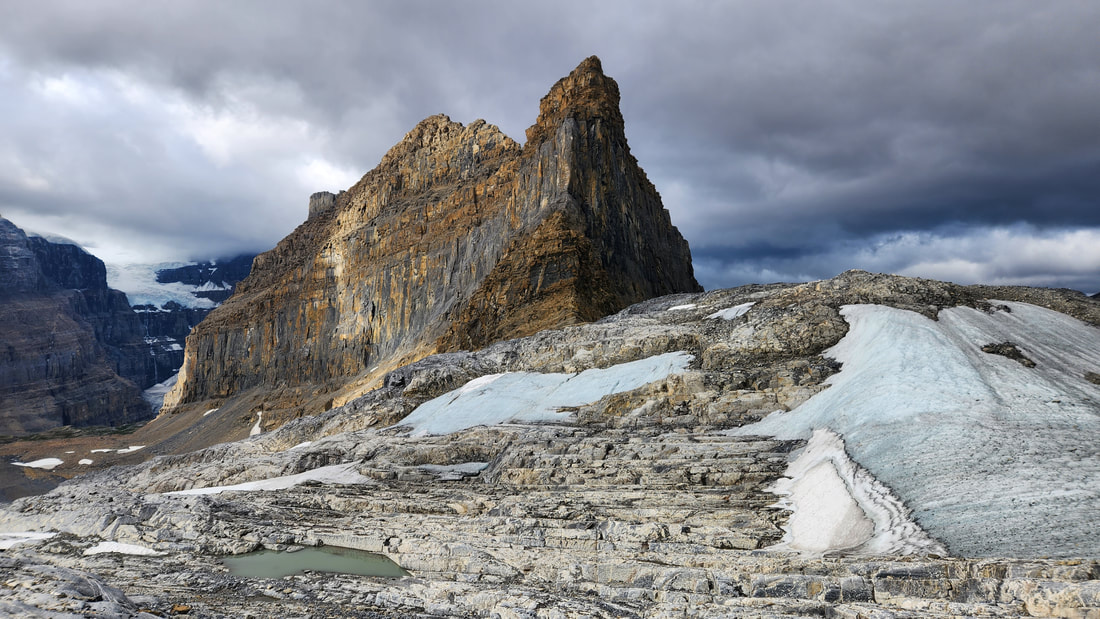
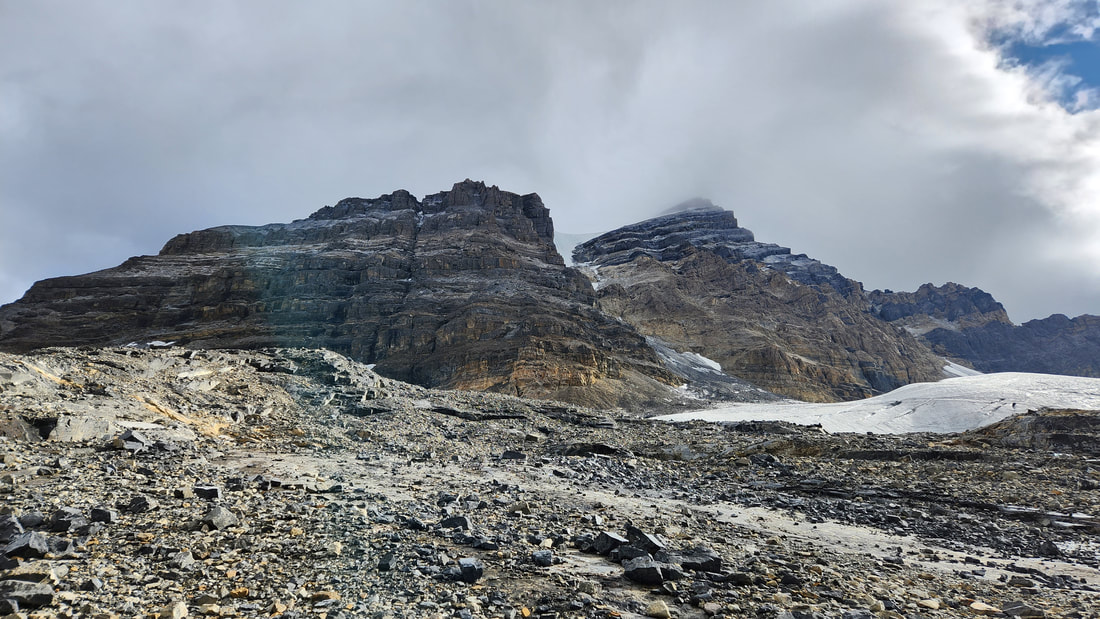
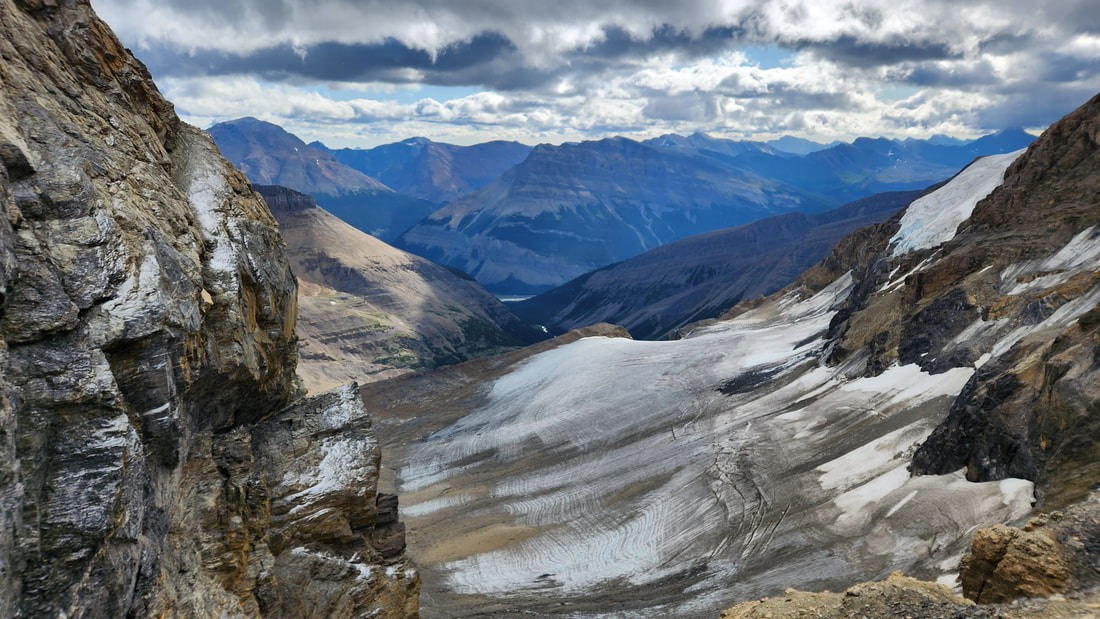
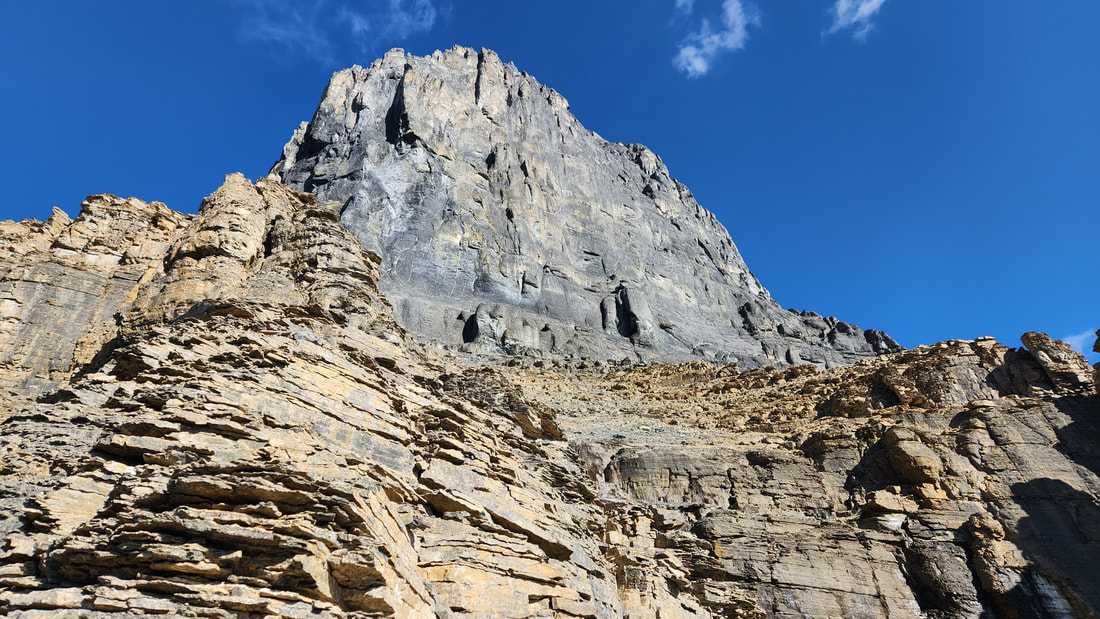
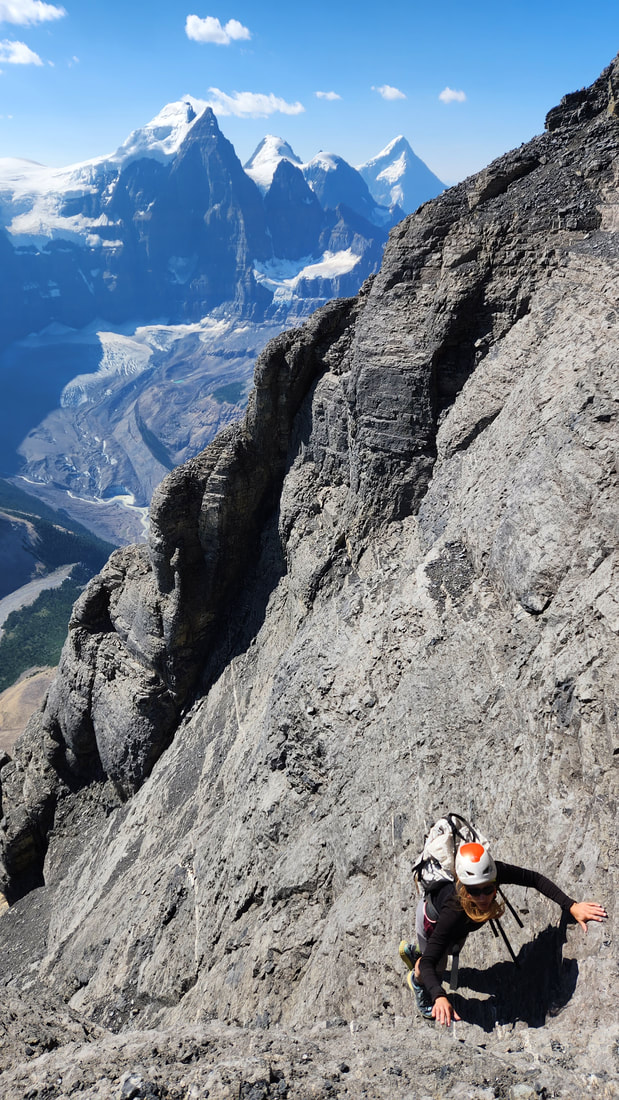
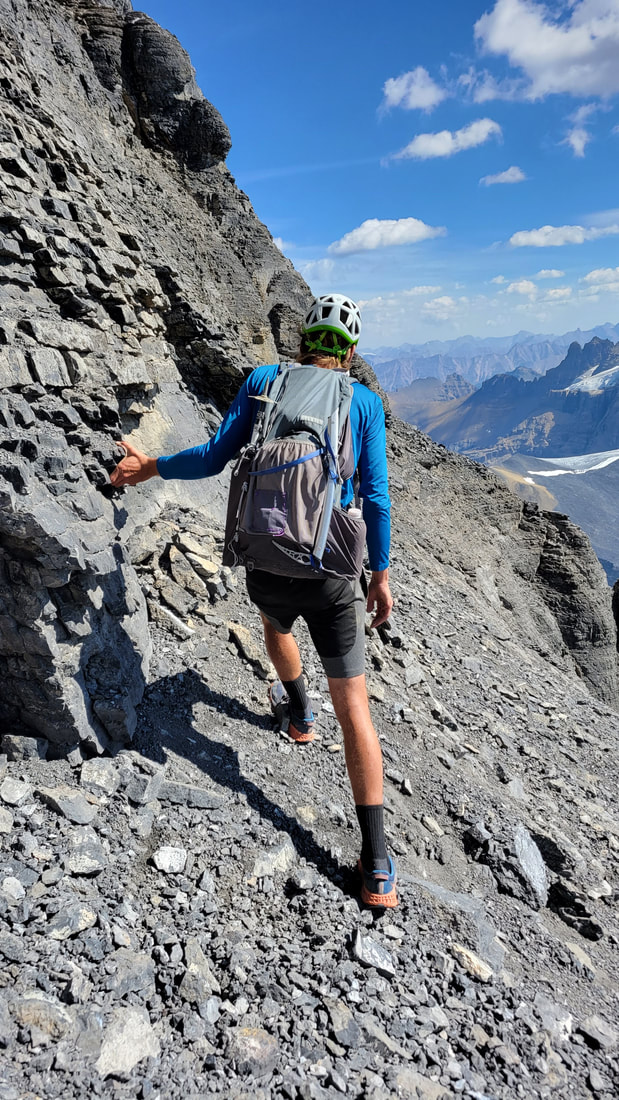
5am came super fast and after a quick breakfast, we started descending down along the ramps in a southwest direction along the base of the west facing cliffs on Little Alberta. It was a 1000 foot drop into the talus strewn valley below, but fairly easy walking. A few small ups and downs were required to cross the valley and reach the start of the Japanese Route on Mount Alberta. Steven has a very good description of the entire route on his trip report which was very helpful. The following text and images outline the mostly non technical part of the route up to the high bivy.
1. Start up the lower scree slopes for about 300 feet to the angled ledge that runs south (left) above the low cliffs that drop down on the lower south face.
2. Begin traversing left and cross a very shitty section of darker colored rock that is hardpan dirt. Trekking pole really helps.
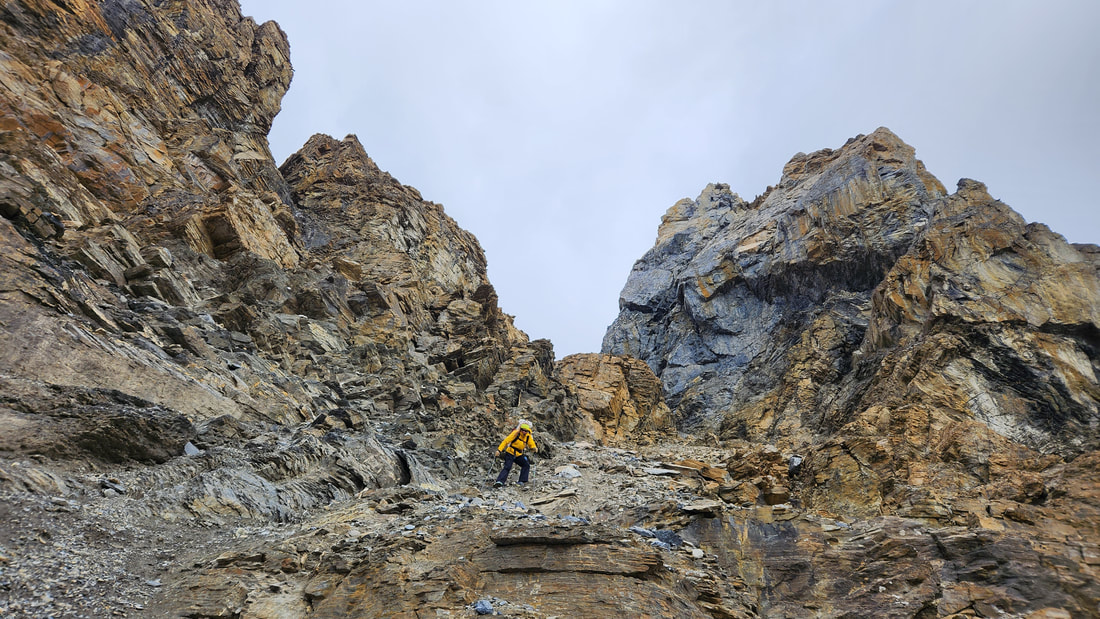
3. The scree ledge narrows up and eventually reaches a short but steep 4th class rock step with jagged looking rocks jutting horizontally out of it. Traverse the ledge to this point.
4. Climb this 25-30 foot step to the base of the upper scree cone.
5. Continue straight up talus and scree a couple hundred feet to the base of the cliffs above.
6. Traverse left ascending along the base of the cliffs on worsening loose hardpan scree until reaching a gully that allows passage to the next large scree ledge above.
7. Climb this class 3 gully on some more solid rock.
8. Traverse back to the right around a prominent buttress on more angled hardpan scree until reaching the base of loose but stepped class 2-3 terrain.
9. Ascend this class 2-3 terrain for another few hundred feet or so until it narrows considerably and exposure increases on both sides of the rib.
10. Climb the first of three class 4 steps with huge exposure. Near the crest slightly climbers left is most solid but the drop to the south is wild.
11. Continue a short bit on the ridge and climb a second more difficult class 4 step to a large slung horn where a short rappel can be done to the north side on descent.
12. Traverse around the largest and most difficult rock step on a narrow ledge on north side into a narrow gully and climb this loose class 4 to a tiny notch.
13. Climb 20 feet of 4th class (possibly low 5th) above the notch with absolte death exposure to the upper large scree ledge. A bolt anchor can be found 20 more feet up the scree for a 25m rappel on descent.
14. Traverse the upper angled shitty scree ledge right a couple hundred feet horizontally to the first rib where the upper bivy is found at about 10,400 feet elevation.
It took us 4.5 hours to reach the upper bivy from the hut.
1. Start up the lower scree slopes for about 300 feet to the angled ledge that runs south (left) above the low cliffs that drop down on the lower south face.
2. Begin traversing left and cross a very shitty section of darker colored rock that is hardpan dirt. Trekking pole really helps.
3. The scree ledge narrows up and eventually reaches a short but steep 4th class rock step with jagged looking rocks jutting horizontally out of it. Traverse the ledge to this point.
4. Climb this 25-30 foot step to the base of the upper scree cone.
5. Continue straight up talus and scree a couple hundred feet to the base of the cliffs above.
6. Traverse left ascending along the base of the cliffs on worsening loose hardpan scree until reaching a gully that allows passage to the next large scree ledge above.
7. Climb this class 3 gully on some more solid rock.
8. Traverse back to the right around a prominent buttress on more angled hardpan scree until reaching the base of loose but stepped class 2-3 terrain.
9. Ascend this class 2-3 terrain for another few hundred feet or so until it narrows considerably and exposure increases on both sides of the rib.
10. Climb the first of three class 4 steps with huge exposure. Near the crest slightly climbers left is most solid but the drop to the south is wild.
11. Continue a short bit on the ridge and climb a second more difficult class 4 step to a large slung horn where a short rappel can be done to the north side on descent.
12. Traverse around the largest and most difficult rock step on a narrow ledge on north side into a narrow gully and climb this loose class 4 to a tiny notch.
13. Climb 20 feet of 4th class (possibly low 5th) above the notch with absolte death exposure to the upper large scree ledge. A bolt anchor can be found 20 more feet up the scree for a 25m rappel on descent.
14. Traverse the upper angled shitty scree ledge right a couple hundred feet horizontally to the first rib where the upper bivy is found at about 10,400 feet elevation.
It took us 4.5 hours to reach the upper bivy from the hut.
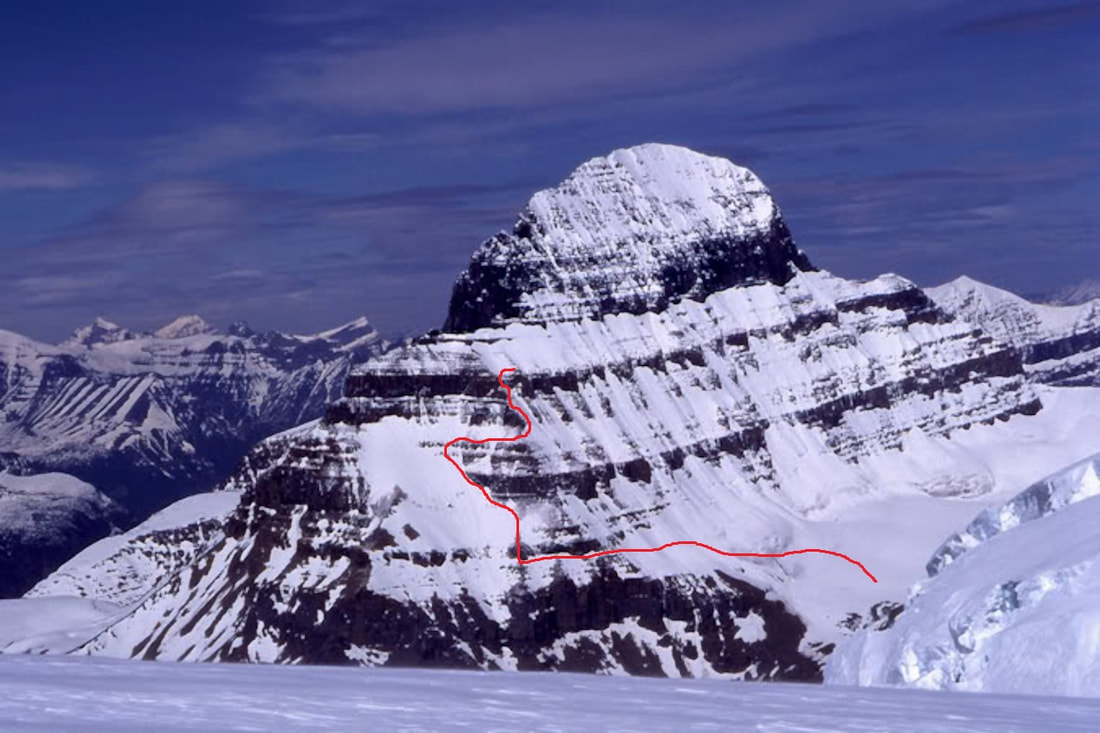
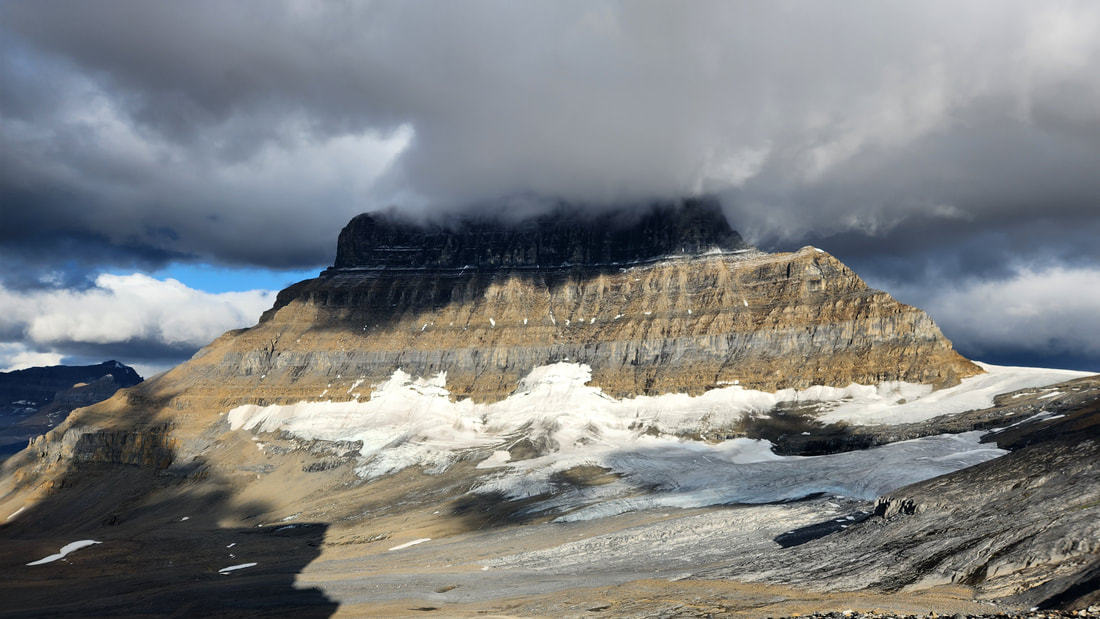
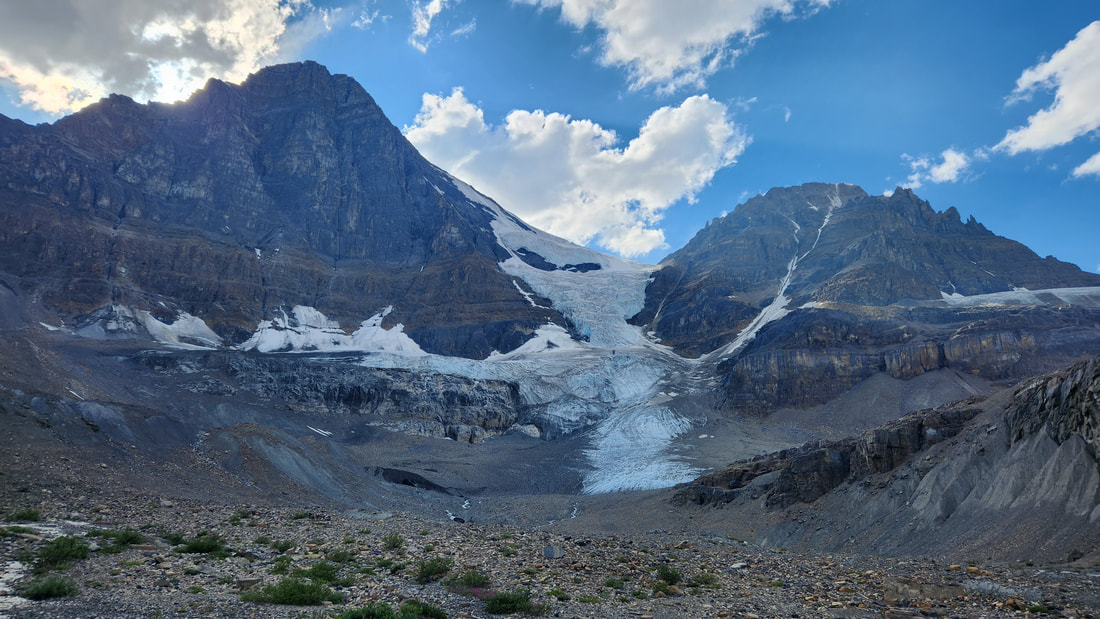
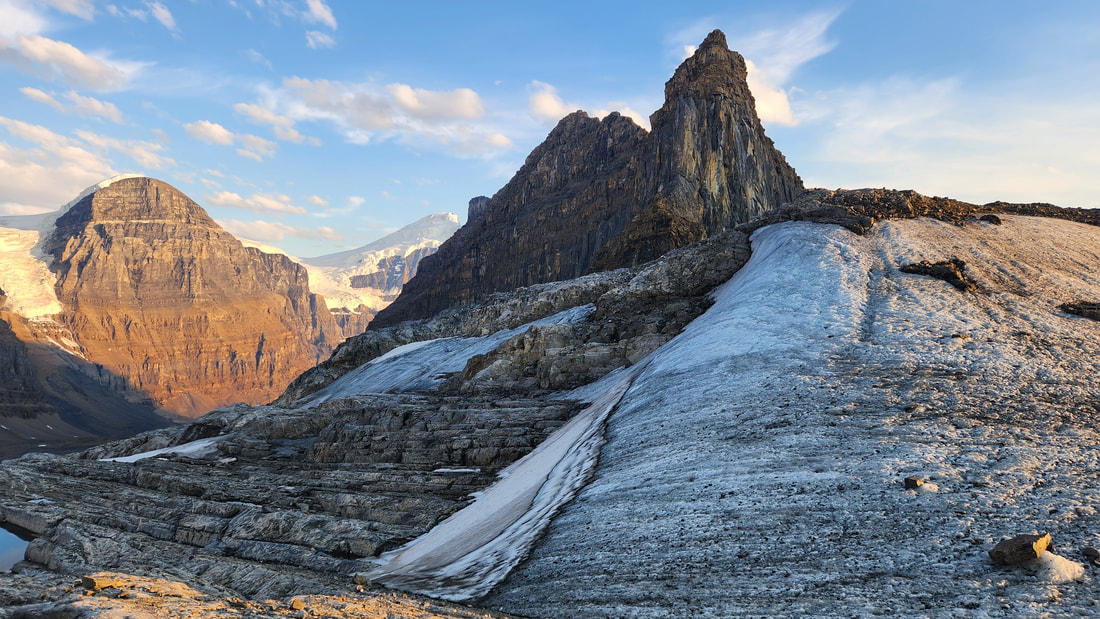
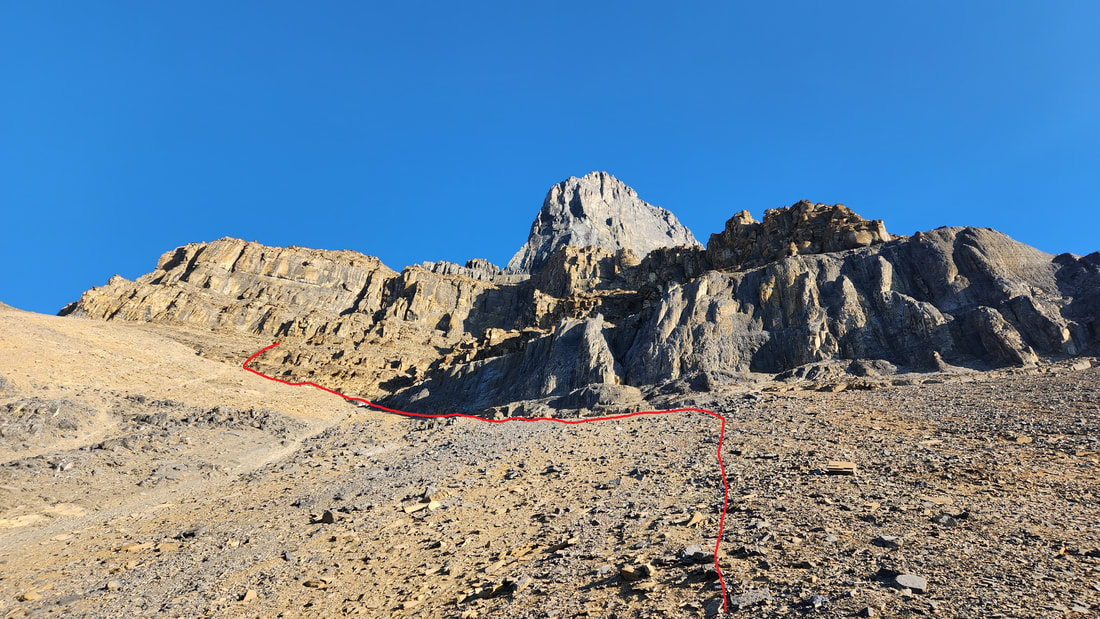
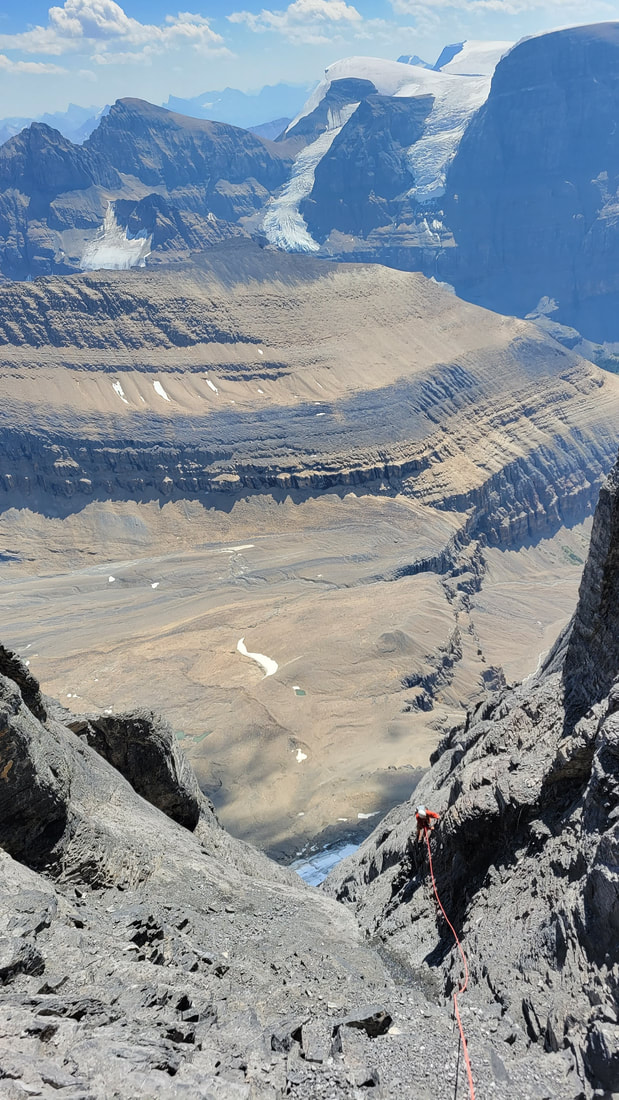
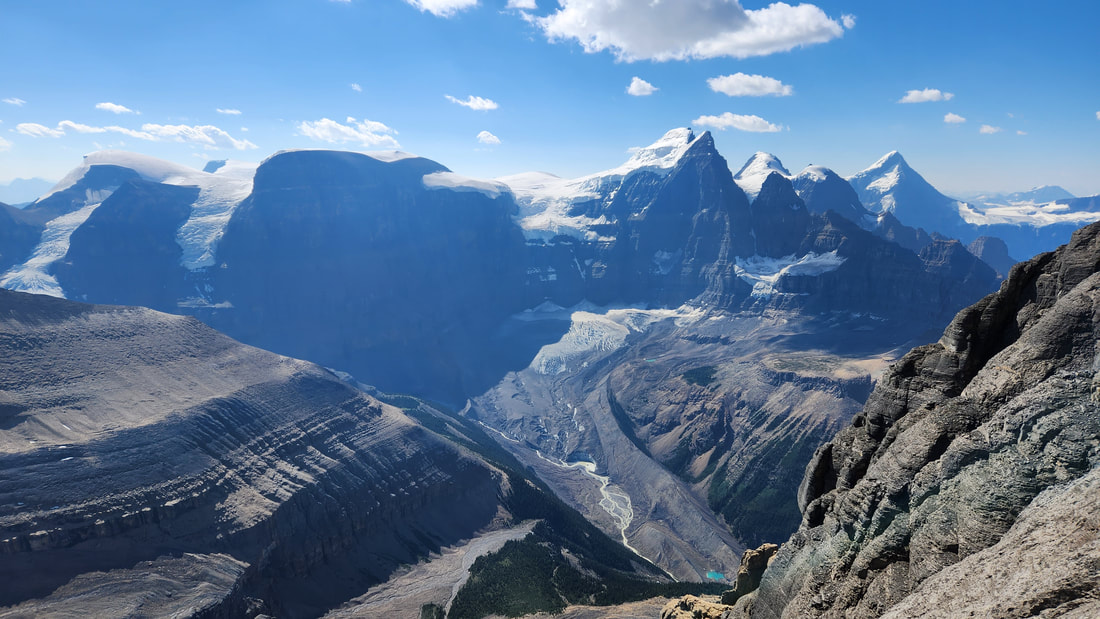
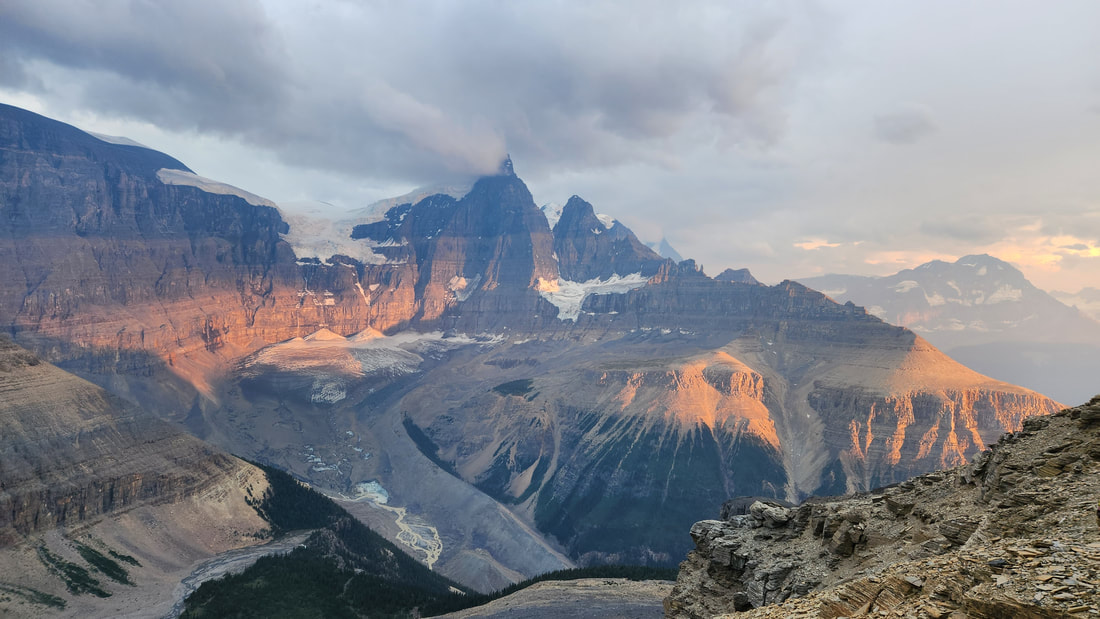
Overview of approach to the high bivy (at end of red line); image from the edge of the columbia icefield.
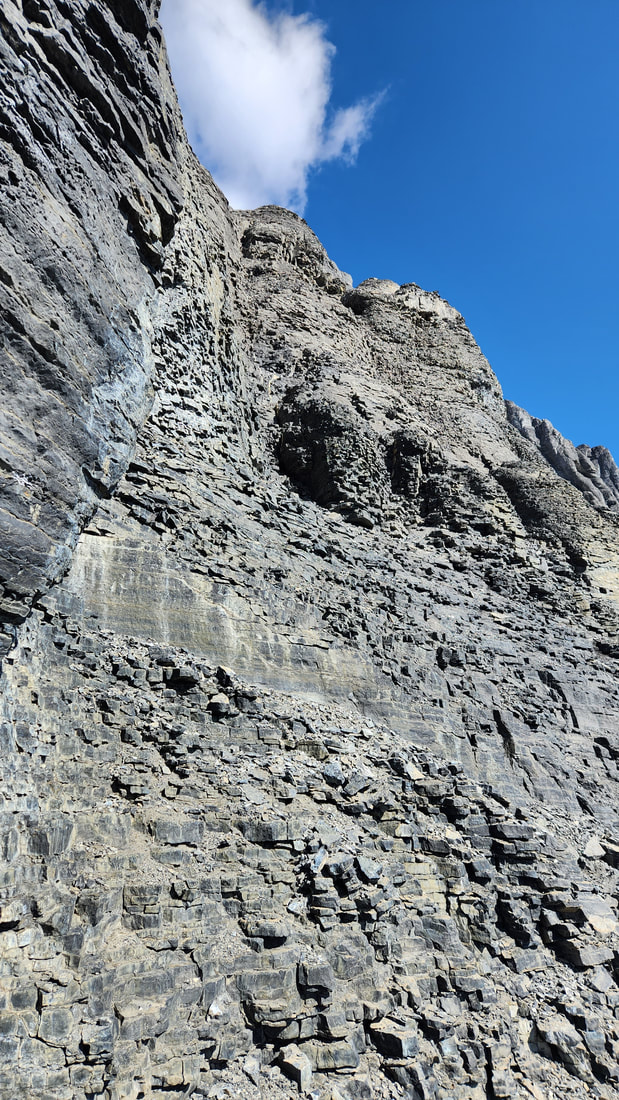
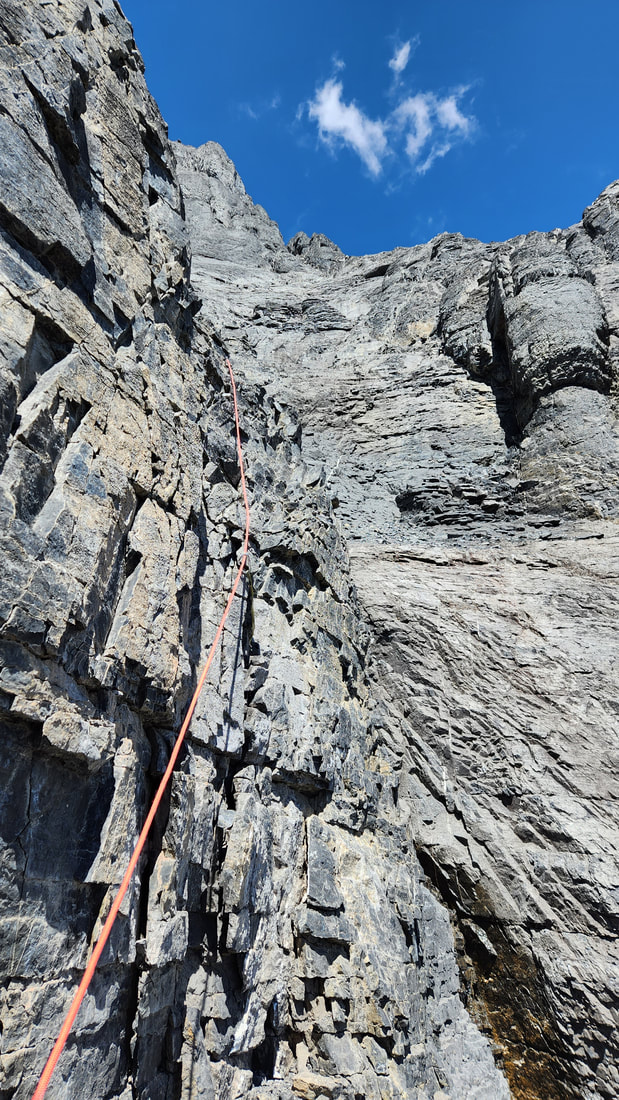
First section of route showing the initial scree ascent and lower ledge traverse (1-4 described above). Notice the section of dark rock just below the left edge of the snow...this part sucks!
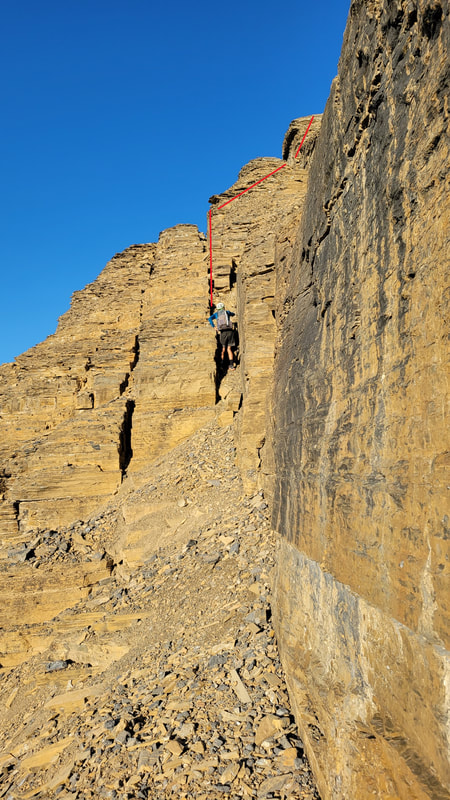
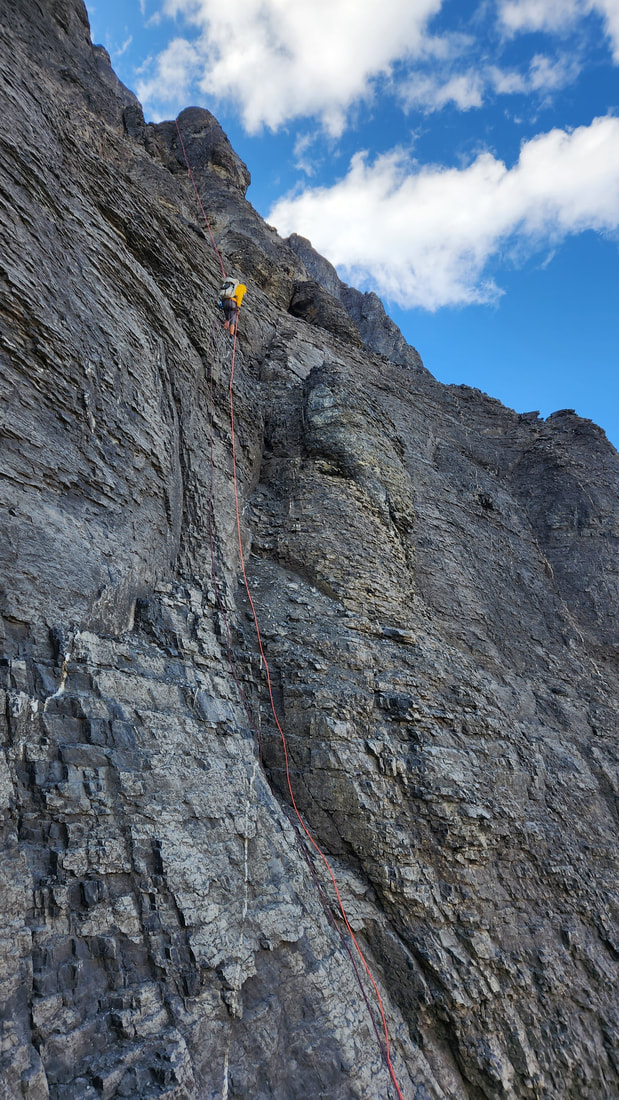
Myself climbing the 4th class step at the end of the lower ledge traverse
|
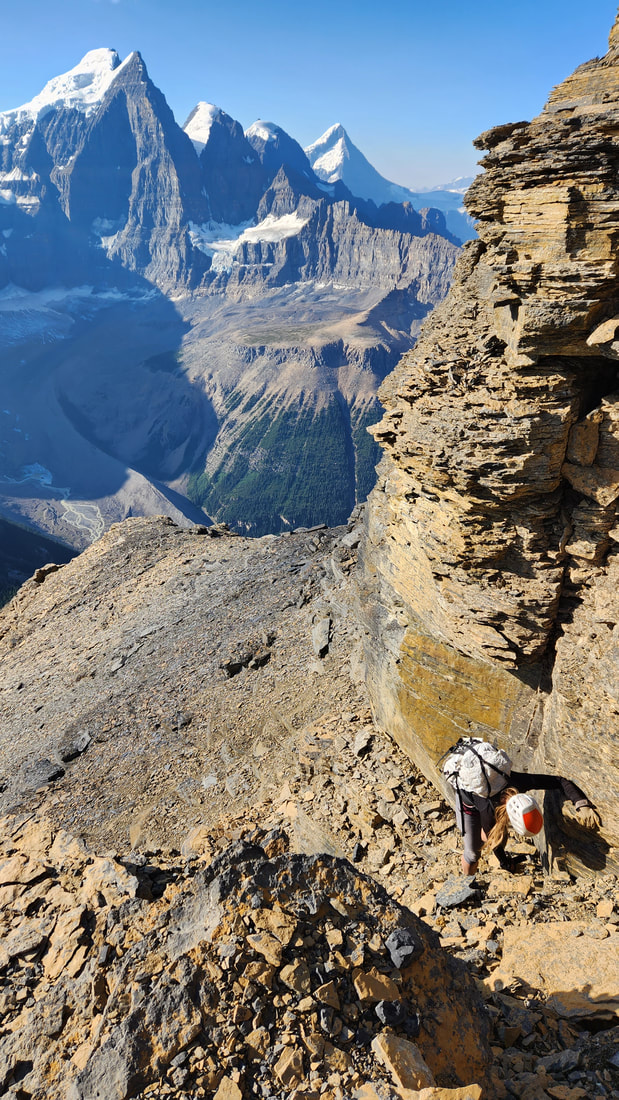
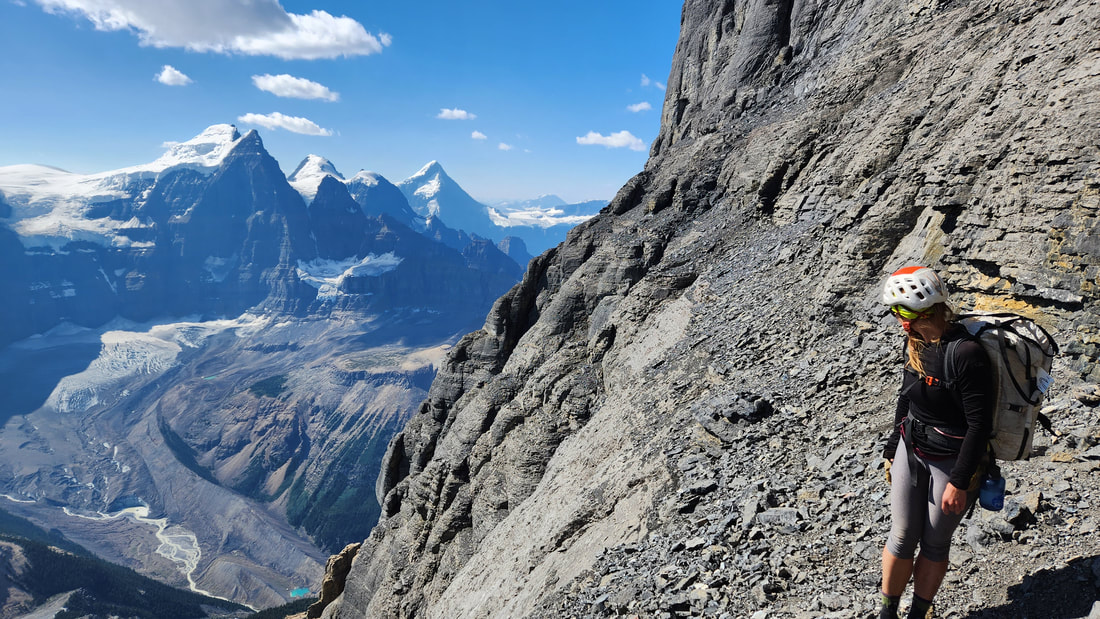
At least the scenery makes up for the shitty rock
|
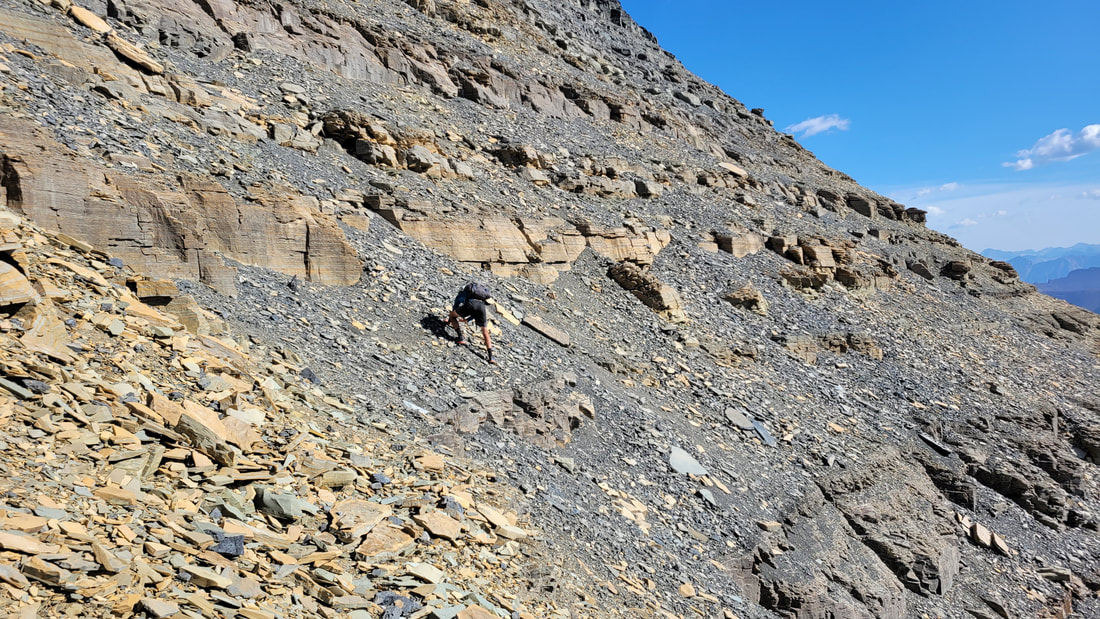
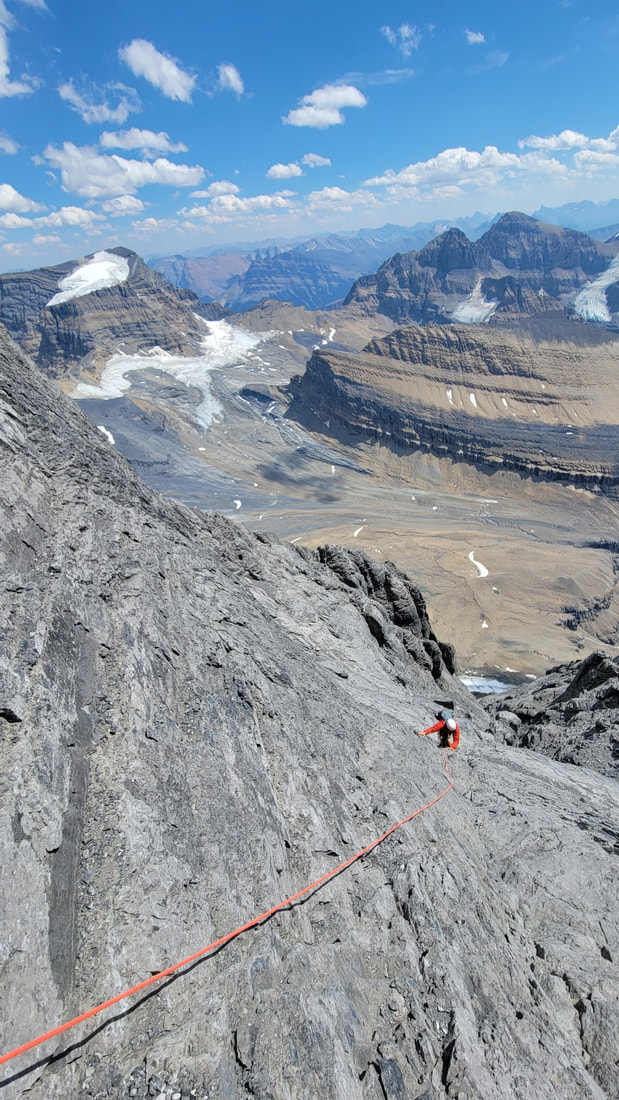
Route up the upper scree apron; the foreshortening is real here
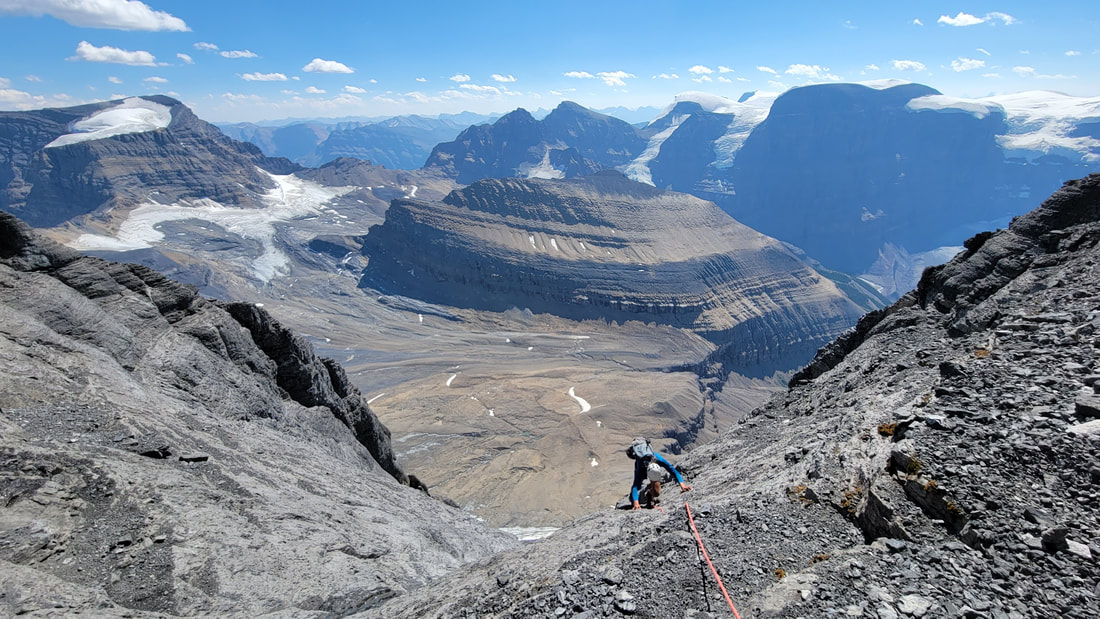
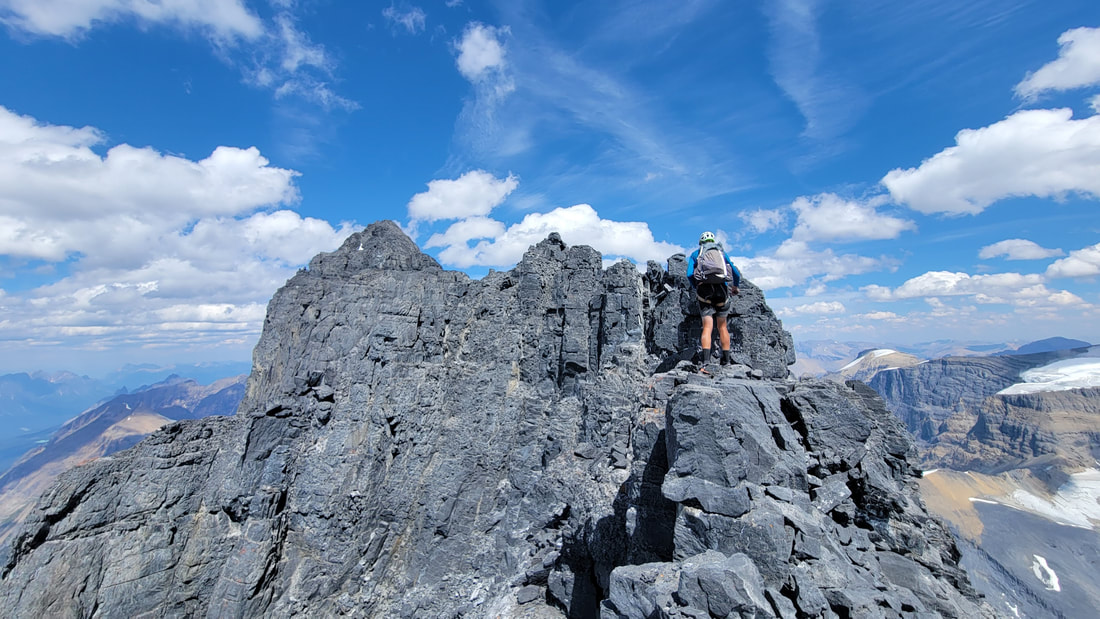
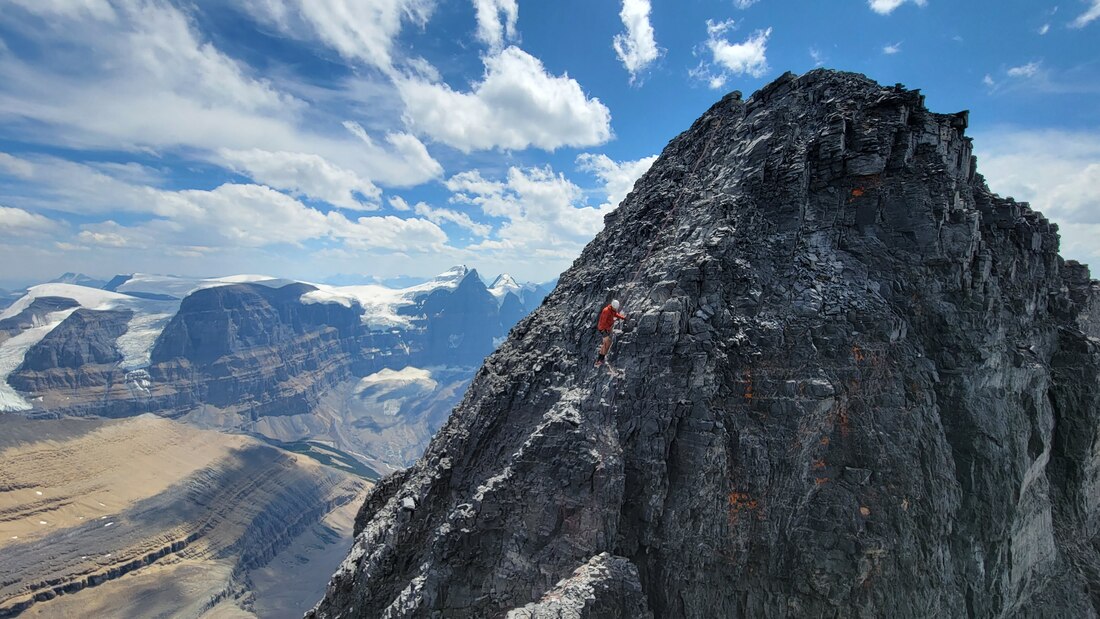
We did not rest long at the upper bivy and started the long traverse back to the right (north) along the upper angled ledge. This was probably the worst terrain on the entire route and had the most awful hardpan loose crap with huge cliffs right below so if you slipped you had to catch yourself real quick. We traversed across two scoops on the ledge and began ascending towards the base of a prominent buttress at the upper end of the ledge that looked like an oozing bulbous of blubber (aka a prominent buldge with a slight overhang at the bottom). The terrain along this traverse really was awful, but once we arrived at the buttress, a two nut anchor was found so we knew we were at the start of the climbing portion of the route. We took the variation that ascends two rope lengths of low 5th class to climbers left of the original start where the more difficult "Elephant Asses" alledgedly are located. The pitch by pitch overview of the route is outlined below. We soloed the first 3 pitches and decided to rope up on the 4th pitch. All of the pitches except for the last two I describe I rated as low 5th class. All pitches were also right about 50 meters long except for the last one, which was about 80 meters (we simul-climbed a bit to reach the ridge faster).
1. Climb from the bulbous buttress up low 5th class sandy ledges trending slightly right.
2. Continue up ledges and into a small chimney/scoop to a narrow and angled, exposed scree ledge. Carefully walk this ledge right a couple hundred feet to meet the original route. A slung boulder atop the end of the ledge indicates the route.
3. Continue up and slightly right close to but not in the main gully. Large rocks were bombing down the gully and you definitely want to minimize time spent in the gully. Stay to the left of the gully.
4. Climb a right facing angled corner/ramp just to the left of the gully then cut straight up on finally more solid rock to another anchor just a handful of meters left of the gully.
5. Move left a few meters from the anchor and climb straight up veering away from the gully a bit. This pitch had more decent rock. Another anchor is found on a ledge. Walk this ledge right back to the gully veering around a large boulder.
6. Climb up a series of loose looking blocks for 20 feet left of the fall line, then quickly cross the gully and ascend easier rock to the large white rope anchor. This is the crossover pitch and it is prudent to watch closely to make sure nothing bombs down as you cross the gully.
7. Climb up cleaner rock with good ledges more or less straight up to an anchor on a small ledge.
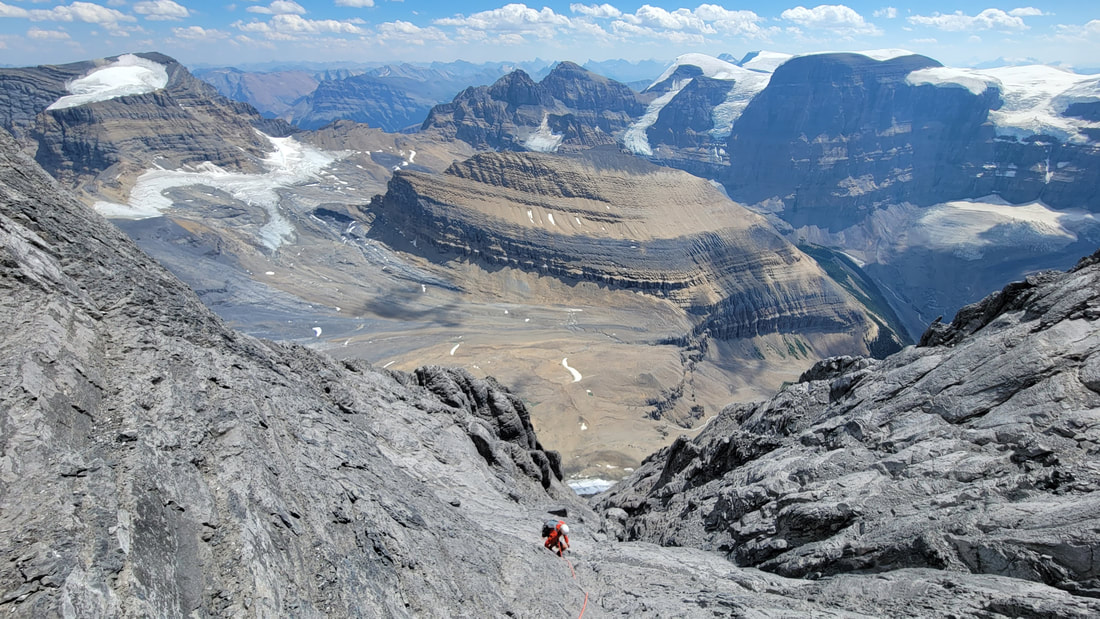
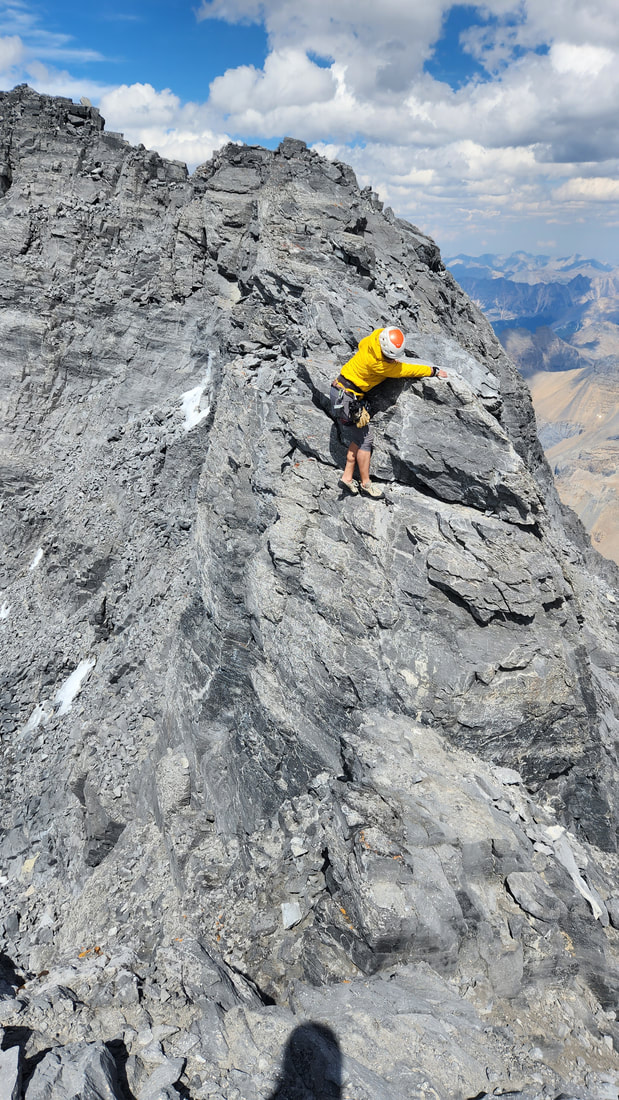
8. Climb slightly leftward then up towards a seam where the angle steepens to almost vertical for a few body lengths. This was the crux of the route. Above this the terrain mellowed significantly but the rubble also increased. A bit of simul-climbing was required to reach the ridge on this pitch and as the second on the rope I had to dodge rocks as I climbed the first 30 meters or so.
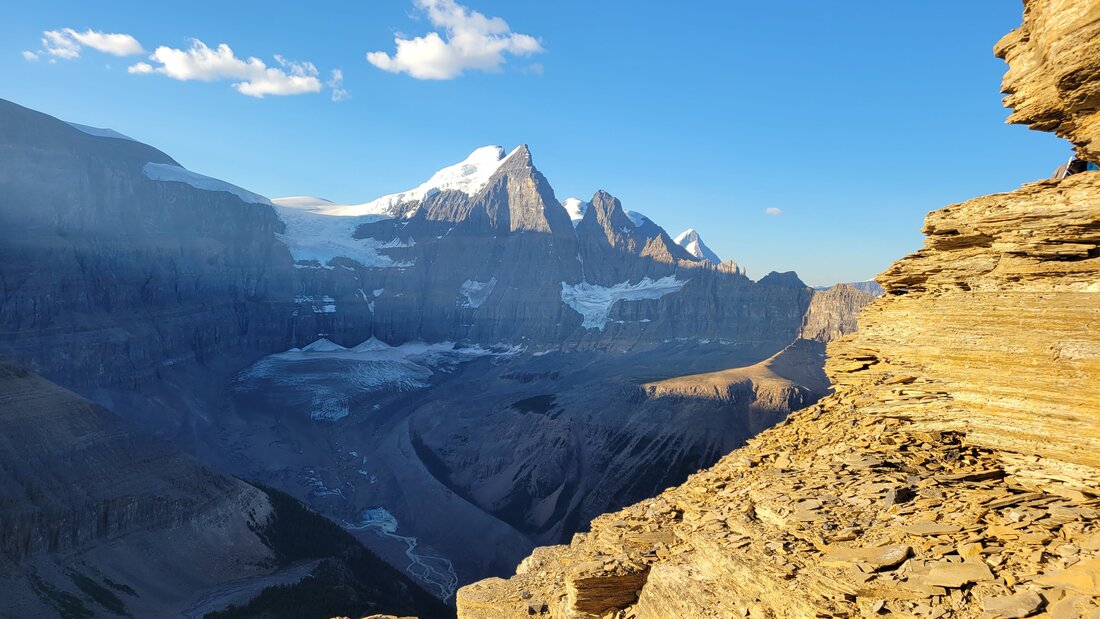
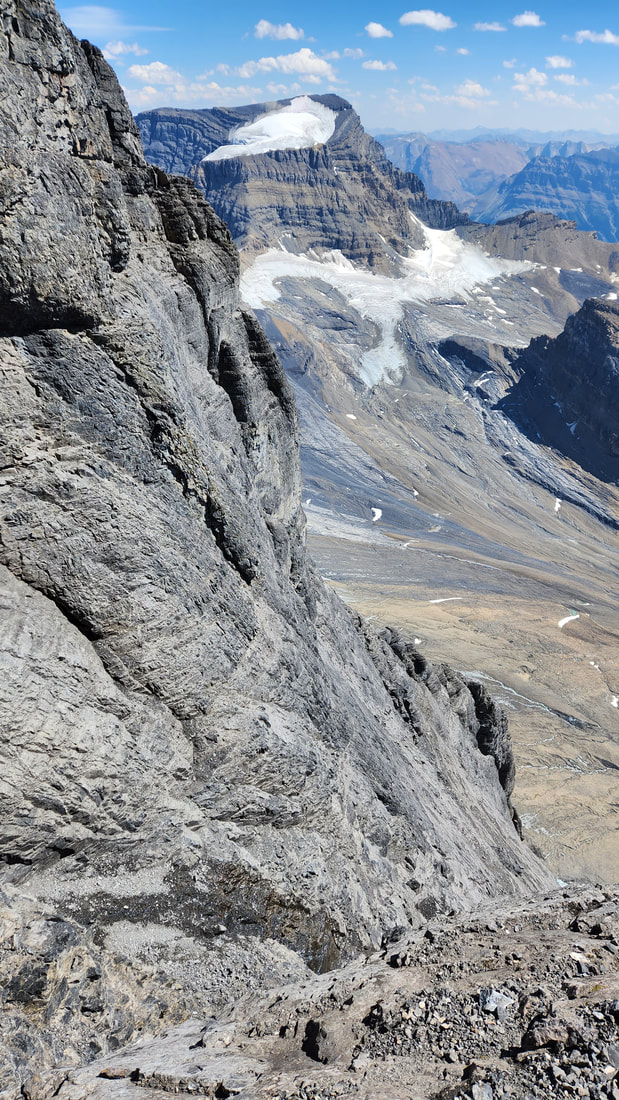
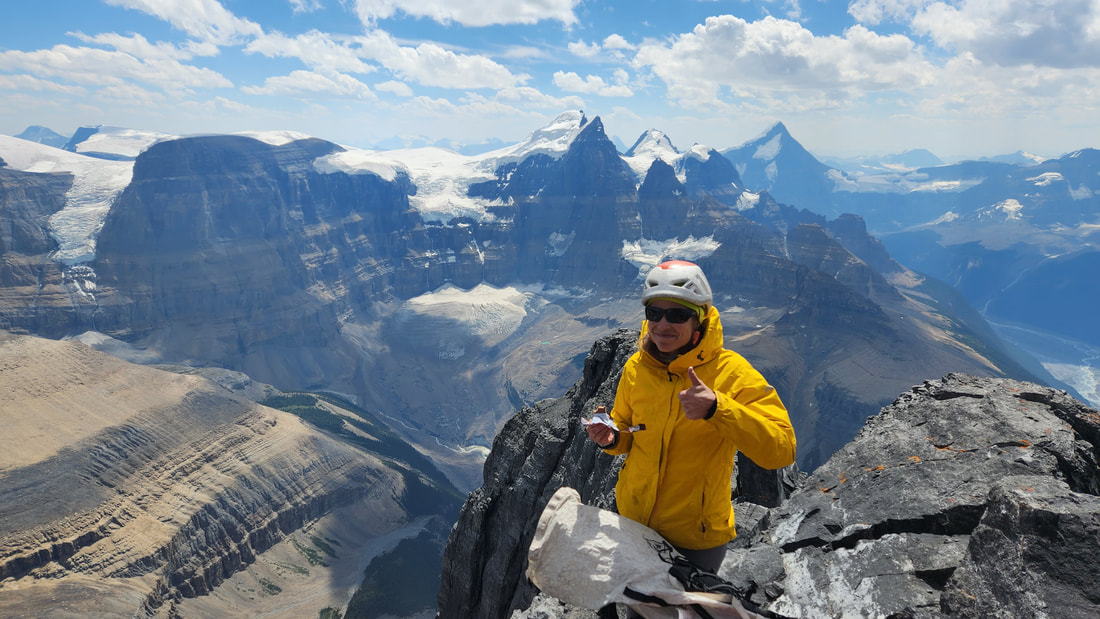
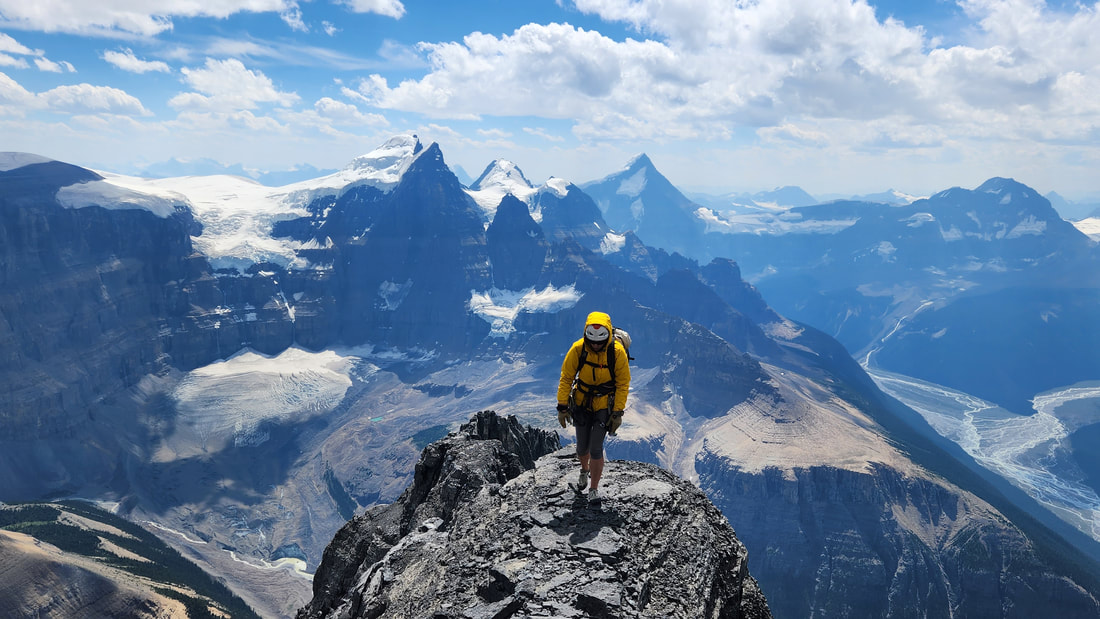
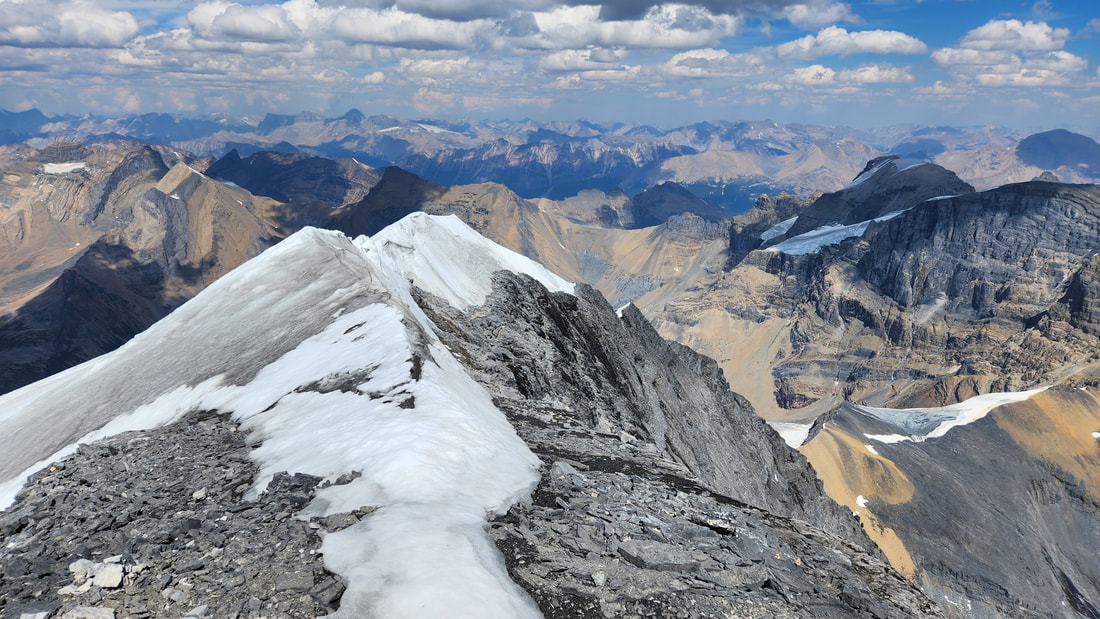
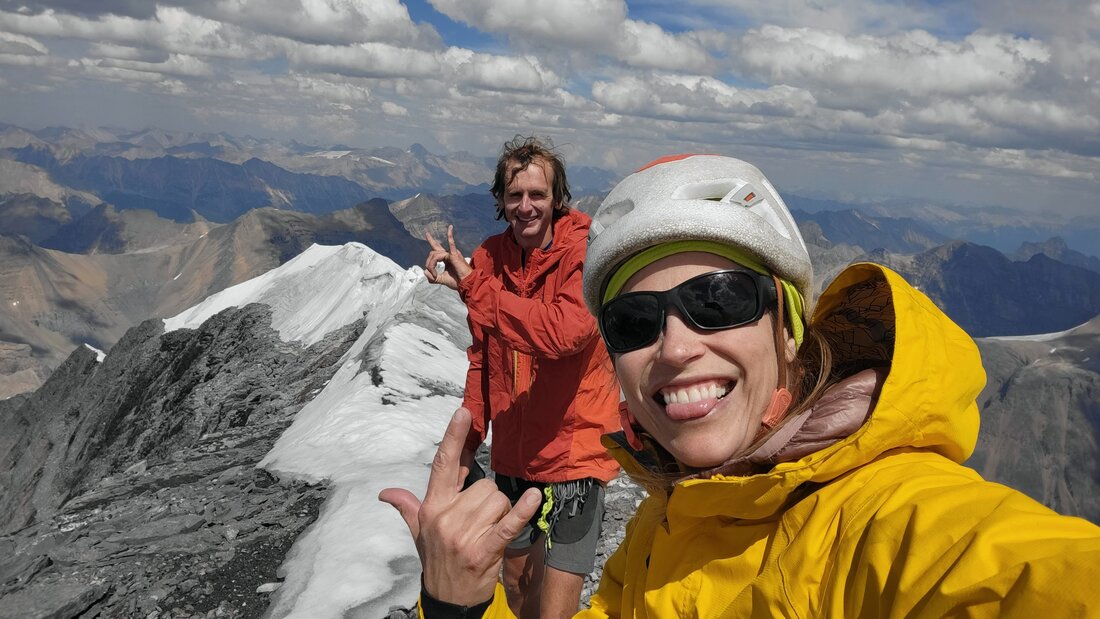
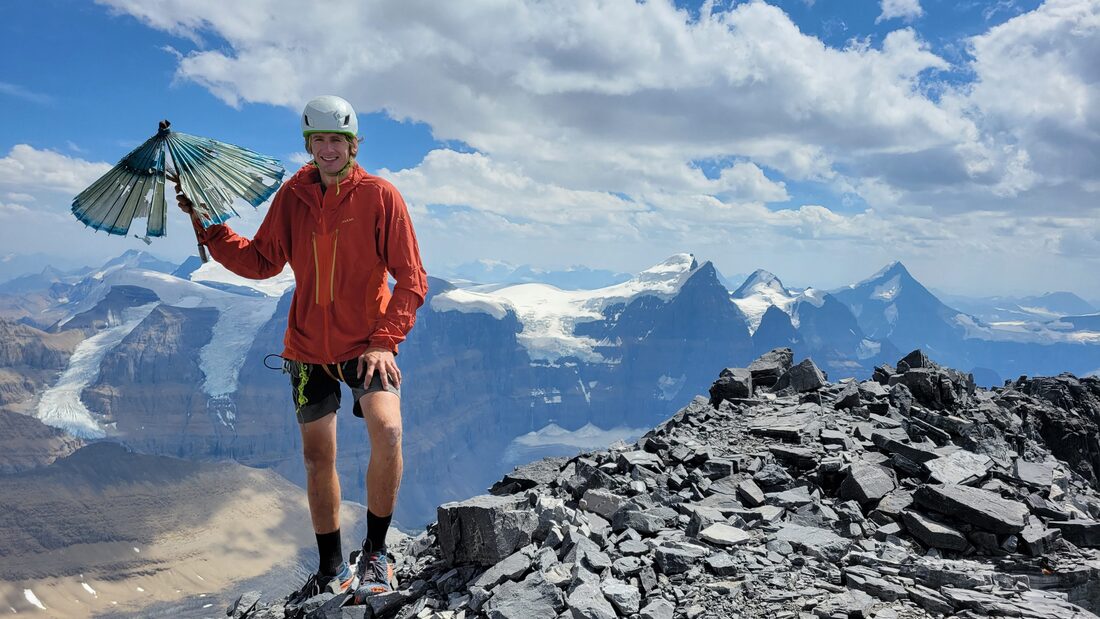
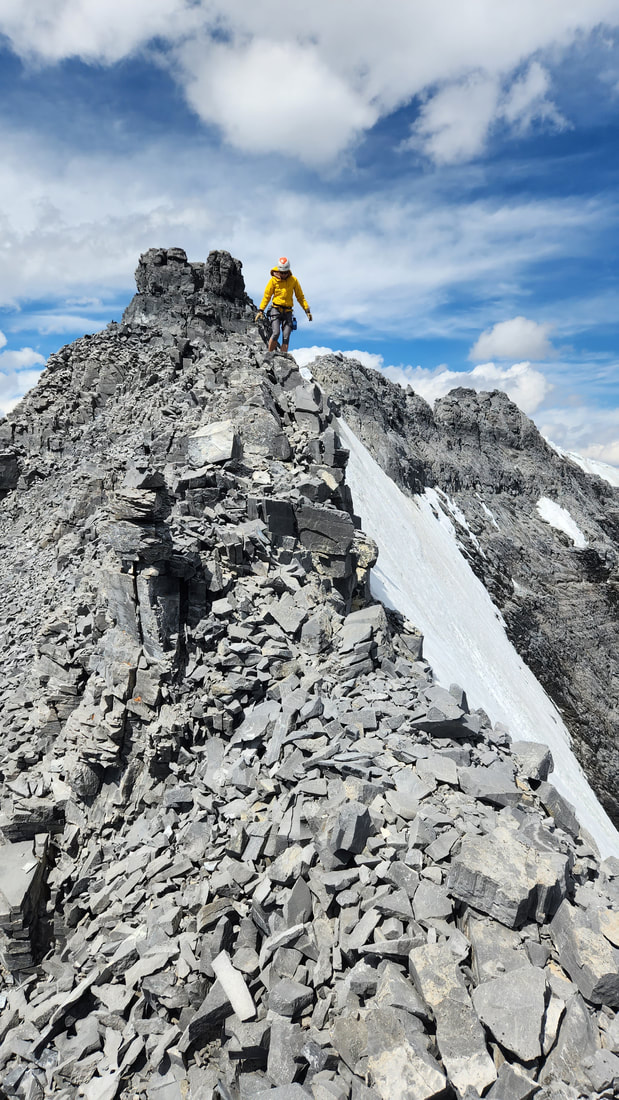
Once on the summit ridge, we followed the narrow and exposed ridge to the summit. There was a few steep 4th class steps to climb along the ridge, and even a short rappel to a crazy notch close to the summit but this turned out to be fairly straightforward to navigate. The west side of the notch though was a black hole of darkness which got the blood boiling! We reached the summit at 2:30pm, 9 hours to make it up. The summit register was soaked as it was not in a waterproof container, but the Japanese umbrella was still there. After a fair amount of research, I couldn't determine when it was placed on the summit. The views were breathtaking though, and although the clouds were starting to roll in more, our weather forecaster said we had precipitation free weather until about midnight so we felt we were still OK on time. Amazingly the winds actually died down during our time on the ultra exposed ridge making for a relatively comfortable stay on the summit. I doubt very many people stood on this peak with less layers on that I had, plus we had climbed the entire route in running shoes without touching any snow. The photos below barely do this justice, the scenery was unreal which made up for the choss.
1. Climb from the bulbous buttress up low 5th class sandy ledges trending slightly right.
2. Continue up ledges and into a small chimney/scoop to a narrow and angled, exposed scree ledge. Carefully walk this ledge right a couple hundred feet to meet the original route. A slung boulder atop the end of the ledge indicates the route.
3. Continue up and slightly right close to but not in the main gully. Large rocks were bombing down the gully and you definitely want to minimize time spent in the gully. Stay to the left of the gully.
4. Climb a right facing angled corner/ramp just to the left of the gully then cut straight up on finally more solid rock to another anchor just a handful of meters left of the gully.
5. Move left a few meters from the anchor and climb straight up veering away from the gully a bit. This pitch had more decent rock. Another anchor is found on a ledge. Walk this ledge right back to the gully veering around a large boulder.
6. Climb up a series of loose looking blocks for 20 feet left of the fall line, then quickly cross the gully and ascend easier rock to the large white rope anchor. This is the crossover pitch and it is prudent to watch closely to make sure nothing bombs down as you cross the gully.
7. Climb up cleaner rock with good ledges more or less straight up to an anchor on a small ledge.
8. Climb slightly leftward then up towards a seam where the angle steepens to almost vertical for a few body lengths. This was the crux of the route. Above this the terrain mellowed significantly but the rubble also increased. A bit of simul-climbing was required to reach the ridge on this pitch and as the second on the rope I had to dodge rocks as I climbed the first 30 meters or so.
Once on the summit ridge, we followed the narrow and exposed ridge to the summit. There was a few steep 4th class steps to climb along the ridge, and even a short rappel to a crazy notch close to the summit but this turned out to be fairly straightforward to navigate. The west side of the notch though was a black hole of darkness which got the blood boiling! We reached the summit at 2:30pm, 9 hours to make it up. The summit register was soaked as it was not in a waterproof container, but the Japanese umbrella was still there. After a fair amount of research, I couldn't determine when it was placed on the summit. The views were breathtaking though, and although the clouds were starting to roll in more, our weather forecaster said we had precipitation free weather until about midnight so we felt we were still OK on time. Amazingly the winds actually died down during our time on the ultra exposed ridge making for a relatively comfortable stay on the summit. I doubt very many people stood on this peak with less layers on that I had, plus we had climbed the entire route in running shoes without touching any snow. The photos below barely do this justice, the scenery was unreal which made up for the choss.

We began the descent and retraced the ridge, upclimbing back from the little notch using the rope as a handline. We also made one short rappel using an existing anchor on the ridge. Once we returned to the same spot we met the ridge, I added a sling around a large block on the ridge so we could rappel the same line we climbed. We made 9 double rope rappels utilizing all the anchors we passed on the ascent, then continuing down the original start back to the ledge system where we could traverse back to the high bivy. We made two more single rope rappels to descend the uppermost part of the climb to the high bivy (using the bolt anchor for the first drop down the narrow gully and ledge traverse mentioned in points 12 and 13 above. We then descended the remainder of the route as a beautiful sunset displayed. The red glow of the sunset was unusually intense since a front was merely just a few hours away. Right at sunset we got back to the valley floor and made the 1000 foot ascent back to the hut just as it was getting dark. That was a slow hike back up. At 11pm we made it to the hut to complete an 18 hour day and I went right to sleep. Barely an hour later at midnight intense rain with thunder and lightning woke me up, but I was happily dry inside the hut. The front that we were trying to beat came in right on time.
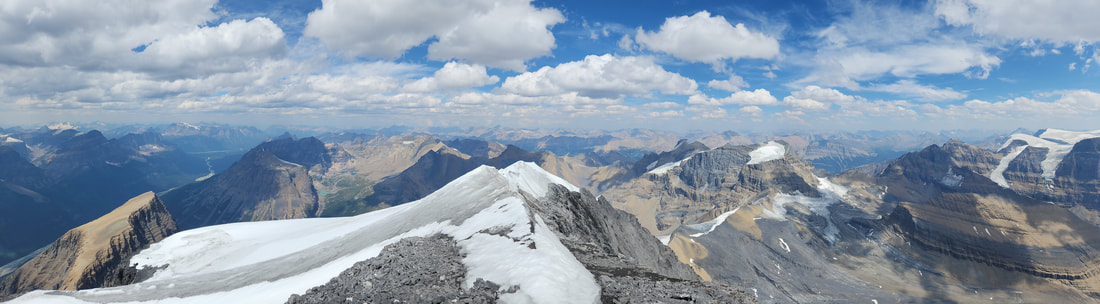
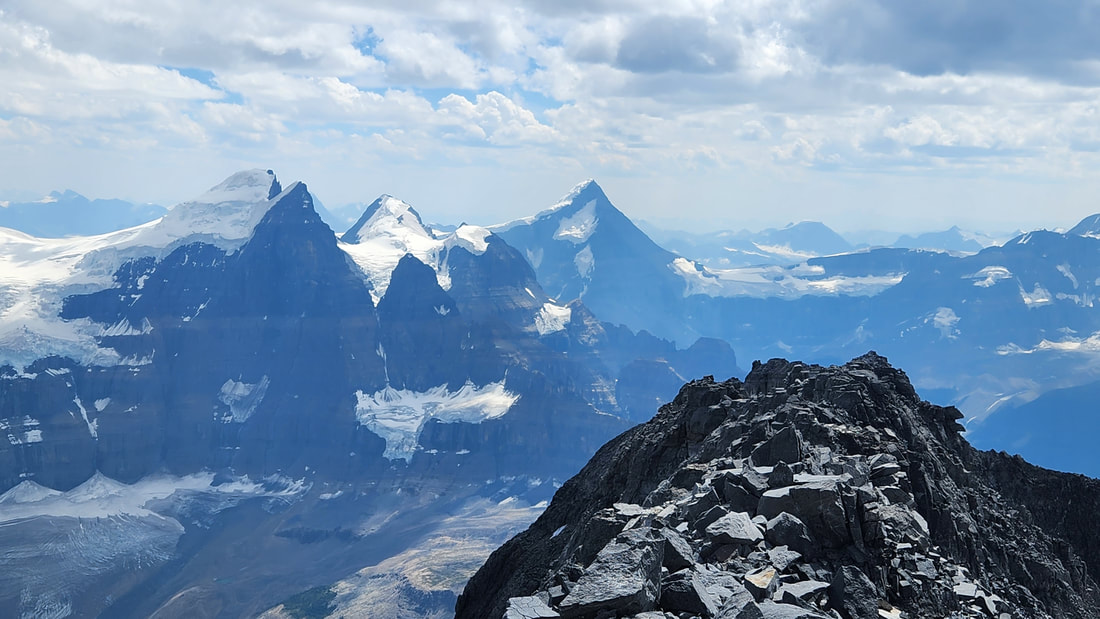
Summit Panorama
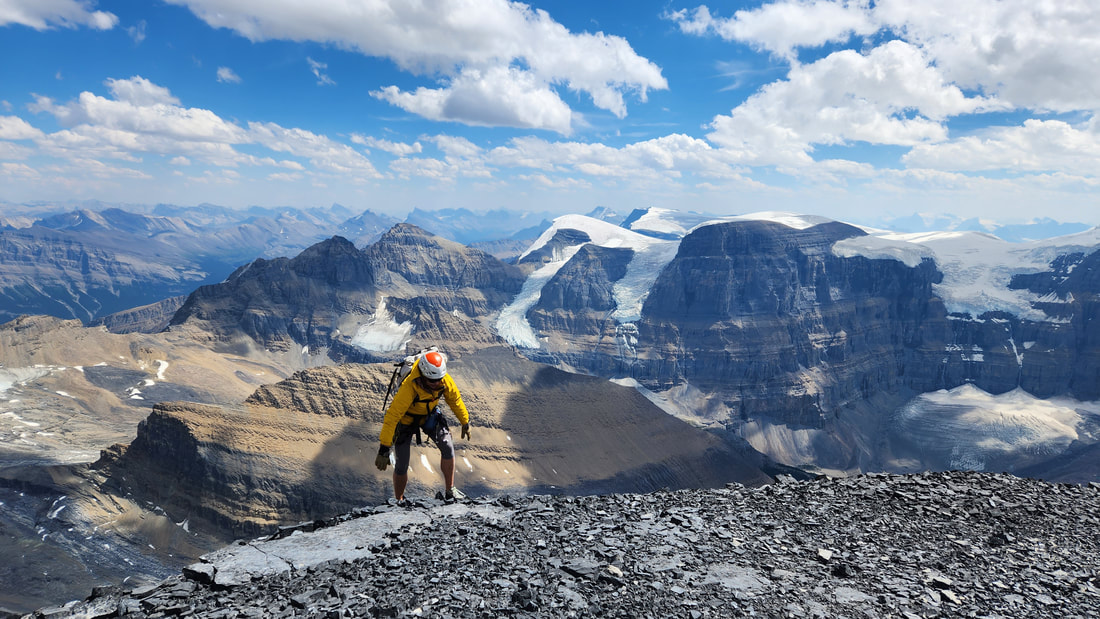
The following morning the air was clear and crisp, with some low clouds lingering on the summit ridge. It was however 20 degrees cooler and windy so after packing up we were off at 9am. We took about 4.5 hours to reverse the approach back to the car. The river crossing was quite a bit colder the second time around!