Introduction
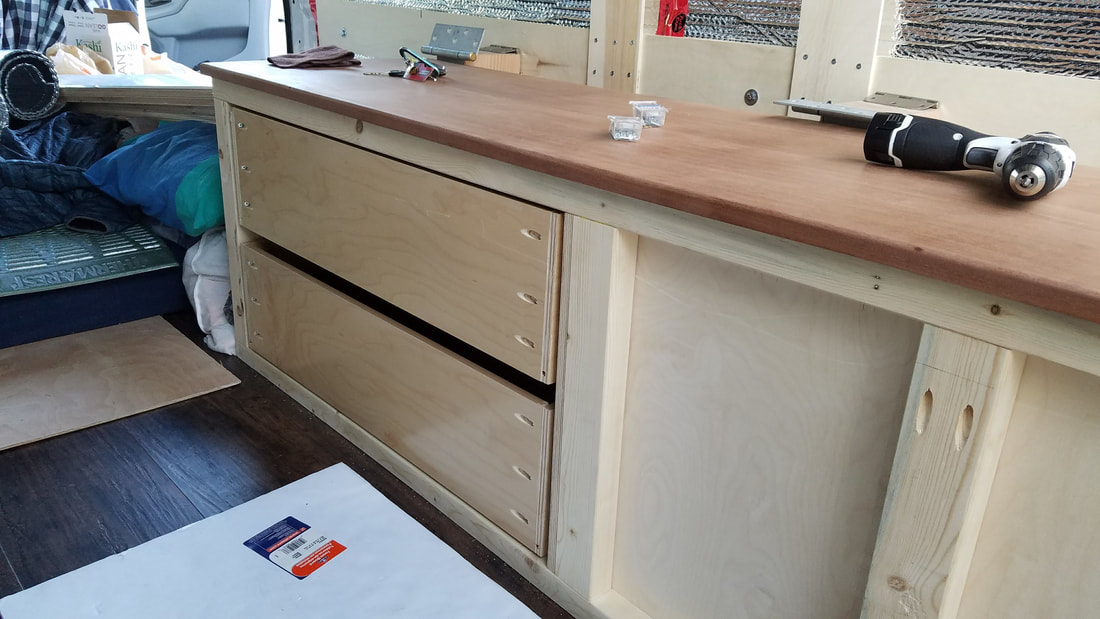
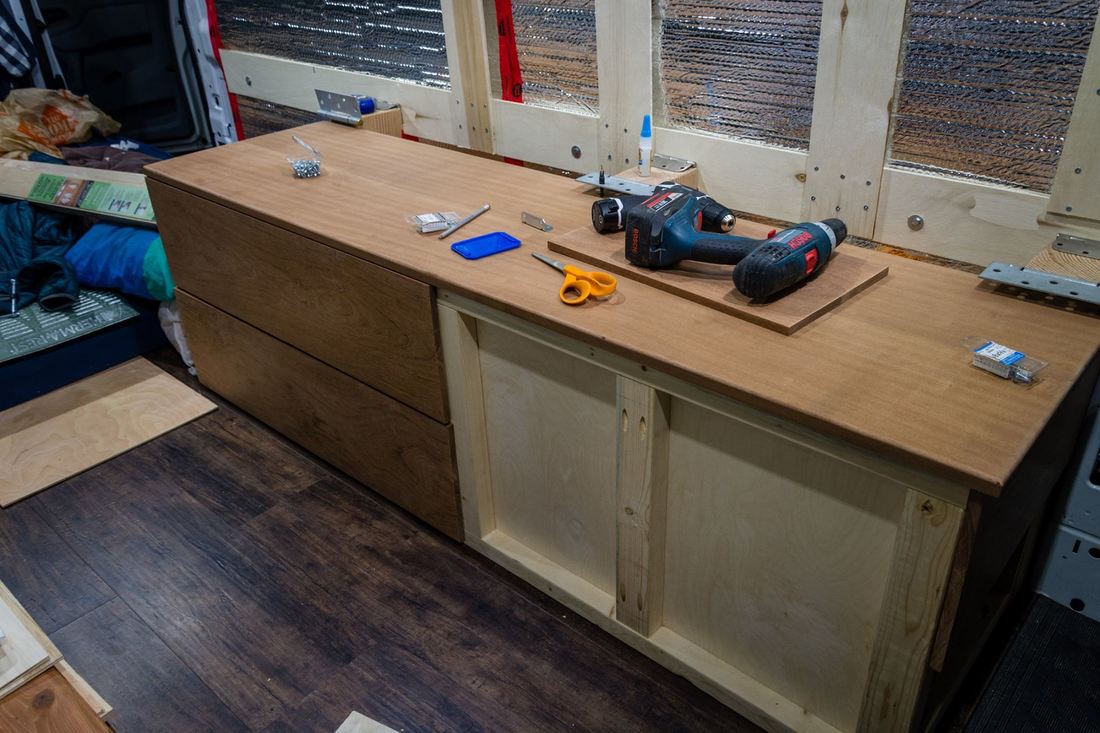
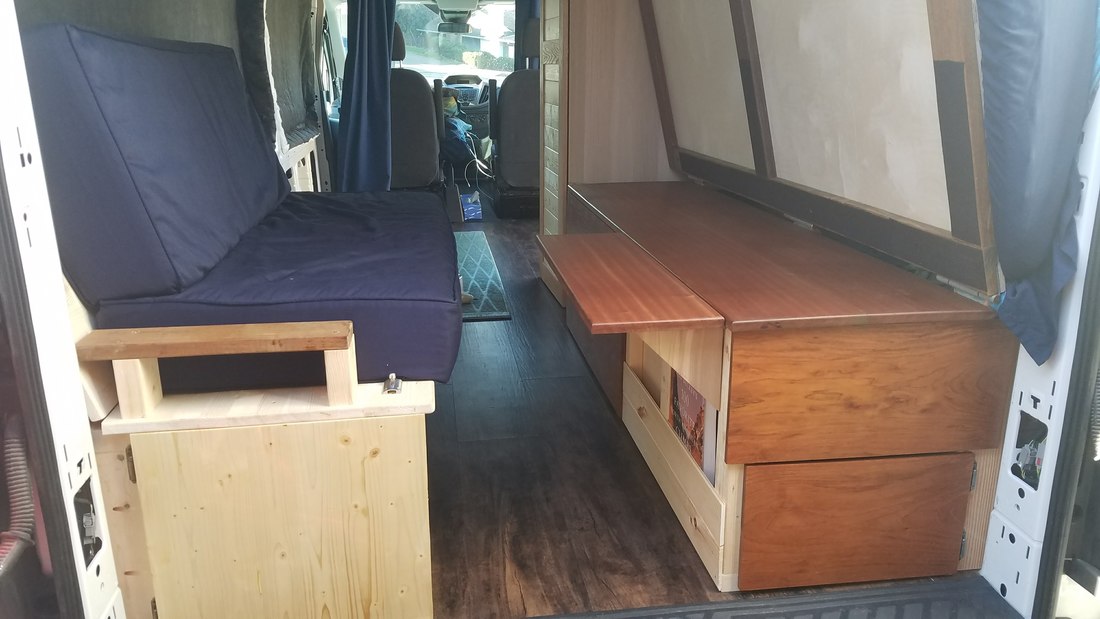
In deciding what we wanted in our van, we knew storage was going to be very important, however with a folding bed, a large portion of one side wall becomes lost due to the bed having to fold up. So we decided a great way to add some good storage is to integrate some drawers into a center table that would sit beneath the bed when it was folded down (and provide support), but act as a table surface for everyday use when the bed is folded up. We made the table the same length as the bed supports (67 inches) by 18.5 inches wide. This width was a good compromise as we wanted to maximize the storage underneath the table, but keep enough space to freely walk through the back of the van.
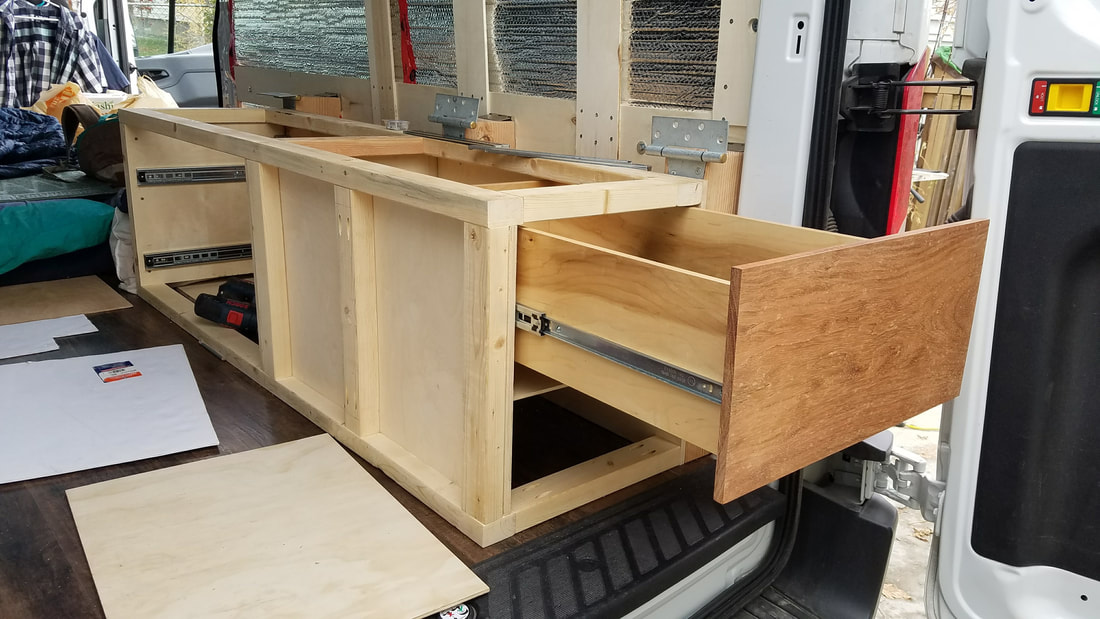
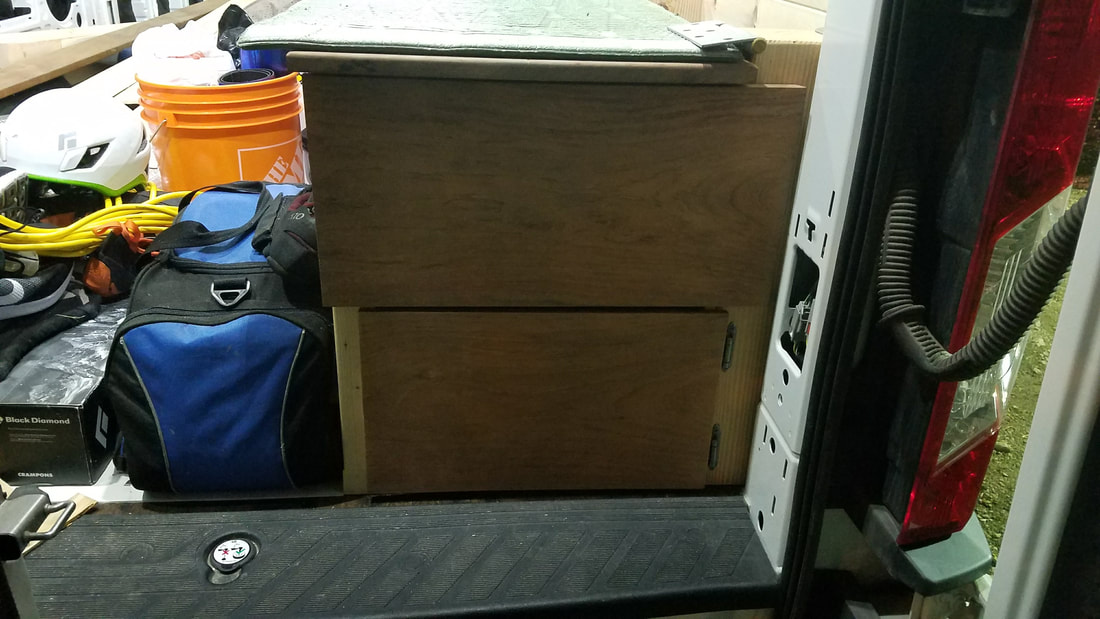
There will be two sets of drawers coming out of the table. One set will open from the front half of the long side into the van, while the others will open out the back, and can only be accessed when the back doors are open. The thickness of the frame, plywood and drawer slides makes the drawers a bit smaller than the table width but that is a necessary evil. We opted to go with quality, and got nice hardwoods for the table surface and the drawer fronts.
There will be two sets of drawers coming out of the table. One set will open from the front half of the long side into the van, while the others will open out the back, and can only be accessed when the back doors are open. The thickness of the frame, plywood and drawer slides makes the drawers a bit smaller than the table width but that is a necessary evil. We opted to go with quality, and got nice hardwoods for the table surface and the drawer fronts.
Materials Used
- Five (5) 2" X 3" X 8' Long Spruce Studs ($2.59 Each at Home Depot)
- Kreg Pocket Hole Jig ($26.98 at Home Depot)
- One (1) 50 pack box of 2.5" Long Kreg Screws ($6.22 at Home Depot)
- Two (2) 4 Packs 90 Degree Angle Braces ($1.64 Each at Home Depot)
- Two (2) 4' X 4' X 1/4" Thick MDT Hardboard for Drawer Bottoms ($15.37 Each at Home Depot)
- Three (3) 8" Wide by 8' Long by 1/2" Thick Pre-finished Drawer Sides (US$21.50 each at Crosscut Lumber in Seattle)
- One (1) 9.5" Wide by 10' Long by 1/2" Thick Brazilian Cherry Hardwood (Jatoba) Board (US$64 at Crosscut Lumber in Seattle)
- One (1) 9.25" Wide by 14' Long by 3/4" Thick Sapele Hardwood Board (US$100 at Crosscut Lumber in Seattle)
- One (1) Bottle Lepage Wood Glue ($5.07 at Home Depot)
- Two (2) Pairs 32" Long Ryadon Drawer Slides ($34.99 Each at Gregg Distributors)
- Two (2) Pairs 14" Long Ryadon Drawer Slides ($15.99 Each at Gregg Distributors)
- Many Fasteners (Did not keep track of them all!)
- We also used Pieces of the Birch 5' X 5' Plywood from the Platform Bed for Parts of the Coffee Table
Total Material Cost: $185 Canadian + $230 US Dollars (Does not include tools purchased)
Tools Used
- Chop Saw (Borrowed from Neighbor in Edmonton)
- Jig Saw
- Drill with Bits and Screw Drives
- Router with Rounding Bit
- Palm Sander with Various Grit Sandpaper
- Eight (8) Each of C-Clamps and Pipe Clamps (Borrowed from my dad in WA)
- Kreg Pocket Hole Jig and Corresponding Screws
- Table Saw (Borrowed from Neighbor in Edmonton)
- Skil Saw (Borrowed from my Dad)
- Straightedges
- Carpenters Square
- Measuring Tape and Pen
Time Spent on the Job: Maybe 24 Hours? It was hard to gauge as we were jointly installing insulation, and a wall over a few weekends.
Step 1 - Cut and Assemble the 2" X 3" Studs & Plywood for the Frame
|
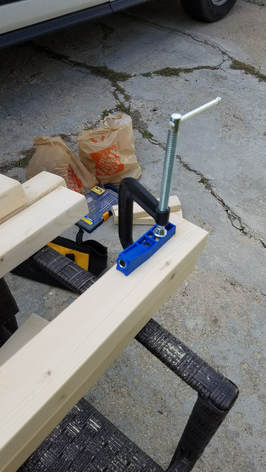
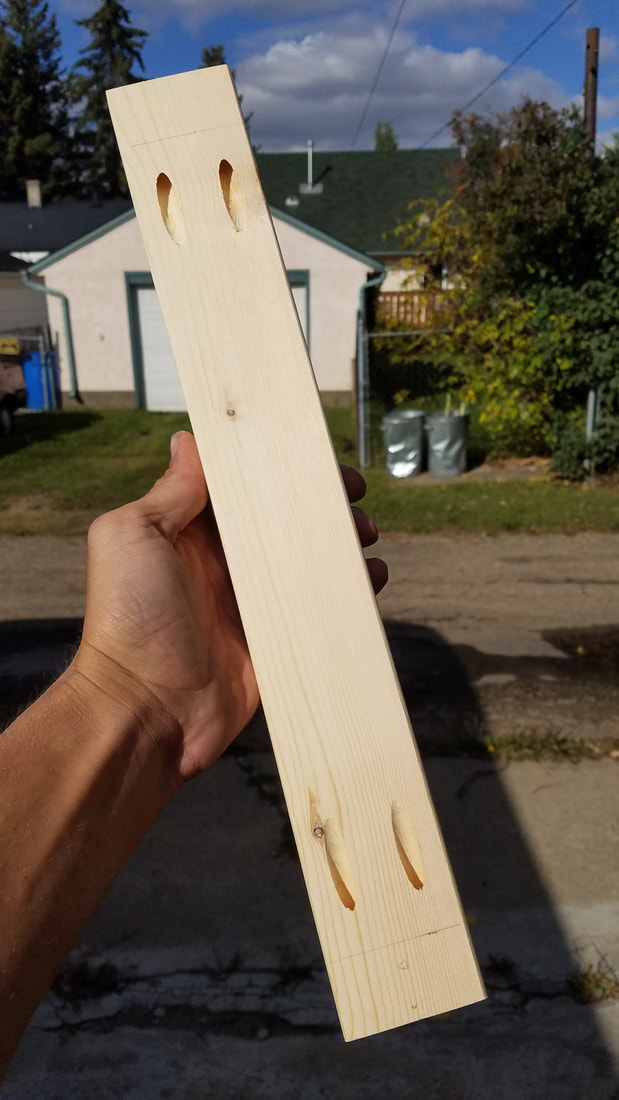
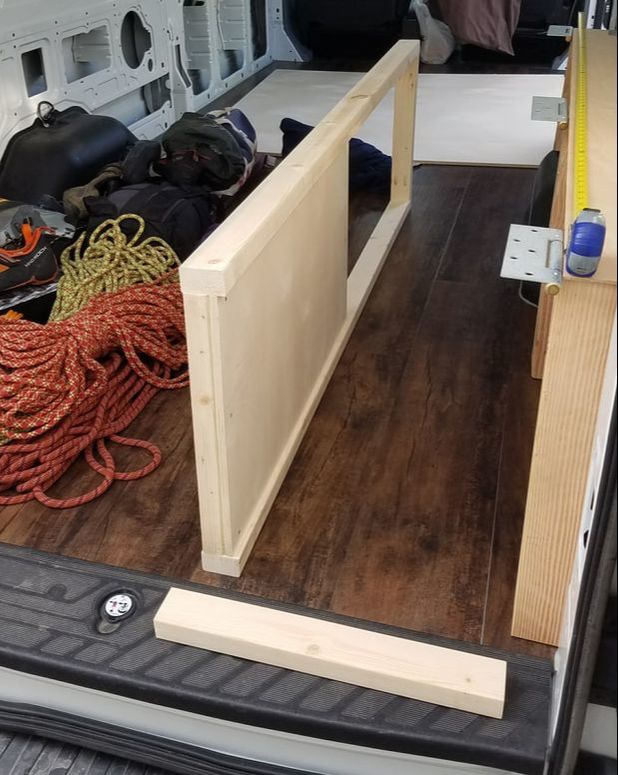
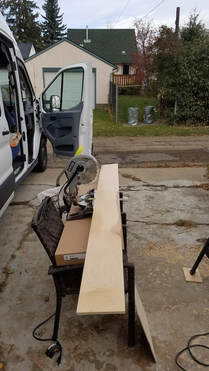
Since we decided to match the table length with the bed supports, our table was to be 67 inches long. With the length and width now determined, we decided where we would like to have drawers, and cut the 8' long 2" X 3" studs to the lengths we needed using a chop saw. These would become the frame for the table. Three 67" pieces and various smaller pieces were all cut and sanded. Then we used the Kreg pocket hole jig to drill two holes on each end of only the shorter pieces, aligning and securing the jig to the correct place on the boards as described in the instructions (placement of the jig differs for different thicknesses of wood). For the 1.5 inch thick studs, the end of the jig needed to be 1.25 inches from the end of the board, and the collar on the provided drill bit set to 4.25 inches. After clamping the jig simply drill the hole until the collar is flush with the jig.
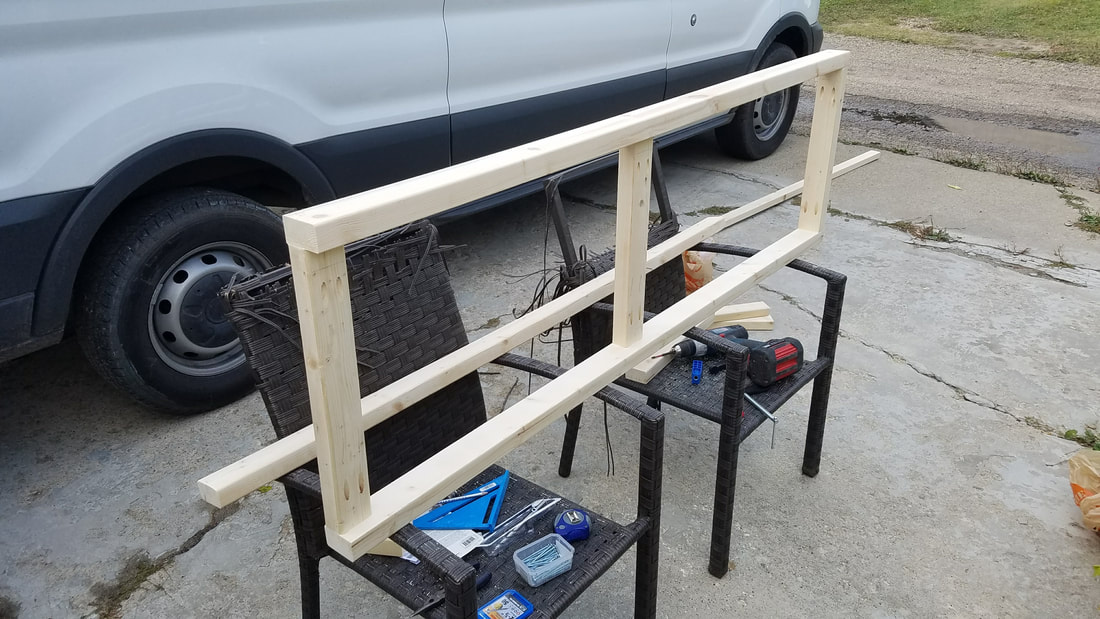
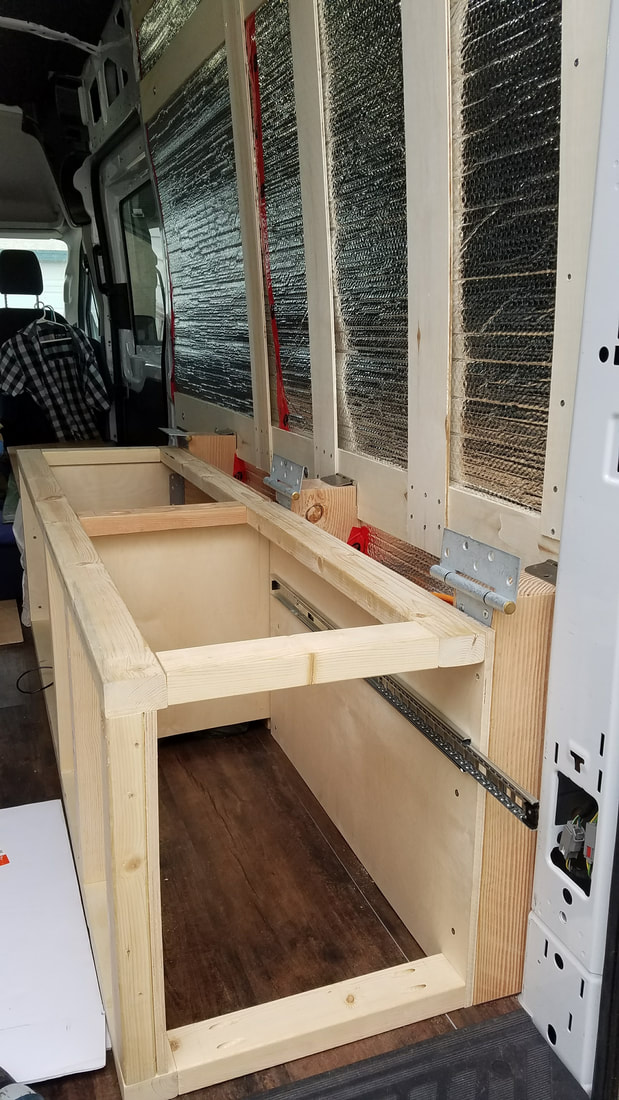
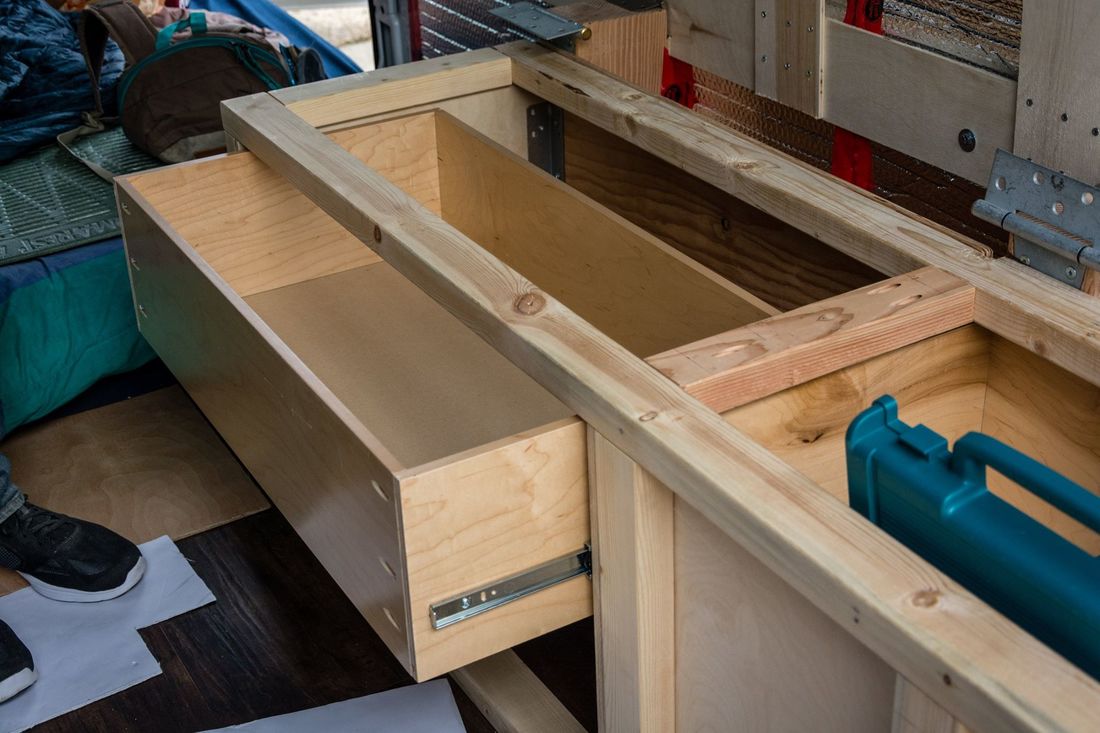
We drilled the pocket holes into each of the smaller pieces since they were easier to work with, then screwed them onto the long 67" pieces, adding wood glue for each joint. Before we knew it, we had the front of the table frame assembled! Note the two vertical pieces in the middle and back end are turned 90 degrees to maximize the width for the drawers that will open out the back side (See photo just below) |
|
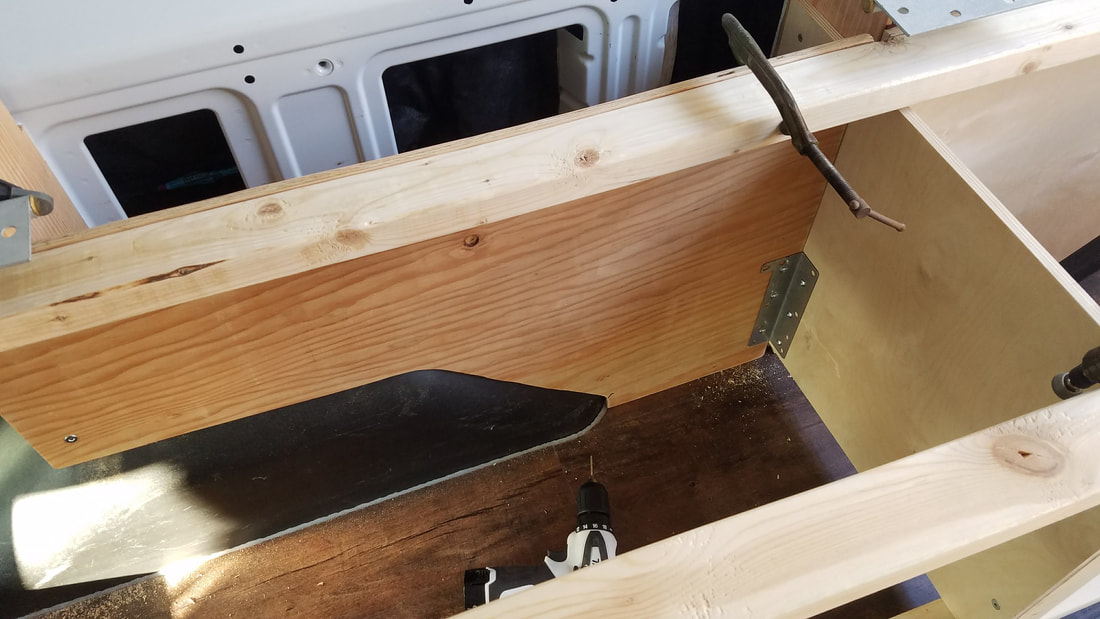
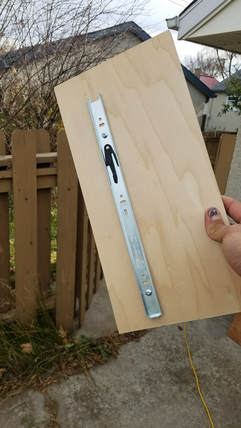
Next, using pieces of the Birch plywood we bought for the bed platform (since there was extra) we cut pieces with the jig saw to place in the spaces where there would not be drawers, and along the face of the bed platform, to separate the 6" gaps between the support beams, and the table. These 6" gaps will become a great place for storage!! These plywood pieces were screwed to the frame as it was assembled, however we had to wait until we got the Thinsulate insulation before we could cover the front of the support beams. Therefore, a couple weeks time would pass until we could continue assembling the frame in the van.
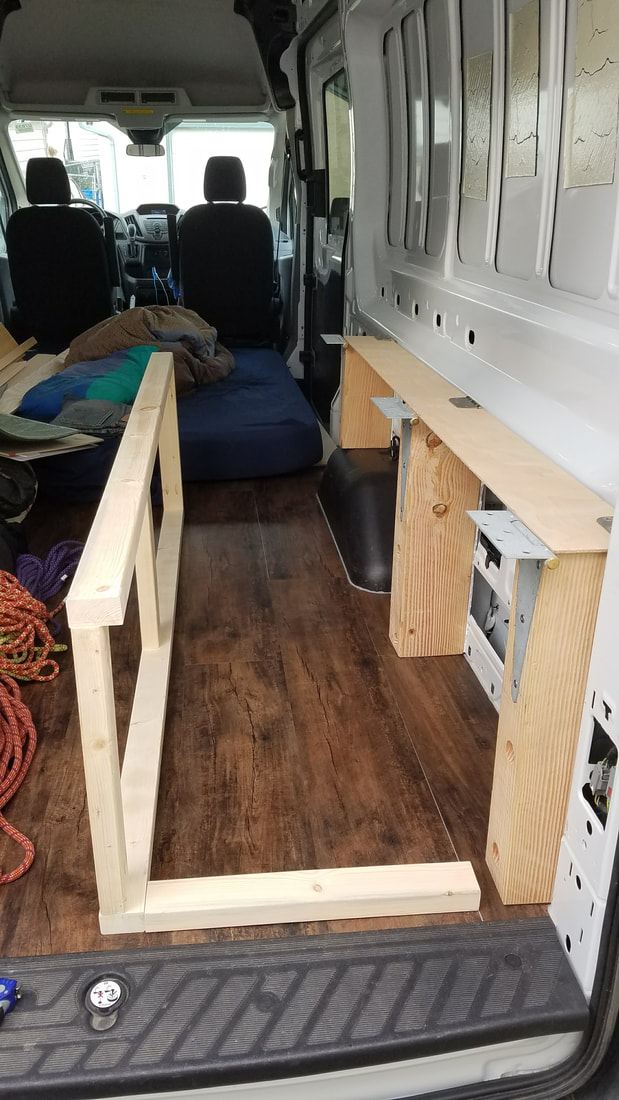
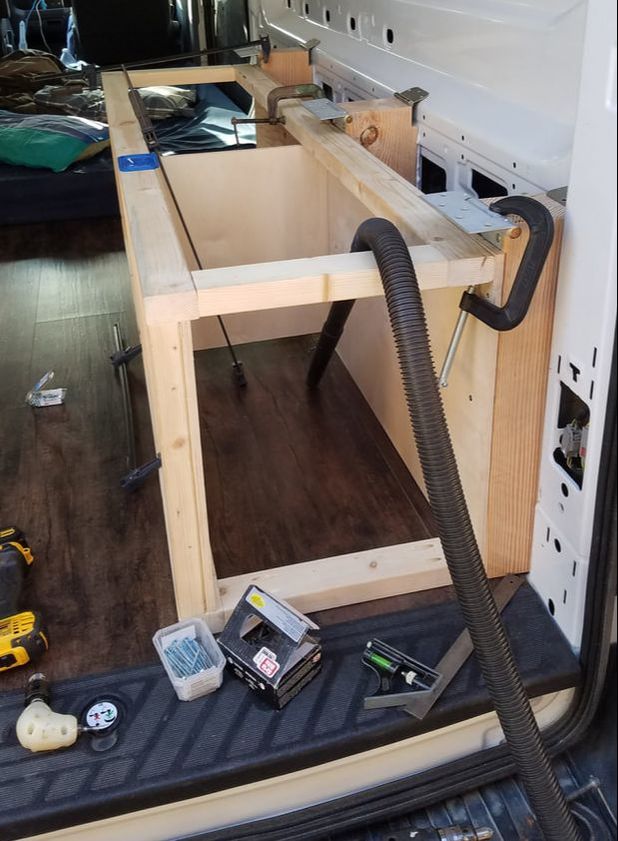
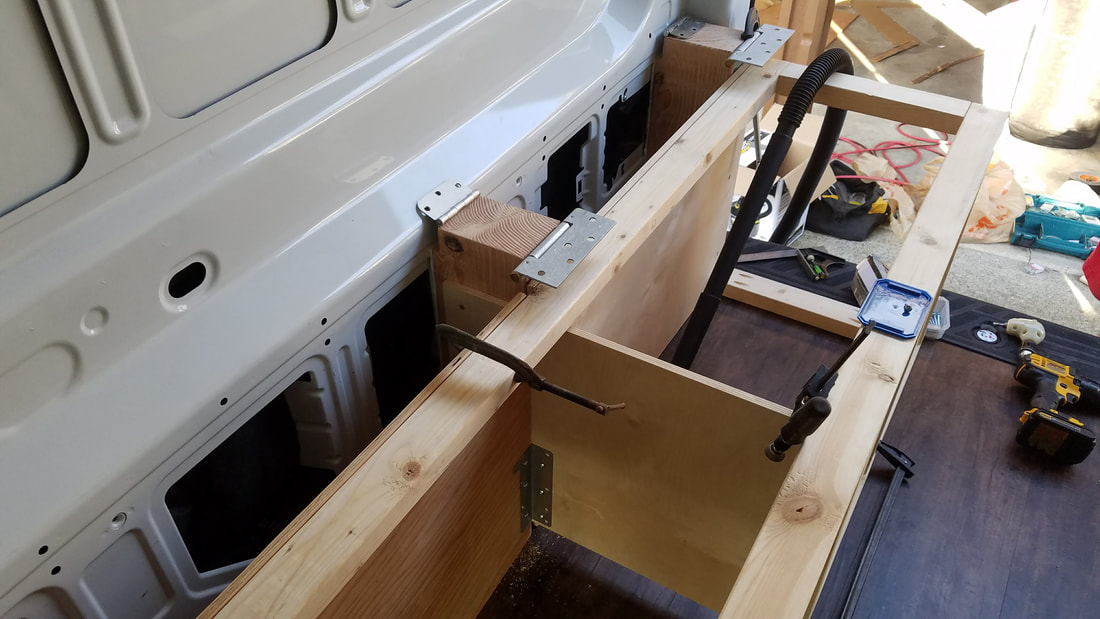
So, I eventually managed to drive from Edmonton back to Seattle for a long weekend to get our insulation (among other things). I won't go into much detail about the Thinsulate installation here (see this article for more details on that), but after filling the portion of the wall that would be covered by the table with Thinsulate, I was able to complete the assembly of the frame with help from my dad at home in WA. Unfortunately Elaine couldn't make the trip to WA with me so this next part was just my dad and I. He had many extra C-clamps which helped to pull out any bowing in the studs as I screwed the frame to the bed supports. I added a piece of plywood that bisected the frame through the middle, which will be the separation for the two sets of drawers. This piece was screwed to the front of the middle support beam. Note that none of the plywood or stud pieces connecting the frame to the supports were glued in case it ever needed to be removed later. Only the joints within the frame itself were glued. See photos below. |
|
|
It is worth noting that this table will also act as one of the primary supports for the folding bed, and the hinges the platform will attach to are exactly 1.75 inches above the top of the frame (by design...see photo above right). This gives me 1.75 inches to work with for the combination of the table top thickness, and whatever we decide to use for supporting the 1/2" Baltic Birch plywood sheets (since they are definitely not strong enough to support us both just on their own). The extra 1 inch Ipe boards (very, very hard wood) my dad has from the new deck he built will work perfectly with the 3/4" Sapele hardwood I bought. The combined thickness of the table and bed frame is 1.75 inches..perfect! The plywood sheets will then sit atop the hinges, and fastened through them into the bed frame below. Extra care will be needed to keep the fasteners from jarring loose, and when the bed is folded down, there will need to be a perfectly flush fit against the table top. See Folding Bed Installation Part 2 for more details about the bed platform!....Coming soon when completed
Step 2 - Cut and Glue the Hardwood Tabletop
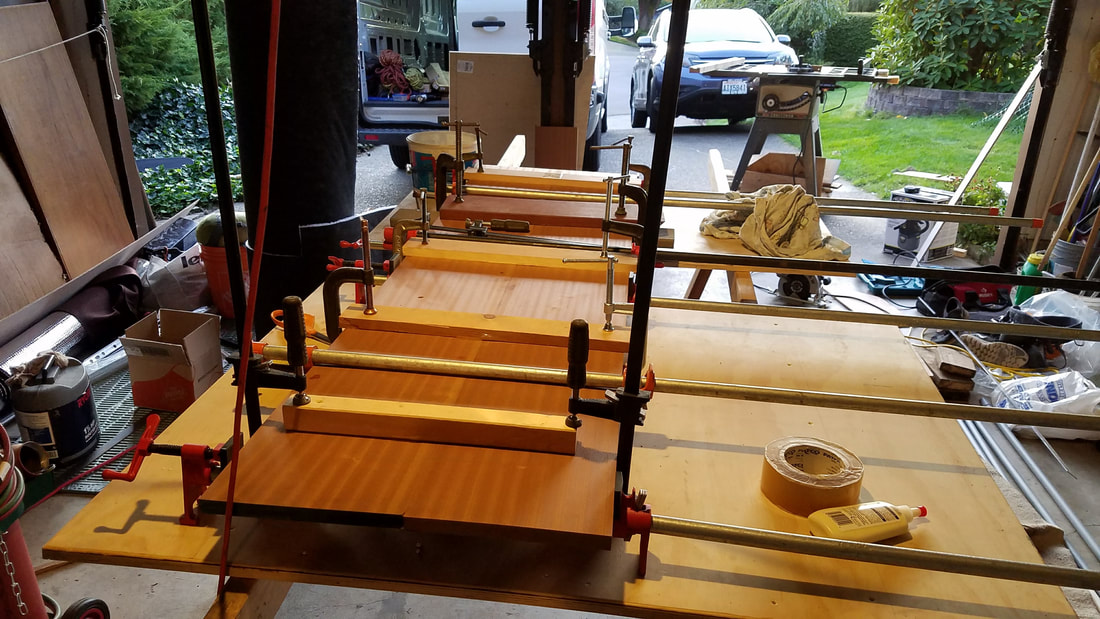
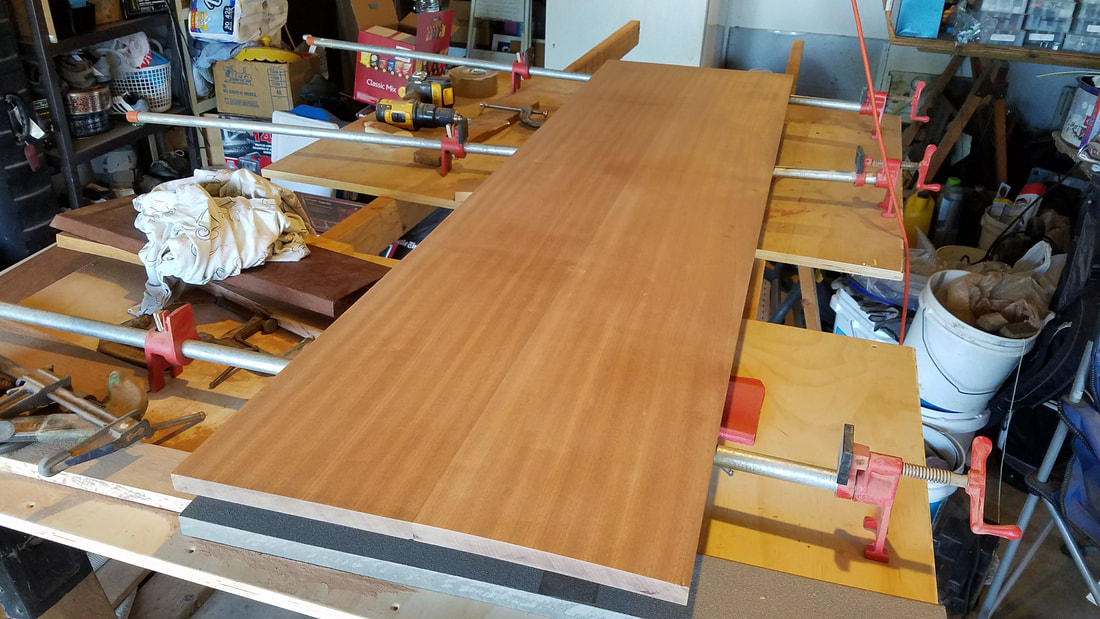
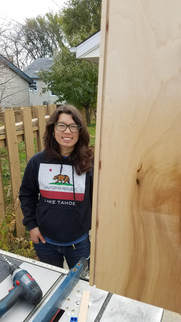
Once all the thinking and planning was done to make sure everything will fit together nicely, I cut the 9.25" wide by 14 foot long Sapele board into three pieces using a Skil Saw with a straightedge guide. Two pieces that are 68.5 inches long and the third as a smaller 32 inch piece that will be the folding up table extension. Note that the Sapele board was already power planed on all sides when I bought it. This method will not work if the wood isn't power planed beforehand, as the seam will not be flush! With the help from my dad, I was able to glue the two 68.5 inch pieces together lengthwise to turn the 9.25 inch wide board into an 18.5 inch board. Many clamps were needed to hold the two pieces together as the glue dried. Once dry, I sanded the surface and tested the fit on top of the frame.
Step 3 - Build and Install the Drawers
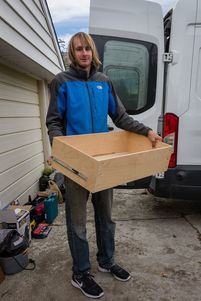
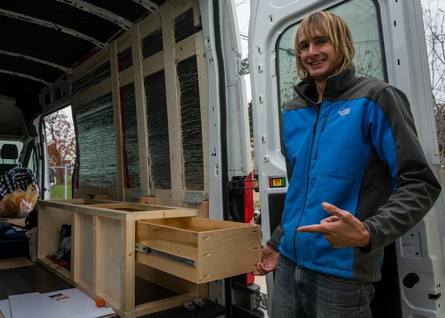
Over the course of a weekend in October, Elaine came up to Edmonton and we built the drawers that would fit inside the frame of the coffee table. In a nutshell, this was fun and challenging, but also a bit finicky, as it was quite difficult to get the drawers to all be perfectly level, square and flush with one another, and the table frame. With patience however, we managed to get it to look acceptable! I found this link which describes a good way to build drawers which helped quite a bit in determining the methodology we used, and gives a more detailed step-by-step guide as to what we did. I more or less copied the method described on the link, with a few things omitted that weren't applicable in our case.
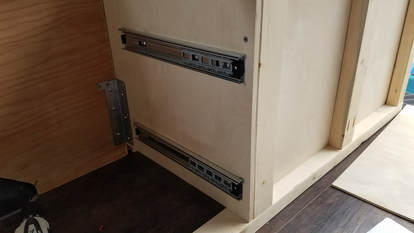
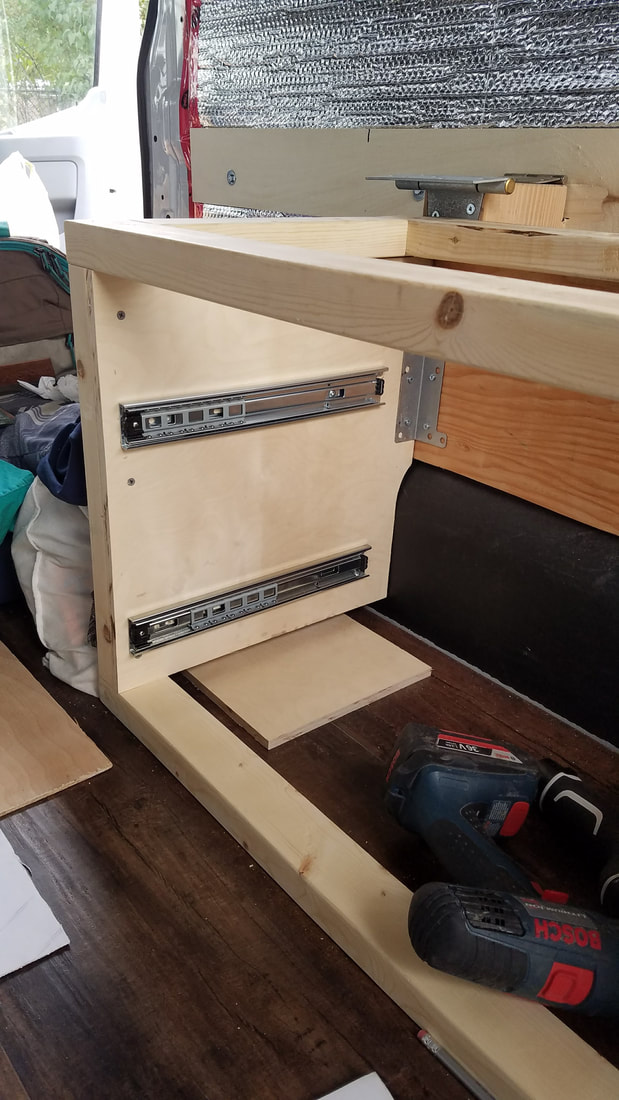
First step was to screw half of each drawer slide onto the side of the cabinet frame. Where ever we decided to screw these into would dictate exactly how we would build the rest of the drawer, so even though there was lots of flexibility in this step, we had to make sure they were at least level, and spaced well enough to allow 2 drawers to fit. For the drawer in the back we simply located the slide just below the center of where the drawer would be. Since the plywood inside the frame is 1/2" thick, and the metal on the drawer slide is 1/8" thick, half inch screws worked perfectly to hold them in place. The slides have various oval shaped holes you can put your screw into, and then be able to slide it one way or another a small amount for final placement. Note each drawer slide is 2 inches shorter than the length of the drawers they are intended for to allow wiggle room.
With the drawer slides mounted to the inside of the drawer boxes, we measured the length of the sides for each drawer, and cut those using the pre-finished drawer side boards I found in Seattle. Working first on the back drawer, we cut the sides to our length of 32 inches, measured where exactly the top of the drawer would be relative to the drawer slide we just installed in the cabinet, then screwed the other half of each slide onto each side piece. This part had to be EXACTLY correct or the drawer would not fit correctly.
|
With the drawer sides cut, we slid them into their corresponding slides and confirmed the ends were flush with the 2X3 studs in the table frame (so the face board would set flush when the drawer is closed). We adjusted the slide accordingly if it wasn't perfectly flush, and measured the distance between the sides for the front and back of each drawer. Using these measured lengths, we then cut our front and back pieces. Then, using the Kreg hole jig we drilled three holes on each end of the front and back drawer pieces, making sure they would be on the hidden faces of the drawer (the front will get hidden by the drawer face board). For 1/2" material, the Kreg instructions sheet says to place the end of the jig 1/4" beyond the end of the work-piece, set the collar on the included drill bit to 3-1/8" and use their 1 inch screws. It's foolproof!...just as long as you clamp the jig every time you drill a hole. This will provide a much stronger connection than simply screwing the drawers together from the ends.
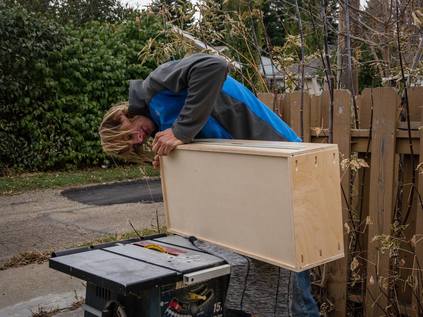
Next we borrowed a small table saw from our neighbor, who was nice enough to allow us to use it, and we cut a 1/4" wide dato (fancy word for a groove) along the bottom of each drawer side piece with about 3/8" separating the dato from the very bottom of the board. To do this I set the fence on the table saw, raised the saw blade about 1/4" (to make the depth of the dato) and ran a test piece through to make sure the depth was correct. Then ran each piece through making sure to make the dato on the INSIDE face of each drawer, as well as on the bottom ends. Since the saw blade is only 1/8" thick, we had to make a second pass on each piece, which I first tested on the practice board and made sure the 1/4" thick hardboard would fit before proceeding to make the second pass on each drawer side. Now we were ready to assemble the drawer! We started by gluing and screwing the two sides and the back pieces together, so we ended up with a big "U" shaped thingy, then measured the inside dimensions and added 3/8" to each length for the drawer bottom (1/4" groove X 2, minus 1/8" wiggle room for the bottom). We then used the table saw to cut the hardboard to the calculated dimensions. Once cut, we slid it in the groove and made sure the fit was perfect before gluing and screwing the front piece, which completed the assembly of our drawer box. With the rear drawer assembly completed, we had our moment of truth, as we attempted to fit it inside the slides attached to the cabinet walls and.... |
We then repeated the process for the two side drawers, which were instead wide and shorter rather than narrower and deeper.
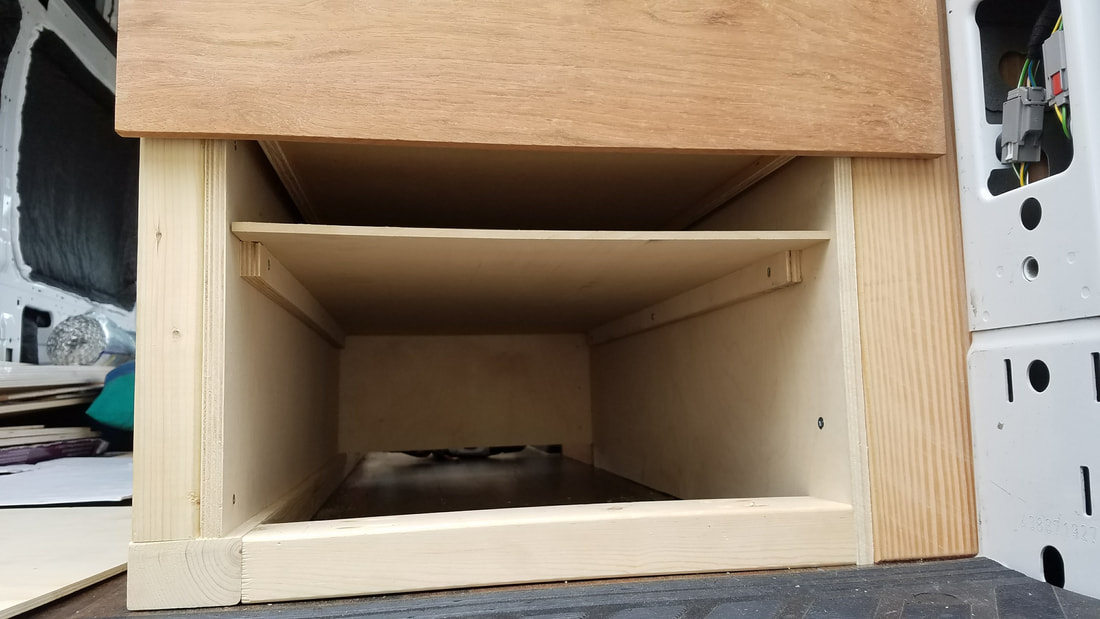
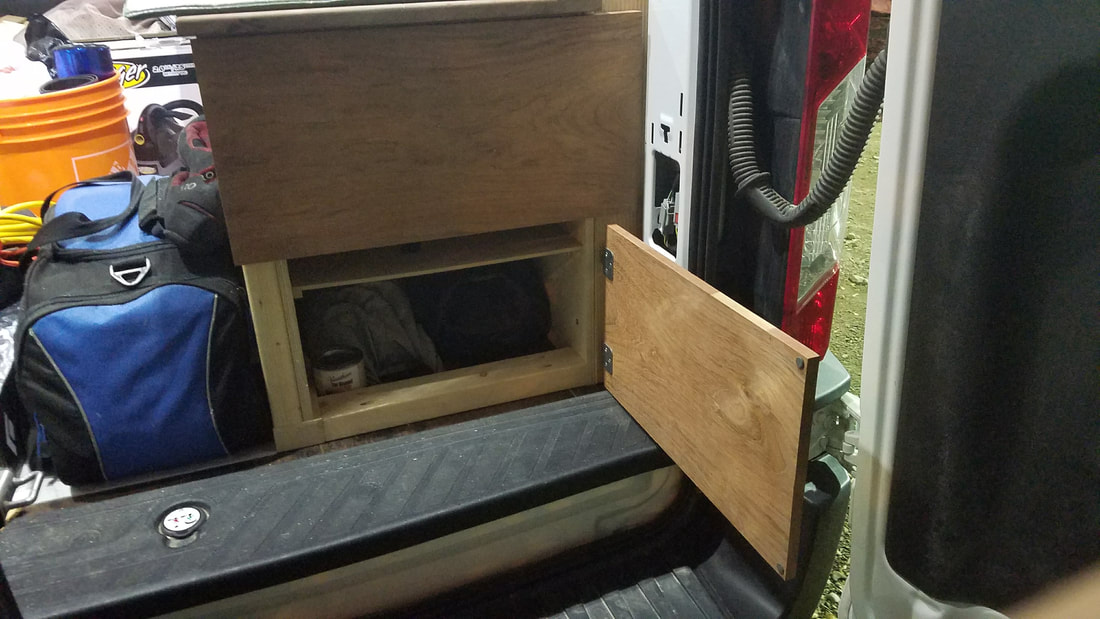
To finish the drawers, we measured and cut the 9.25" wide Brazilian cherry board to match the length of each drawer front, plus some extra on each side to cover up the vertically oriented 2X3 studs making up the frame. The extra 1.25 inches of height will allow the drawer front to cover the horizontally oriented studs. We sanded each drawer front, and secured them to the front of the drawer box with 3/4" screws from the inside to allow no visible screw heads on the drawer face. Getting the face boards to fit perfectly with one another with the correct size gaps was tricky, and required a lot of fiddling around and a little bit of shimming. We then added a small shelf just 2 inches below the rear drawer to allow convenient storage for our long things such as ice axes, trekking poles and pickets (see bottom left photo below). This was done by simply cutting out another piece of our 1/4" hardboard, and two pieces of scrap 1/2" plywood for it to rest on. Lastly, we used seven 90 degree angle brackets and 1/2" screws to secure the table top, by screwing the brackets to the underside of the table and then into the studs from below, making sure to pilot each screw hole with a small drill bit to avoid any cracking in the table, since it is a hardwood (Sapele).
Step 4 - Install the Rear Door
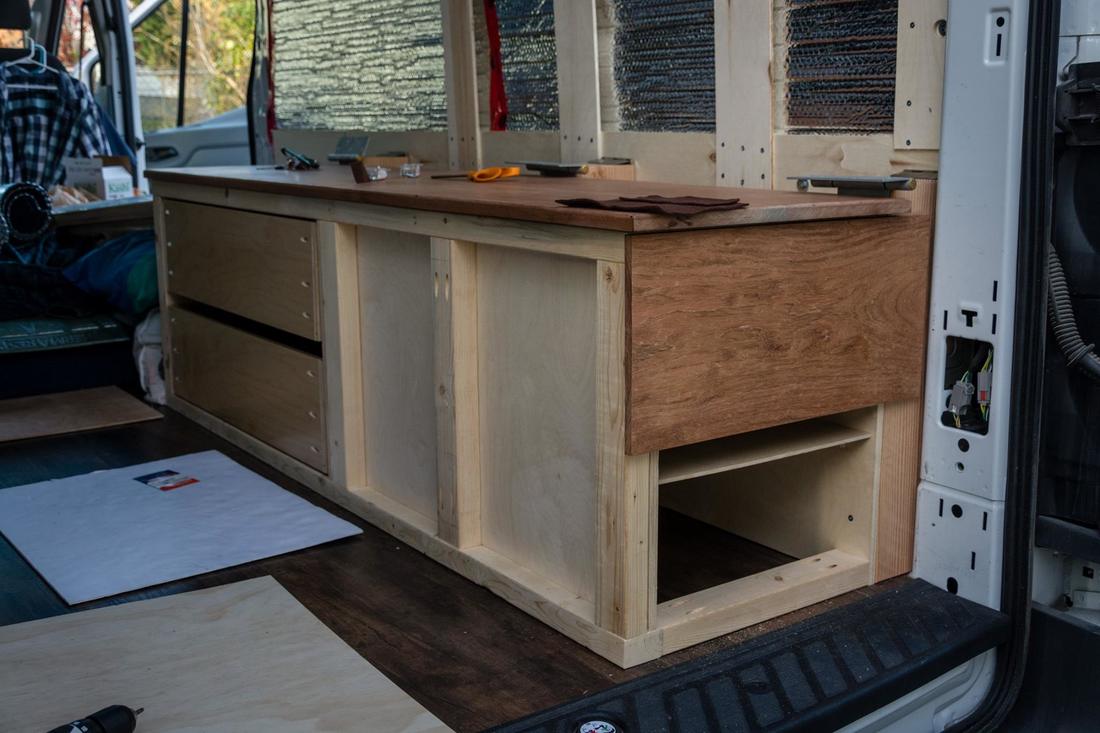
So, we still have the open space in the back of the coffee table below the rear drawer, but we had just enough left over Brazilian cherry to make a door to cover the lower storage compartment. We used two hinges mounted to the bed support to allow it to open to the right against the van back door. Unfortunately, the remaining piece wasn't quite long enough to cover the entire table frame or bed support but that'll have to work. We will install a device to hold it shut such as a magnet or tongue and groove lock later
Step 5 - Add the Table Extension
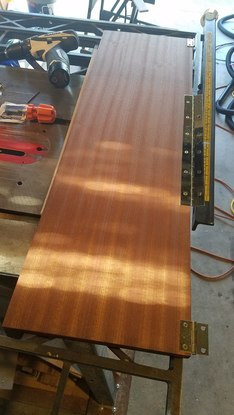
When we are seated on the couch, we thought it would be nice to have a folding table extension that can be folded up when we need it and lowered when we don't. With the remaining sapele wood we had from the table top, we prepared a piece just the right length. I cut two triangle shaped pieces of cedar that also fold in and out sideways from the frame of the table. When extended out, these triangles will provide support for the table extension, which folds up/down and rests on the supports when out. See the photo below.
Step 6 - Finishing
Our plans for finishing the coffee table will be to use the same pine tongue and groove wood panels we will use for the walls, to cover part of the non-drawer portion of the side that sits adjacent to the two drawers (which will be left partially open to house a couple nice coffee table books). We also applied a protective varnish to all the drawer fronts, table top and the wood panels. We still need to install drawer handles using some climbing holds Elaine found at the Calgary Climbing Center. Photos to come when this eventually gets completed.
Proudly powered by Weebly
