Introduction
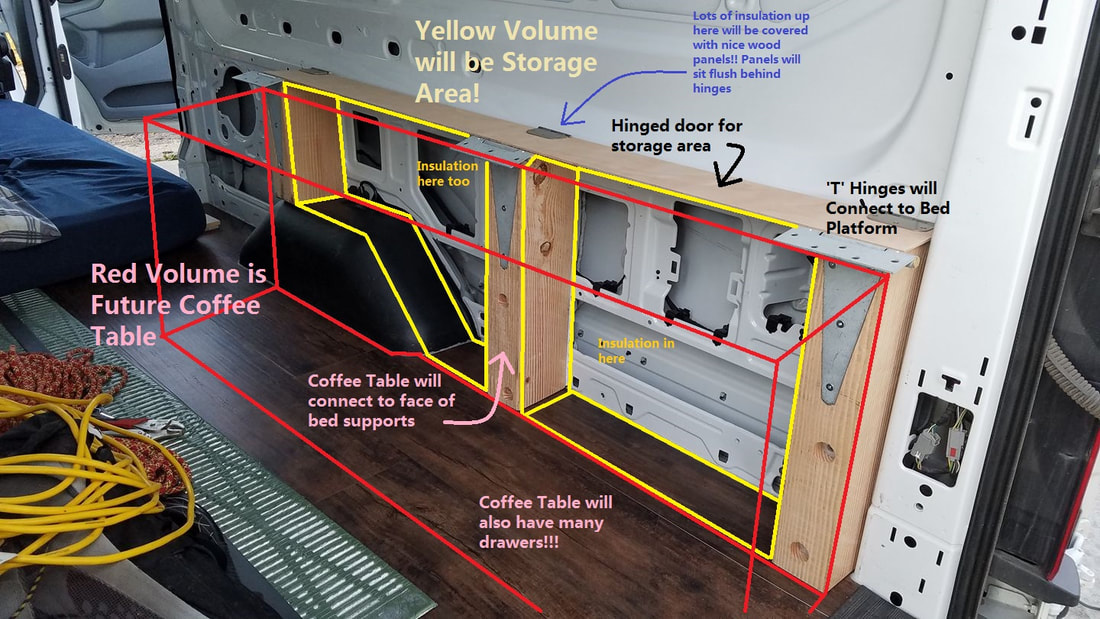
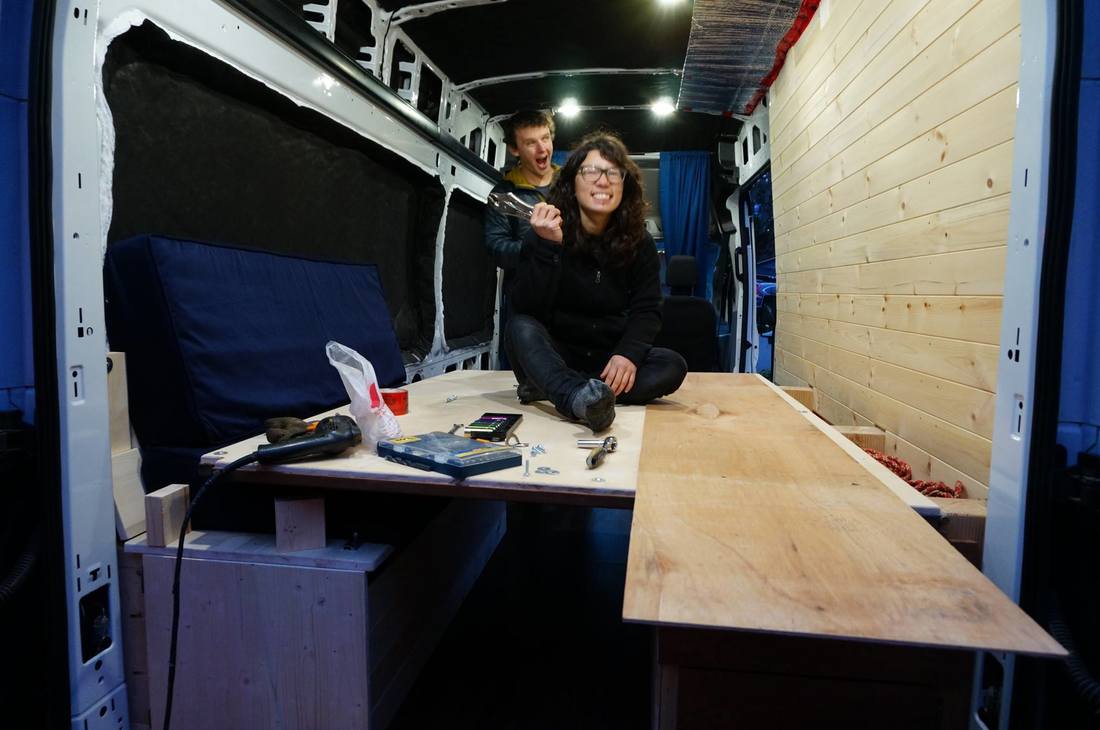
The bed in our Ford Transit conversion will be a folding bed, hinged on the passenger side, so we are able to open up the back half for more space during the day, especially since we may be working inside at times. Having a nice place to sit, with a table surface to work or eat on is paramount for long term livability. This is why we will design a folding bed, and no folding bed is complete without a burly set of supports! Since we already purchased a 6" thick queen size foam mattress (we will cut it to the correct width later on), we will have to allow space for a 6" thick bed to adequately fold into against the wall. This means the hinge point must be offset from the van wall by over 6" to allow extra space for the insulation and side panels. Additionally, we wanted the area between the support beams to be used as storage so a second smaller hinging panel needs to be placed on top of the supports. As you can see, things get pretty complicated, however despite not having the insulation or side paneling installed, we believe the supports will work well. Only time will tell I suppose!
Materials Used
Part 1 - Supports
- One (1) 4" X 6" X 8' Douglas Fir Beam, Not Milled ($23.92 at Superior Lumber)
- Three (3) Everbilt 10" Heavy Duty 'T' Hinges ($10.91 Each at Home Depot)
- Three (3) Everbilt 4" Hinges ($2.84 each at Home Depot)
- One (1) Box of 50 Marson Brand 1/4" - 20 Rivet Nuts ($22.90 at Gregg Distributors)
- One (1) Small Bottle Oxford White Vehicle Touch-up Paint ($3.29 at Napa)
- Ten (10) 6" Long 1/4" - 20 Bolts with 1-1/4" Diameter Washers ($0.65 Each at Home Depot)
- One (1) Pack 24" X 36" Elmer's White Foam Board ($6.99 at Michael's)
- One (1) 2' X 8' X 1/4" Thick Half Sheet Fir Plywood ($24.95 at Windsor Plywood)
- One (1) Square Meter Pack Brown Felt ($4.99 at Michael's)
- Four (4) 1/4" Hanger Bolts ($0.79 Each at Home Depot)
- 12" Long 5/16" Drill Bit ($22.44 at Home Depot)
- 1-1/4" Spade Bit ($6.99 at Home Depot)
- Various Lengths Square Drive Screws (~$15 at Home Depot)
- Miscellaneous 1/4" Carriage Bolts, K-Nuts, and Washers for Setting the Rivet Nuts
Part 2 - Bed Platform
- Two (2) 5' X 5' X 1/2" Thick Russian Birch Plywood ($25 Each at Windsor Plywood)
- Two (2) 12' Long by 3.5" Wide by 1" Thick Ipe Boards (Free from my parents)
- One Box Size 12 by 3/4" Long Wood Screws ($3.29 at Lowes)
- Three (3) Climbing Hanger Bolts ($2.29 each at MEC)
- One box 5/16" Marson Brand Rivet Nuts ($22.90 at Gregg Distributors)
- Queen Size Foam Mattress ($200 at Mattress Mattress)
- Miscellaneous other screws and fasteners
Total Material Cost: $465 Canadian Dollars (Does not include tools purchased)
Tools Used
- Reciprocating Saw with Long Wood Blades
- Router with Cutting and Rounding Bits
- Drill with Assorted Bits and Drives
- Palm Sander with Various Grit Sandpaper
- Measuring Tape
- Carpenters Square
- Socket Set with Deep Well Sockets
- Box Wrenches
- Vice Grips
- Scissors and Utility Knife
- Router with Cutting and Rounding Bits
- Drill with Assorted Bits and Drives
- Palm Sander with Various Grit Sandpaper
- Measuring Tape
- Carpenters Square
- Socket Set with Deep Well Sockets
- Box Wrenches
- Vice Grips
- Scissors and Utility Knife
Time Spent on the Job: 24 Hours
Part 1 - Folding Bed Support Installation
Step 1 - Sand + Cut the Rough 4" X 6" Beam
|
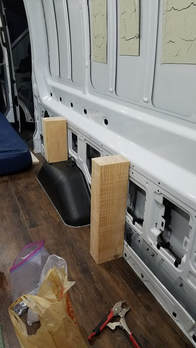
The rough 8 foot long Douglas fir beam I bought at Superior Lumber was in dire need of some serious sanding. I spent the better part of 3 hours one evening just sanding it with the palm sander using 60 grit sandpaper. Even though it will always be hidden, I felt it was important to sand it well. When we finally decided exactly how high above the van floor we wanted the bed to be, I cut the first piece off the beam at 21 inches long using a reciprocating saw with a long blade designed for wood. A Skil saw would have been much better for making the cut perfectly square, but I made the Sawzall work. Starting the cut with a hand saw helped, then any amount that was not exactly square I sanded with the palm sander. This 21" distance will be the height of our bed, which corresponds well with the van walls. I repeated for the second (middle) support beam with the same length, then the third one, which will rest on top of the wheel well. I made that one only 12 inches, subtracting the overall height of the wheel. More sanding commenced until all ends were as square as possible.
|
Step 2 - Installing the Rivet Nuts
|
Finding the best way to bolt things to the side walls of the van was easy thanks to many other van conversion blogs out there...so I can imagine that rivet nuts aren't too big a surprise to anyone who might be reading this. Finding rivet nuts is a totally different story though! One blog we have been reading speaks of this elusive "Plusnut" like it's the greatest thing since sliced bread, however they would not ship them to Alberta, so I shopped around and even the specialty nut and bolt stores here in Edmonton didn't have steel ones (only aluminum...not going to cut it!).
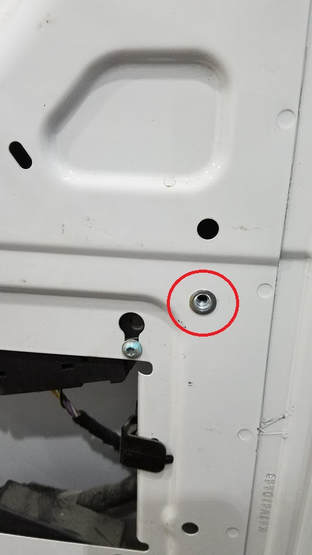
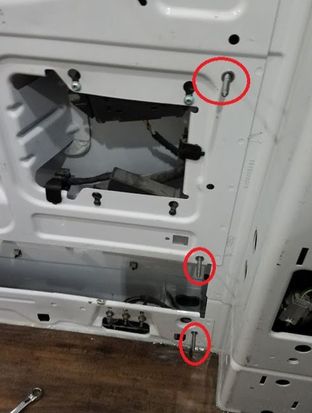
I finally found a box of 50 rivet nuts at Gregg Distributors (biggest competitor to Grainger here) that was the 1/4" - 20 thread count type with the thinner grip range. The box says a 25/64" hole is required. Unfortunately the holes that exist in the van are like 24.5/64" so they wouldn't quite fit!! I had to go buy a 25/64" bit to enlarge the holes ever so slightly (shaving more or less). To prevent rusting, I applied a little vehicle paint to the bare metal on the edges of the hole, which I had matched for our van at Napa. They were able to give me a small bottle with a built in tiny brush for touch up work for a few bucks...score! With the holes the correct diameter, I could then install the rivet nuts. See the graphic below how this was done...it was quite tricky! I set 3 rivet nuts each for the two longer support beams, and two for the shorter one. |
|
|
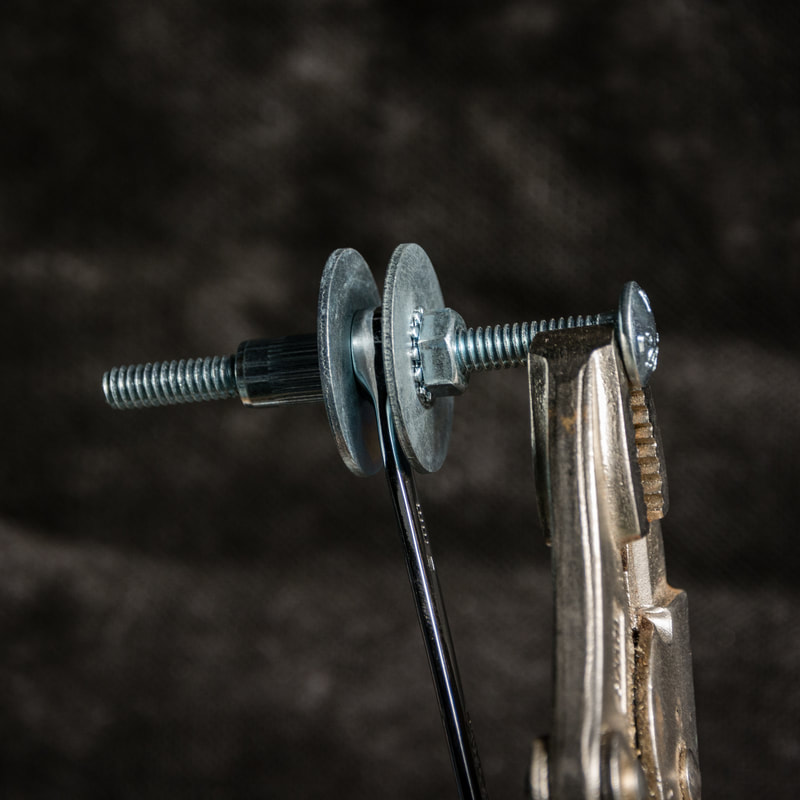
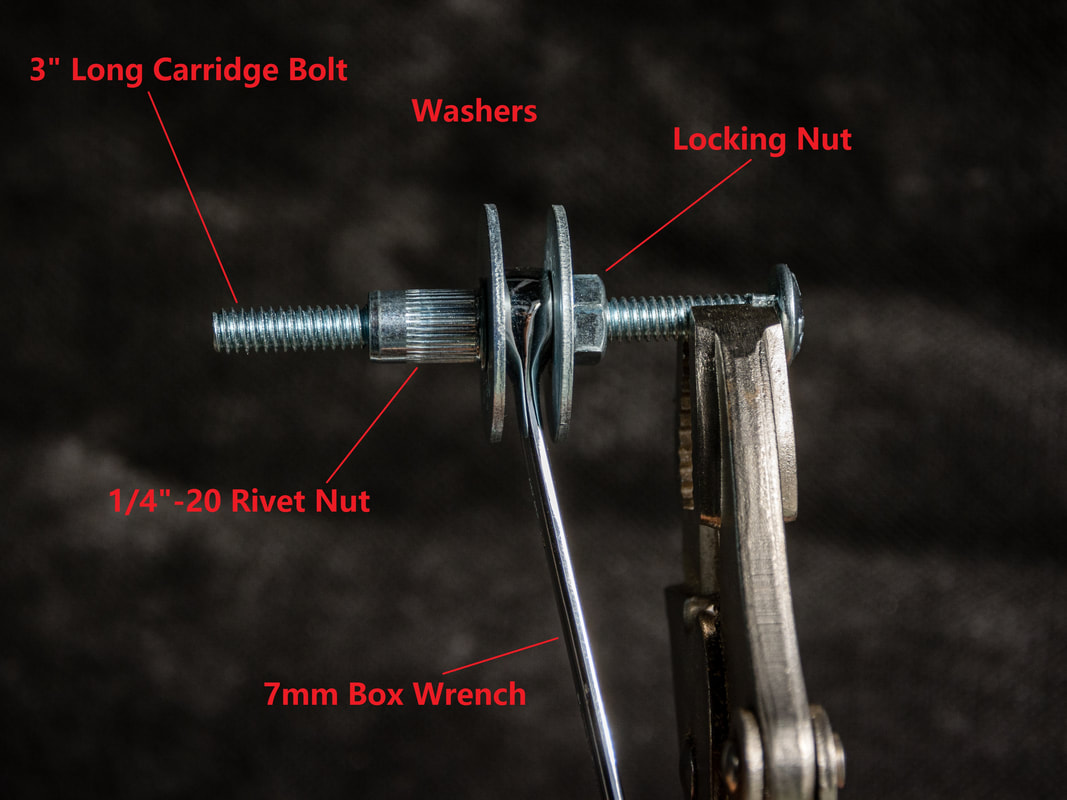
In the video on the left, you can see how we installed the rivet nuts. A 1/4-20 by 3" long carriage bolt held with vice grips was used, and everything placed onto the bolt in a specific order (see photo just above). First, a locking nut first screwed onto the bolt about 60% up, then a large washer, then a 7mm box wrench, then another washer, and finally the rivet nut was screwed onto the bolt until it was flush with the second washer. Holding the vice grips and the 7mm box wrench together with one hand, I placed the rivet nut into the hole of the van panel (making sure it was exactly 25/64" in diameter, as required for the rivet nuts we bought), and used a second, larger wrench to torque the locking nut. Turning this nut compressed the rivet nut and wedged it against the van. Once fully compressed we simply loosened the nut to unbind it from the washer, removed the vice grips and unscrewed the carriage bolt from the now secured rivet nut. Note the purpose of the 7mm box wrench and the second washer is to prevent the rivet nut from spinning as you torque the nut.
|
Step 3 - Drilling
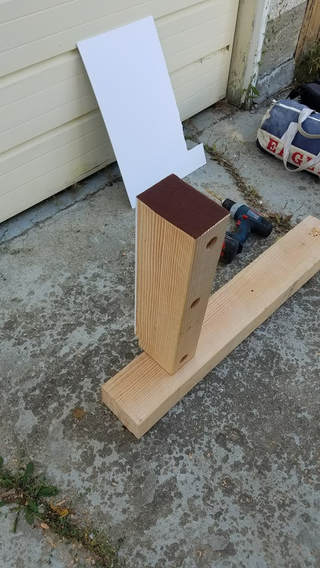
Next step was to drill 5/16" holes through the 6" width of the support beams. I screwed the hanger bolts (shown below) into the set rivet nuts and pressed the beam against all 3 of the bolts, and their sharp ends matched the pattern of the nuts so I knew where to drill. With the 12" long bit, I carefully drilled through the beams from the back side, trying to stay as straight as possible (very hard to do going through 6" of wood!). A drill press would have been nice, but we are not rich...
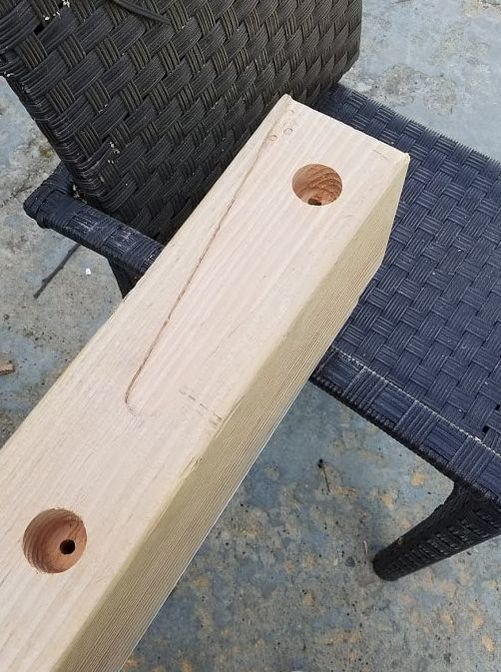
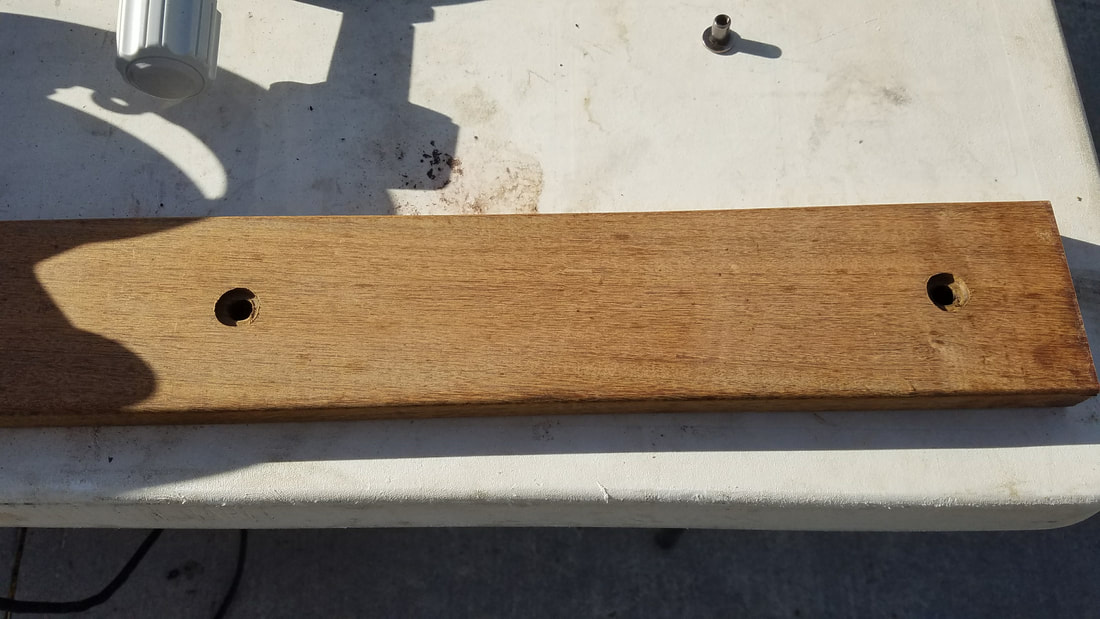
With all the holes drilled, I flipped the beams over to their front side, and used the 1-1/4" spade bit to drill a wider diameter hole for the large washer to sit into the beam, also allowing the 'T' hinge to sit flush against the front of the beam. See photos below!
With all the holes drilled, I flipped the beams over to their front side, and used the 1-1/4" spade bit to drill a wider diameter hole for the large washer to sit into the beam, also allowing the 'T' hinge to sit flush against the front of the beam. See photos below!
Step 4 - Cutting Space for the Hinges
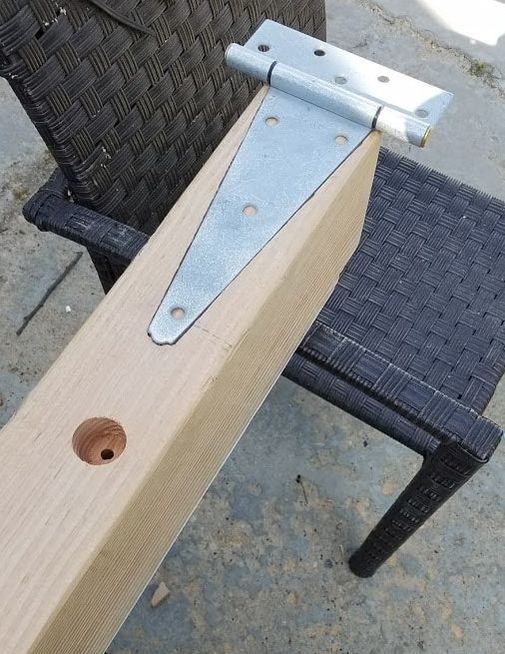
Once I test fit each piece to ensure all the holes lined up, I set my router to 1/8" with the cutting bit (same thickness as the large 'T' hinge) and traced the hinge outline on the face of the beam. It was slow and loud but after 45 minutes I got all 3 hinge outlines cut out. I then marked the location of the screw holes and pilot drilled each one. For the backside of each beam, I also cut a 1" notch out of the upper back corner to make room for the smaller 4" hinges, which will be used as the door to access the volume between the support beams (future storage area). I then pilot holed each screw location and installed these hinges backwards, so the rounded hinge axis was resting on top of the beam. This was done to maximize the space for the future wall panels to sit flush behind. The only downside of doing it this way, is the flange of the hinge will be visible on top of the access door, but that'll have to do.
Step 5 - Adding Foam Board and Felt
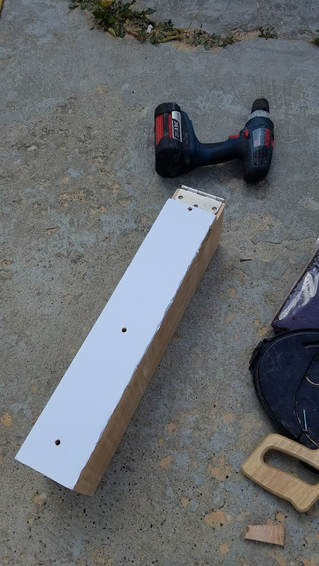
Nobody likes squeaks, so in an effort to eliminate any squeak potential, we want to make sure there is never any wood directly touching the metal van, or wood touching other wood without sufficient glue. Therefore, I used some superglue to attach some white foam board to the backside of each beam, cutting out strips with a utility knife. I also added some brown felt to the bottom of the beam to buffer it from the vinyl flooring.
Step 6 - Bolt Beams to the Van!
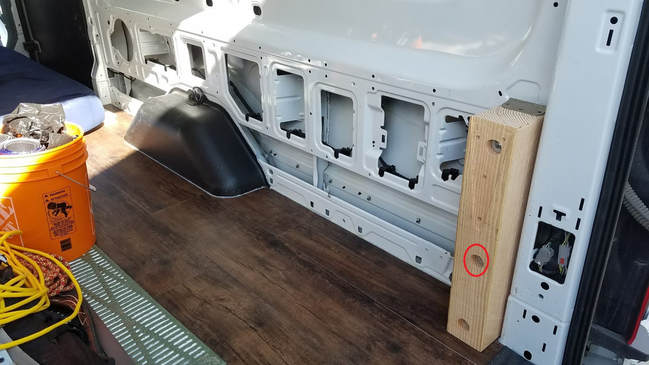
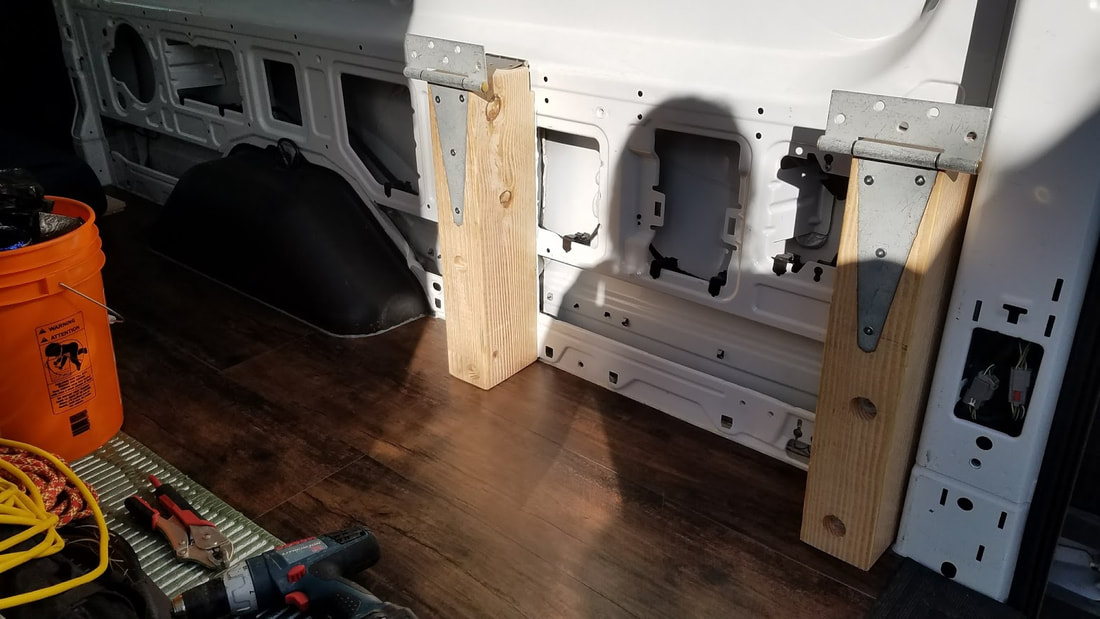
This was the point I felt like progress was really being made! I grabbed the 6" long by 1/4" diameter bolts, placed the washers, and simply bolted them into the rivet nuts, being careful not to over tighten them. These beams are not going anywhere! Then I simply screwed the 'T' hinges to the beam with 3" screws using the pre-piloted holes.
So What's Next?
Now that the bed supports are complete, we can begin to envision the entire back half of our van conversion come together. The next major step is to install the Thinsulate insulation we bought (which is waiting for us in WA), and build the coffee table (outlined in red), which will feature large drawers for clothing and climbing gear. This coffee table will screw securely to the face of the support beams, and also likely into the floor for added security. The top of our table will be a nice hardwood, with a hinged extension to make the 2 foot wide table extend to be about 3.5 feet when the bed is folded up. I think I might be in love with hinges haha! The added bonus of the table is when the extension is hinged closed, it will provide extra support for the bed while we weight it at night. The couch on the opposite side will provide the bed support on the far end while it is folded down in "sleep mode"
Until next time....Happy Building!
Until next time....Happy Building!
Part 2 - Bed Platform Installation
Step 1 - Build First Ipe Board and Secure to Hinges (October 2017)
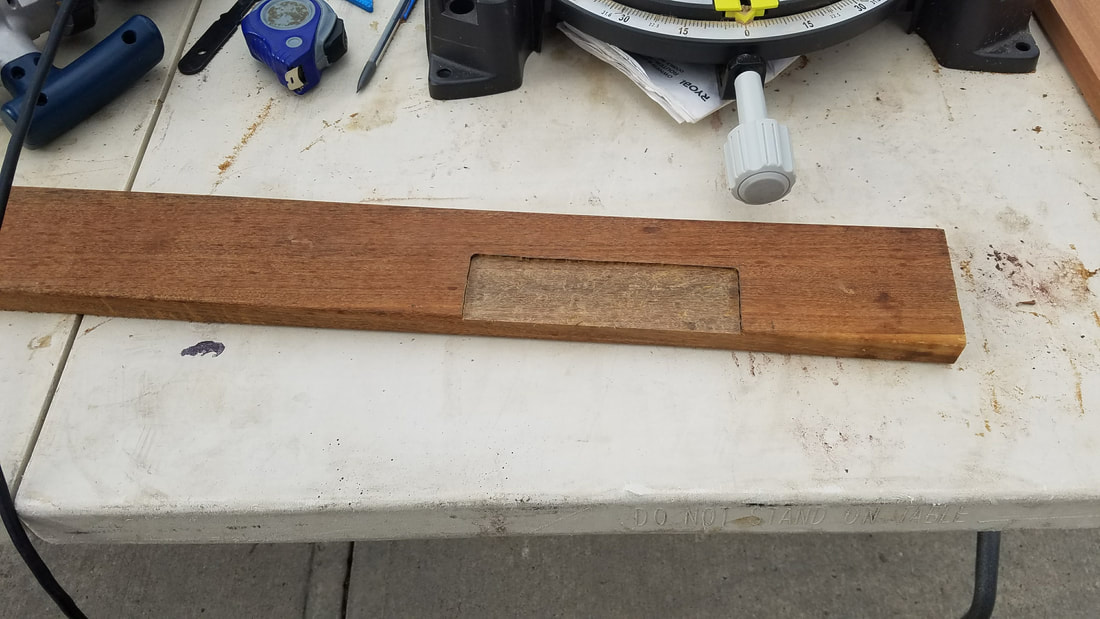
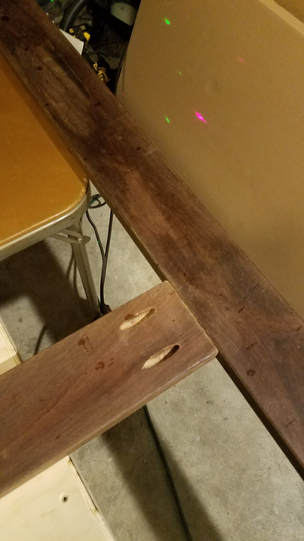
With the coffee table and couch nearly complete (see the next couple articles), we could start building the bed platform that will fold down over the coffee table and couch, which will be the main support for the bed when it's down. I managed to grab one of the 12 foot long Ipe boards from my parents home in WA in October (when I returned from Edmonton to pick up the Thinsulate) which I used as the first, and primary bed platform support that would connect to the three large hinges on the supports. If you aren't sure, Ipe is one of the hardest woods on the planet, and is very tough to work with. My dad purchased dozens of 3.5 inch wide boards to replace our deck. He had a few extras, which I meant to take back to Edmonton in October but forgot two of them. With only one, I could still start the folding bed platform. With Elaine busy working, I did this step myself. I first cut the Ipe board to length with a chop saw, then marked the hinge locations on the board. I set the router with the cutting bit to 1/8" depth and slowly routed out where the hinges would sit against the board. This allows the plywood which will sit atop this board to be flush.
|
I repeated the routing process, which was quite slow in this extremely hard wood, for the other two hinges and tested the fit. I had to trim around a couple times, until the piece fit perfectly with each hinge. I then marked each screw hole location (5 for each hinge) with a marker. Next, I routed out circular holes at stepped depths to match the additional connector bolts I purchased to provide additional strength in binding the plywood to this board, which will be under the most stress when the bed is lifted and lowered.
|
I then super glued the first half of the connector bolts into these holes, which holds the inside threads for the bolt itself, which will be threaded on when the plywood platform is installed. I also cut pieces of dark red sticky back felt to the underside of the Ipe providing a thin buffer between the Ipe and the table top so that the table isn't scratched when the bed is down. To finish off this step, I took the size 12 3/4" screws and connected the board to the underside of each hinge, making sure to pilot hole each screw. Without a pilot hole equal to the diameter of the screw shank, the screw will shear off and/or the wood will split.
Step 2 - Build Bed Platform (December 2017)
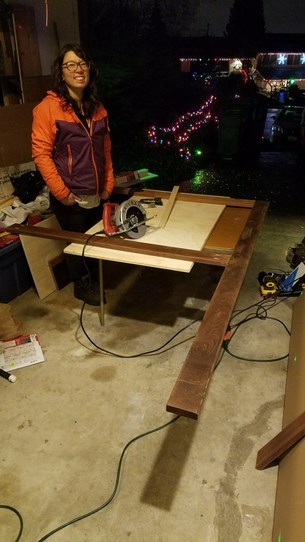
Without the remaining Ipe boards we couldn't finish the bed platform until we went back to WA in the middle of December. Elaine and I then made it our goal to finish the bed platform in WA before we drove down to Red Rocks, so we could give the bed a test run on a weeklong trip to the desert. With help from Josh, we managed to get it done!
We cut the remaining pieces of the underside support and used the Kreg jig to drill to connect them together. In addition to drilling the angled holes on the face of the boards, we also had to pilot hole into the second board for each screw location. We made one additional piece along the length of the bed which would sit on the couch for support, and three pieces going width-wise making a double square frame. It was definitely going to be strong enough.
We cut the remaining pieces of the underside support and used the Kreg jig to drill to connect them together. In addition to drilling the angled holes on the face of the boards, we also had to pilot hole into the second board for each screw location. We made one additional piece along the length of the bed which would sit on the couch for support, and three pieces going width-wise making a double square frame. It was definitely going to be strong enough.
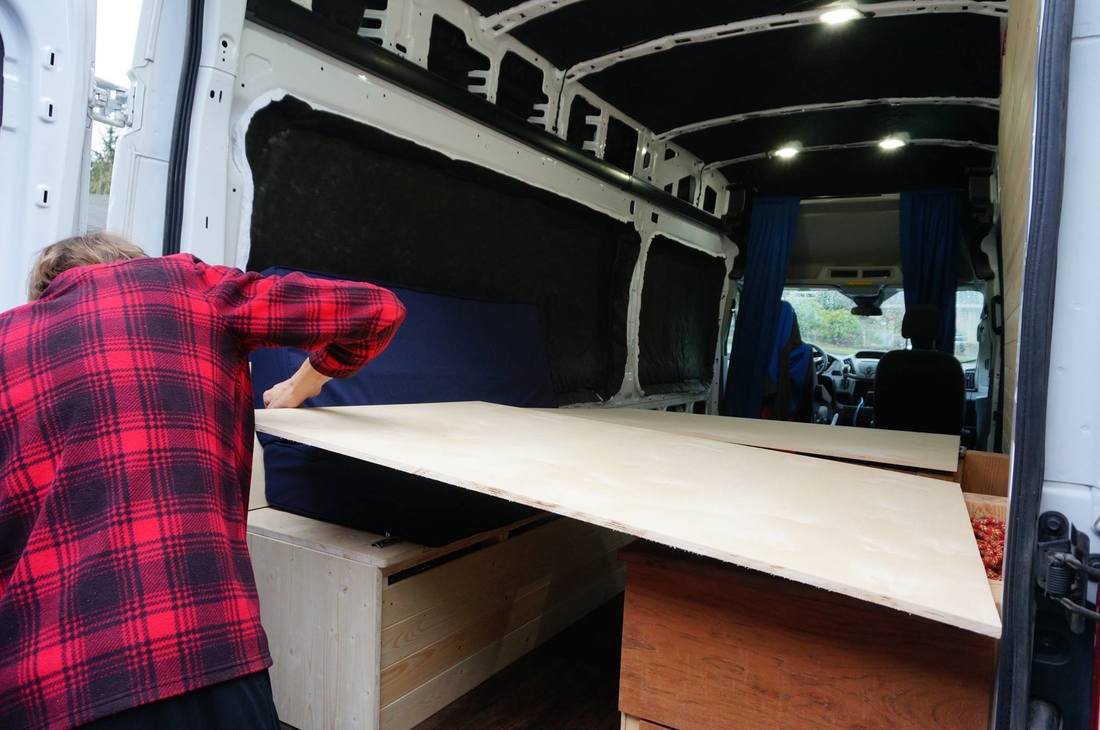
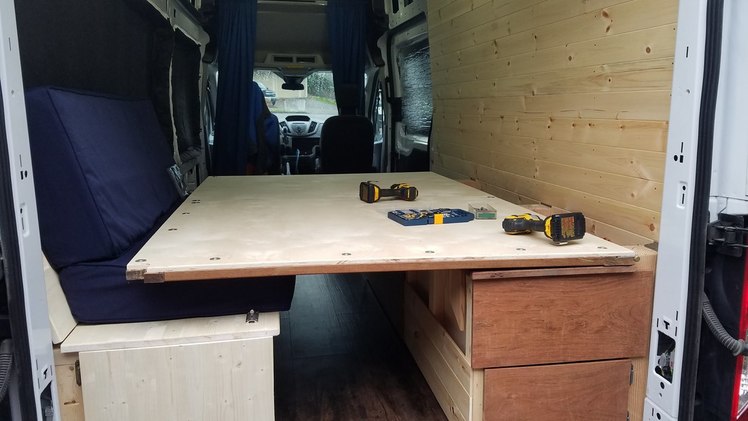
With the frame complete, and connected to the existing board I installed back in October, we dry fit the two pieces of plywood onto the frame. I took the router and rounded over all the edges of the plywood, and we began pilot hole drilling where each screw would get drilled. We systematically installed screws at regular intervals connecting the plywood platform to the frame below, using washers.
Step 3 - Install Additional Supports
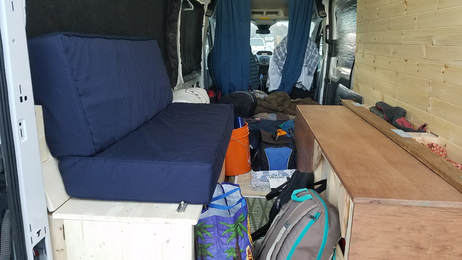
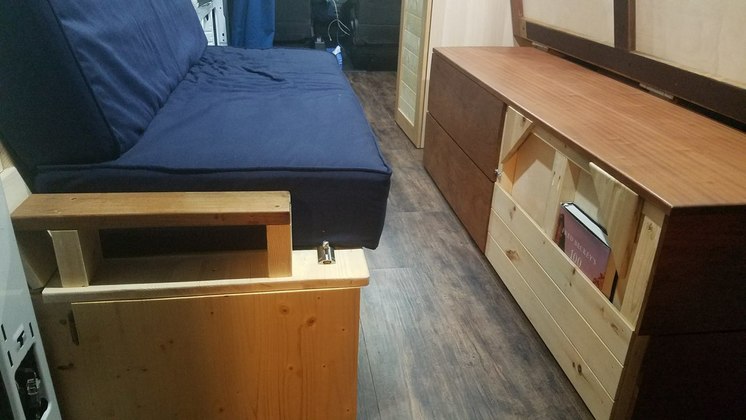
As seen in the photo directly above, the bed platform is sitting directly on the couch cushion. This is not ideal, as it will wear our the expensive foam and allow the bed to sink too much, and stress the hinges too much. To mitigate this, we added some supports to both the front and rear ends of the couch, at the exact perfect height to make the bed level, and allow it to rest squarely on both the table, and the supports adjacent to the couch. This was fairly easy to do, as we simply cut 4 small pieces of 2 X 4 all the same length (I think it was about 3.75 inches...whatever was required to match the height of the table top), and screwed two of them on each side of the foam with long screws from the frame stud. Then, we cut a piece of the Ipe board and screwed one to each side atop these 2 X 4 pieces. The top of these two supports matches exactly the height of the table, and sits just 1/2" below the foam cushion. Therefore when the bed is down, most of the weight sits on these supports and the table, where a small amount also rests on the foam.
Step 4 - Ceiling and Bed Anchor
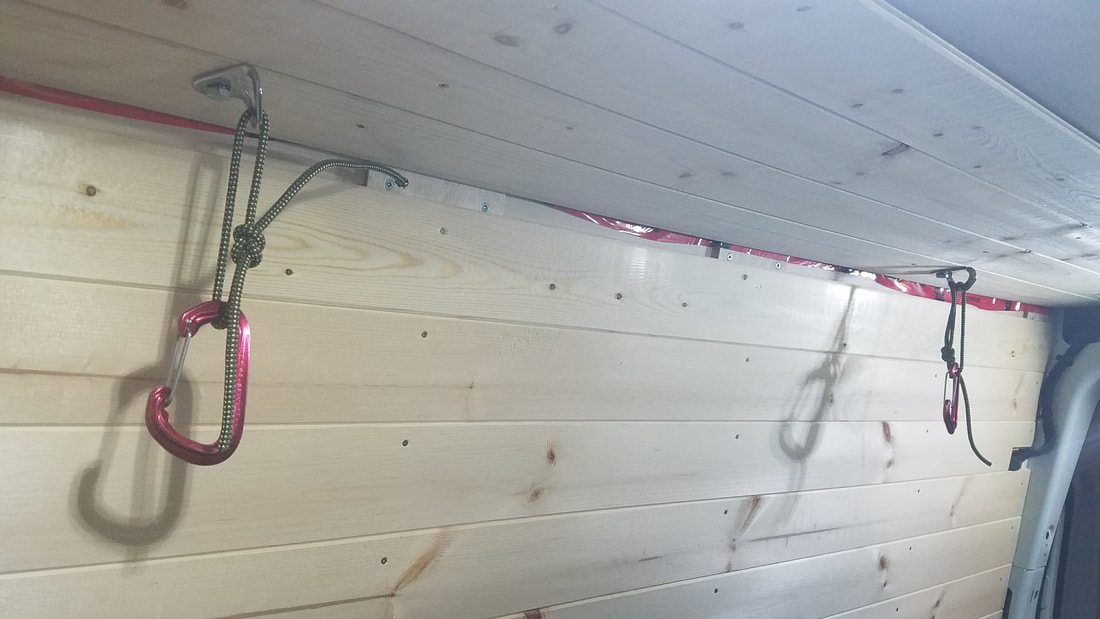
In order to hold the bed in its upright position, we needed to build a portion of our ceiling, and install the hanger bolts that we could clip the bed to when we folded it up. First, we installed two of the larger 5/16" rivet nuts into the larger holes in the end of two metal cross beams that cut across the ceiling of the van. We had to enlarge the holes to a diameter of 9/16" for the rivet nut to fit. We then used the tuck tape to secure a piece of the Reflectix to the ceiling. Then, using the 1/4" thick half sheet of flexible plywood, we installed three more rivet nuts into the ceiling cross beams (one on each) and used 1 inch hex bolts to secure it to the ceiling. Coincidentally, we didn't have to even cut the plywood, as it's width and length was perfect to fit on the ceiling above the passenger side of the bed. We attached some furring strips to this piece of plywood, then attached some of the 8 foot long pine panels on top of those strips. We used the hanger bolts to mark where we had to drill through the panels for the bolts to be placed, and installed them. The last step was to drill a couple small holes into the edge of the bed platform, and tie some cord that would connect to the anchor bolts with a couple carabiners.
Proudly powered by Weebly
