Overview
Metcalf Mountain is a beautiful chunk of granite in the Beartooth Mountains of southern Montana. The east face has a few excellent aid and difficult free routes that have been done but perhaps the most enjoyable route on the mountain is its wild north rib. Characterized as a jagged ridge featuring many small spires, solid rock and some great technical crack climbing, this route is a fun technical objective that can be done as a day climb due to the short approach for Beartooth standards! As stated on the main Metcalf Mountain page, this is one of the few high Beartooth peaks that makes a good day hike/climb.
Getting There
Trailhead
Rock Creek Trailhead
This is the standard trailhead for the Spirit Mountain group which includes Mount Rearguard. From the Montana Road 308 and US Highway 212 junction in Red Lodge, go west on US 212 for 11.4 miles and turn right onto FS 2421 (Rock Creek Road) and measure from this point. Follow this paved road for 0.9 miles where it turns to dirt and passing by three National Forest campgrounds. Here the road forks, take the left fork and continue on the good dirt and pass the M-K Campground at mile 2.8. Here the road becomes rougher. Continue 8 miles on this road as it drops into Wyoming and reaches the trailhead at the Montana/Wyoming state boundary at 8,700 feet. This road is passable for tough passenger cars with good ground clearance. There are many good places to pull off and camp.
Approach
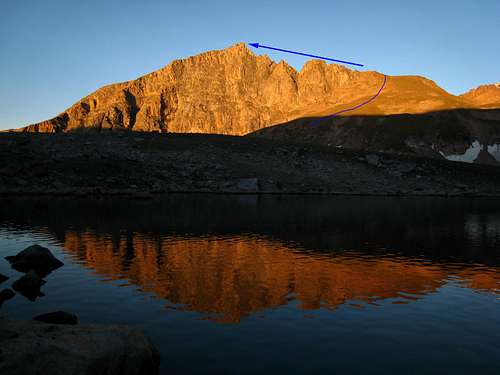
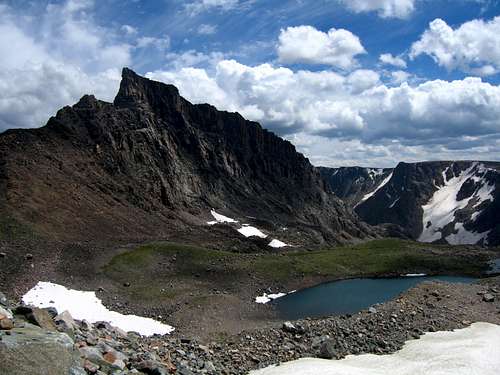
This is one of the shortest approaches to any 12,000 foot peak in the Beartooth Mountains. From the Rock Creek trailhead, begin up the steep switchbacking trail through an old burn area and reach a nice footbridge crossing Rock Creek after 0.6 mile at 9,080 feet. Cross the bridge and continue up the trail for eight more switchbacks and locate a side trail heading off to the right (north) at 9,230 feet. There may be a cairn here to mark the turnoff. Follow this steep but well traveled boot path along the left (west) side of Rock Creek for 0.35 mile to where it crosses back to the east side of the creek on large boulders at 9,600 feet. Past this crossing the slope eases and the path continues through open grass above and on the right side of the creek. Continue to a small tarn at 9,820 feet and cross the stream again just below it. Follow the path around the left side of the tarn and pass a very shallow second tarn.
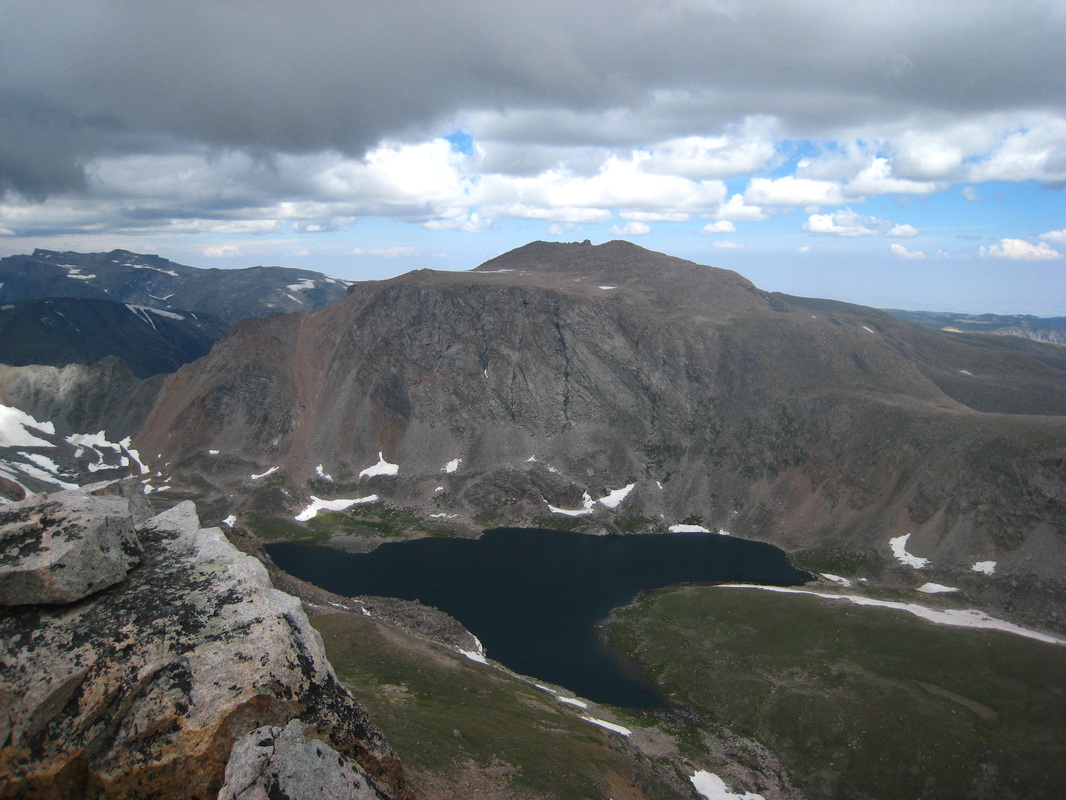
Once past the second small tarn, cross back to the east side of the creek and follow a faint trail as it gently ascends towards the large bench just to the east. Hike along this mile-long grassy plateau, passing another larger lake on the left at the base of the east face of Metcalf and on to the southwest corner of Moon Lake at 10,400 feet. It's about 3.2 miles from the Rock Creek Trailhead to Moon Lake with slightly over 1,500 feet of elevation gain. At this point the approach is over and steeper hiking begins. Cross the outlet stream on a series of rocks and immediately start climbing up the talus and grass slope to the west. Instead of heading to the 11,130 foot saddle between Metcalf and Spirit Mountains, continue on an ascending traverse to the southwest aiming for the start of the towers on the north rib. Crest the ridge at about 11,500 feet (1,100 feet above Moon Lake) right where the first scrambling begins. This section of the route is all Class 2 talus and grass and takes about an hour.
Route Description
Note that the description below is for using a 30 meter rope. A longer rope isn't needed as it just adds weight but if you did bring a longer rope, what is described as pitches 3 and 4 can be combined.
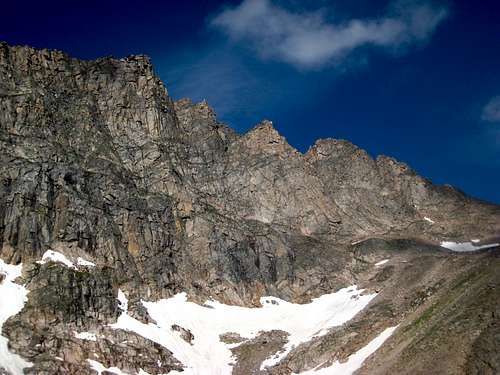
From 11,500 feet on the ridge, bypass the initial difficulties on the right (west) side via Class 2 ledges. Climb back left to a small notch just past the first prominent tower and bypass the second tower on the left (east) side. From here, cross a notch and climb up the crest. Crossing this first notch involves a very exposed low 5th class move before easing back to Class 3. Just ahead the largest tower along the ridge is seen with downward sloping slabs. Your first objective is to get to the north side of this large tower. Descend a few feet to the right of the crest and scramble ledges to the base of the large tower. Traverse around the left side of the large tower and cross a short but exposed ledge and cross a small rib.


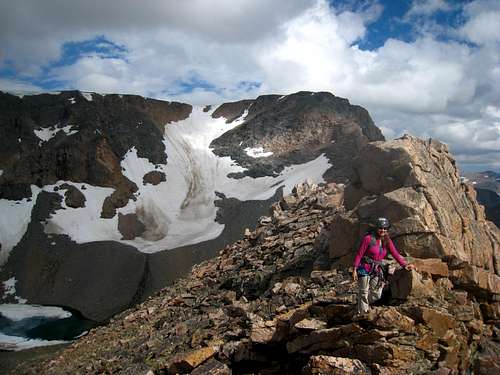
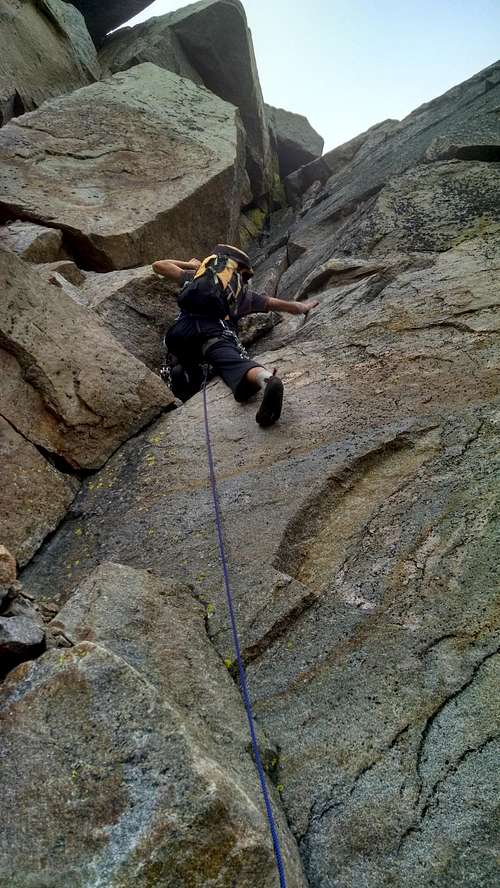
Pitch 1 Locate a nice chimney just past the rib and climb it (Class 5.4) as it angles leftward and reaches the ridge crest once again just beyond the top of the tower. This will run out a 30 meter rope and some simul-climbing may be required. Descend a steep talus gully to the notch between the tower and the remainder of the route. This gully drops about 100 feet on Class 3 blocks with the final 40 feet involving a short rappel off a fixed nut. Once at the notch, traverse a large ledge to the right of the crest for about 100 yards, passing below two more small towers. Gain a second, higher ledge and switch back to the north.
Pitch 2 Locate a nice chimney which looks friendlier than everything else on the cliffs above. Climb the chimney for about 25 meters with a 5.8 crux involving a narrow squeeze to the right of a large chockstone. Packs may need to be hauled up here. Above this pitch there is a huge ledge where the leader can anchor to a large horn and comfortably sit for the belay. Continue the route by walking this large, flat ledge to the left (north) back to the crest of the ridge. There is a long, narrow flat spot reminiscent of a diving board on the ridge here you can walk out onto to view the rest of the route (See photo below).
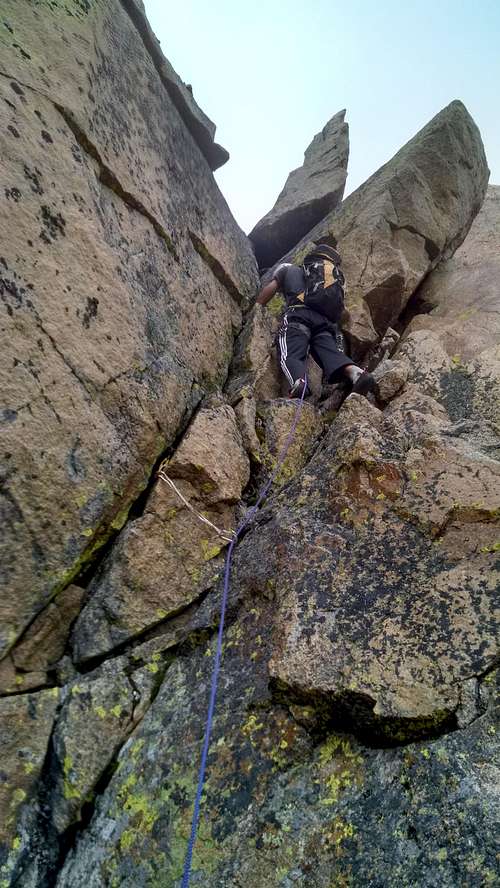
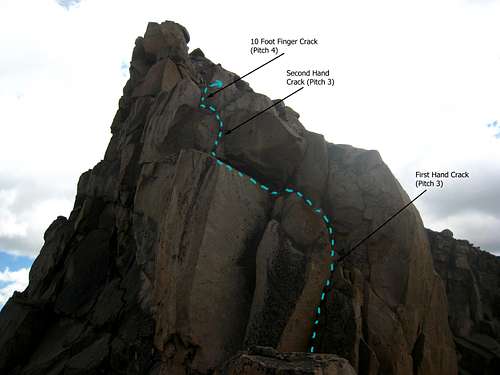
Pitch 3 Locate an excellent 5.8 vertical hand crack and climb it about 20 feet and traverse left up a downward sloping slab to another, curving hand crack. Climb this second crack for 15 feet and emerge onto another slab and walk to the base of a 10 foot finger crack dihedral. Belay here because you will run out of rope if you have a 30 meter. The finger crack above you makes for an excellent anchor.
Pitch 4 Climb the 10 foot finger crack (Class 5.7) and emerge onto a large slab ledge above and walk to the right of the summit block until the rope ends and belay off a horn at the base of the final pitch. The 10 foot finger crack is the only technical climbing on this pitch with the rest being Class 2.
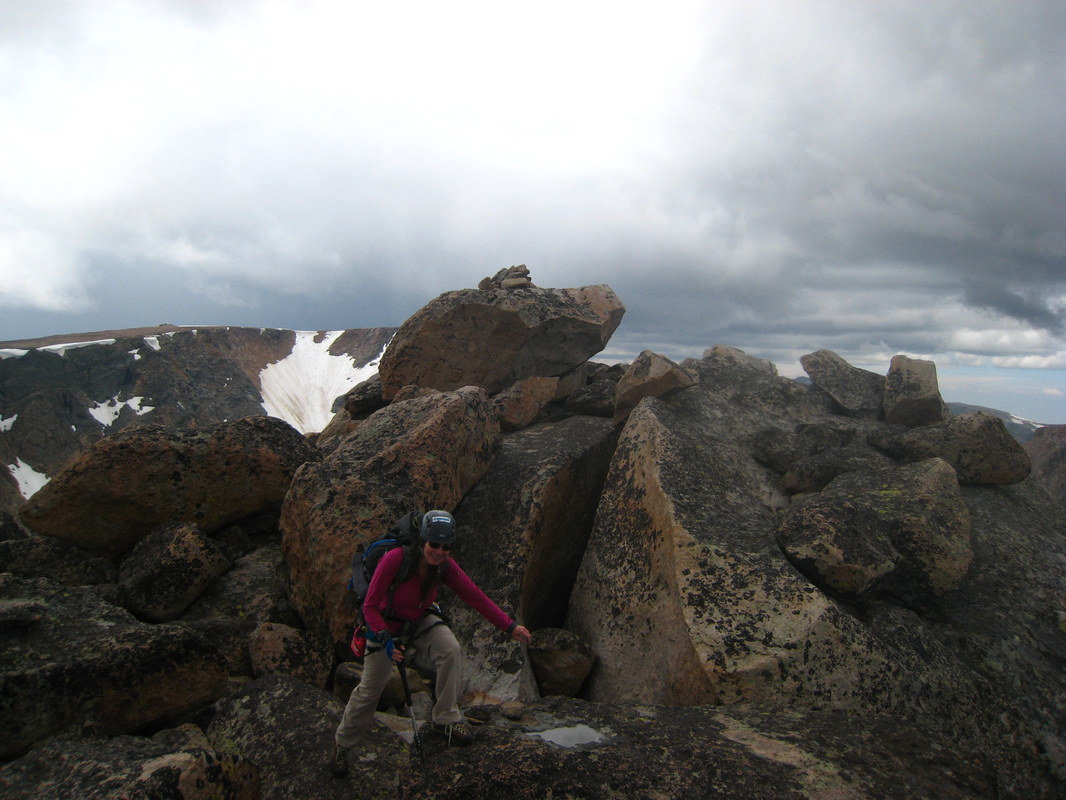
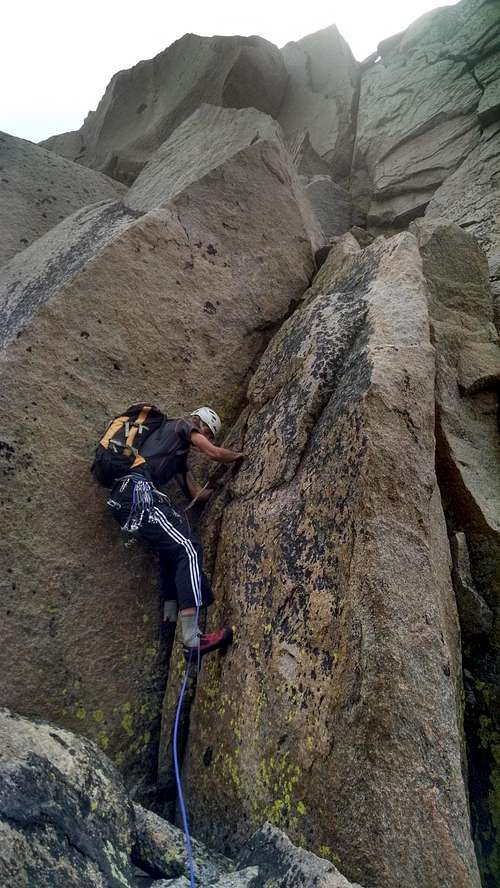
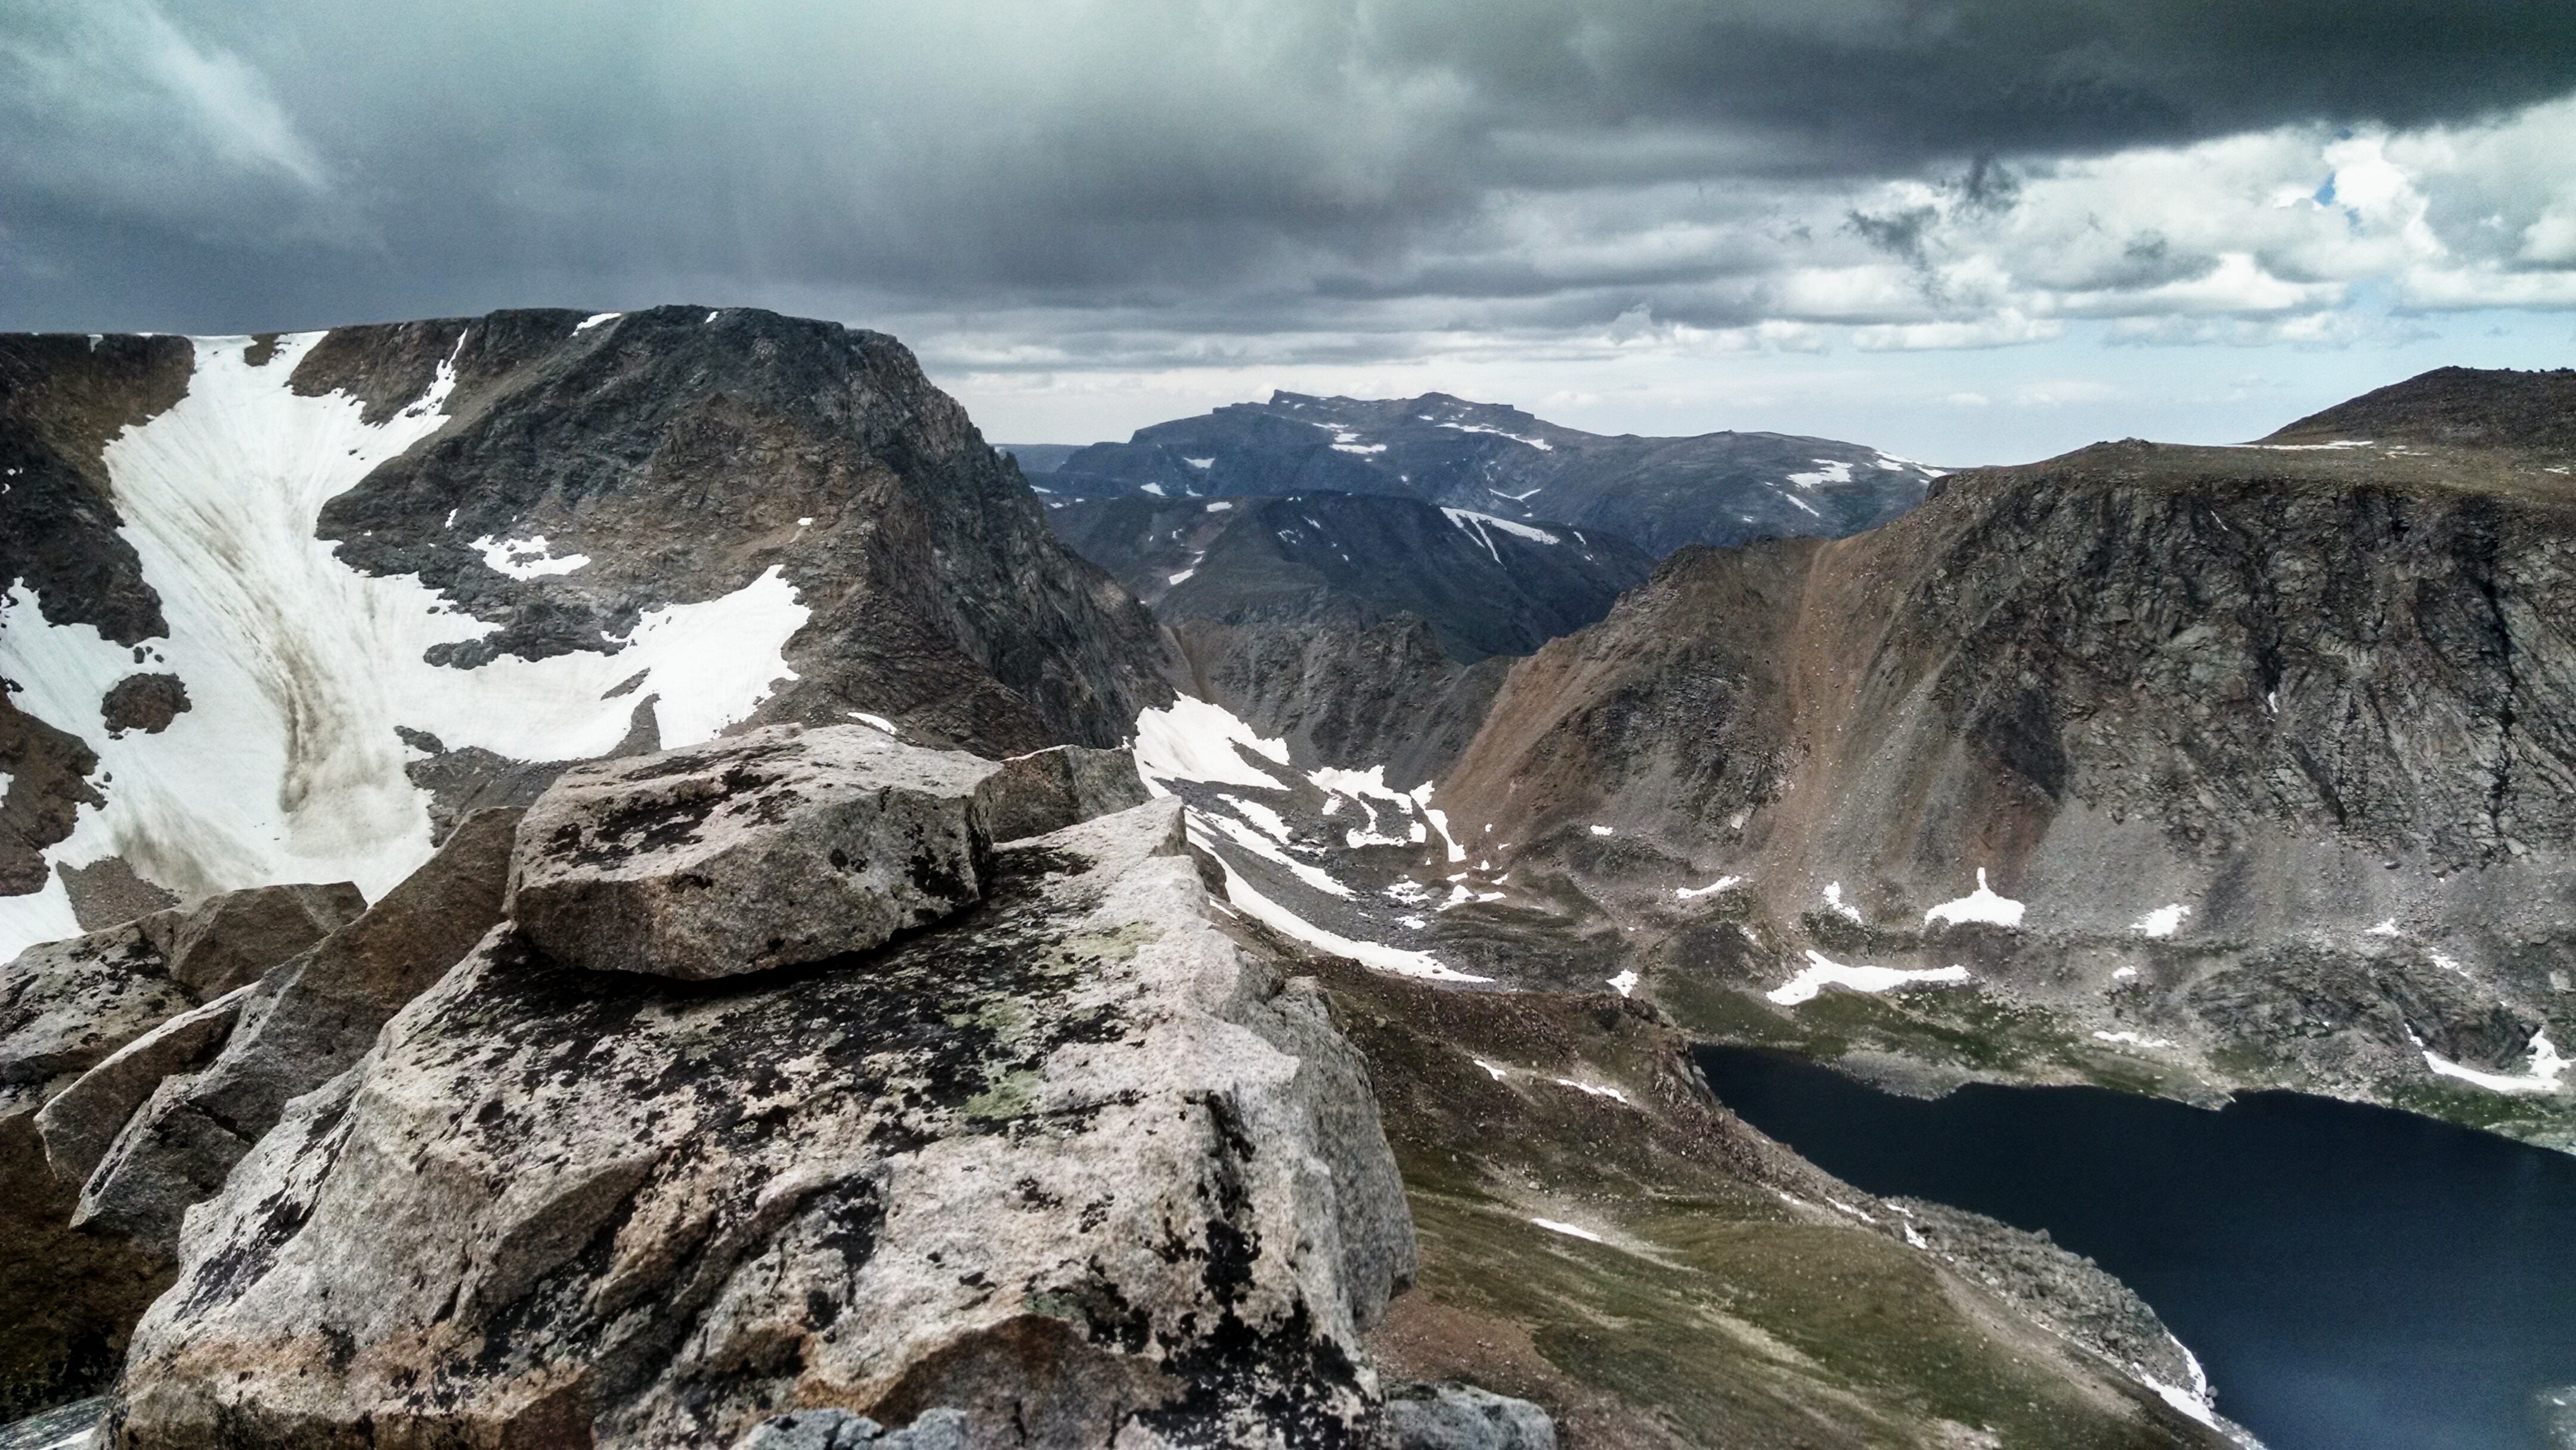
Pitch 5 Locate a nice chimney which starts easy, climbs up a large step and continues to a vertical finish (Class 5.6) over large blocks offering great handholds. Emerge onto the talus strewn summit plateau and walk a few feet to the highest rock, which may be a bouldering problem for shorter people. Enjoy the views of Spirit Mountain to the north, Granite Peak to the west, Mount Rearguard to the east and the Beartooth Pass, complete with the sound of engines running to the south!
Descent
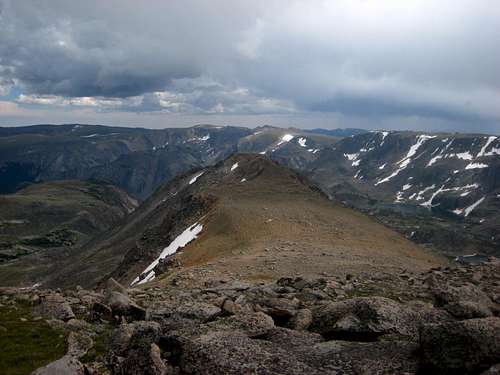
Descend the south ridge route described on the main page. This Class 2 talus hike is 10 times better than trying to reverse the route.
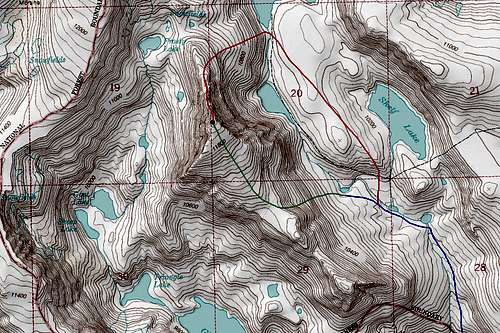
Map
Essential Gear
Single rack of Black Diamond C4 cams from 0.3" - 3" there was a decent amount of hand cracks on the upper route so maybe bring an extra 1 or 2. I didn't find any need for any pro less than 0.3"
30 meter rope is more than enough since the pitches are short and the descent is a walk off. Also bring the obvious...harness, helmet, rock shoes, belay device etc.