Introduction
Elaine and I decided the floor was the most logical place to start a van conversion, so that's what we did. In an effort to make everything we do to the van reversible (just in case), we opted for vinyl planks laid atop a plywood underlay. We did not want to glue a large roll of vinyl or linoleum as that would be near impossible to remove without completely destroying it. Plus, if we need to we can easily remove one or two planks around the edge of the floor. The week leading up to Labor Day weekend, I bought most of what we needed, but left the purchase of the actual planks themselves so we could decide which ones we want together. When we designed our floor, we made it a priority to make the floor as thin as possible while still maintaining strength in an effort to make sure I could still stand inside. Remember, I barely fit as it is without any floor or ceiling at all! In the end though, we think our floor turned out amazing, and after a long decision process at Lowe's, where we had many samples strewn around the aisles, we picked out a beautiful floor that suited everything we wanted while staying reasonably priced.
Materials Used
- Three (3) 4' X 8' X 3/8" Thick Premium Fir Underlay Plywood ($36.98 Each at Windsor Plywood)
- 1 Meter Wide X 30' Long Roll Taiga Stealth Foam Underlay ($39.98 at Windsor Plywood)
- Three (3) Tubes of Marine GOOP Adhesive ($11.77 Each at Home Depot)
- Four (4) Boxes Mohawk Brand Chocolate Saddle 9" X 48" Luxury Vinyl Planks - 25 Square Feet per Box ($78.85 Each At Lowe's)
- Two (2) 100 Piece Boxes of #8 X 5/8" Long Square Drive Wood Screws ($9.99 Each at Home Depot)
- One (1) Tube of GE Silicone II Clear ($6.20 at Lowe's)
- One (1) Bottle Great Stuff Gaps and Cracks ($15.75 at Home Depot)
- One (1) Small Container Wood Filler ($4.99 at Home Depot)
- Two (2) Rolls Gorilla Double Side Tape ($3.39 Each at Wal-Mart)
- One (1) Bottle Gorilla Super Glue ($5.99 at Home Depot)
**Note all Dollar amounts are in Canadian Dollars**
Total Material Cost: $562 Canadian Dollars (Does not include tools purchased)
Tools Used
- Jig Saw with Blades
- Palm Sander with 60, 120, and 220 Grit Sandpaper
- Good Scissors
- Knife
- Two Drills with Plenty of Bits and Various Drive Types (Square, Star, Phillips etc)
- Countersink Bit
- 2" Putty Knife
- Measuring Tape
- Caulking Gun
- Palm Sander with 60, 120, and 220 Grit Sandpaper
- Good Scissors
- Knife
- Two Drills with Plenty of Bits and Various Drive Types (Square, Star, Phillips etc)
- Countersink Bit
- 2" Putty Knife
- Measuring Tape
- Caulking Gun
Time Spent on the Job: 4 Days (We worked an average of 9 hours each day)
Step 1 - Remove Existing Floor and CLEAN
Once we had all the materials and tools we thought we needed, we started disassembling the existing black vinyl floor that came with the van. We had to remove the plastic trim pieces on the side door entrance and at the back end. This was done by removing the screw caps with a very small flathead screwdriver and removing the screws. Then we carefully removed the trim. The back piece easily slid out when the screws were removed, but the side trim had a few of those annoying plastic inserts that you have to pull out in just the right fashion to avoid breaking them. Luckily we didn't break any, but it would turn out we wouldn't need them in the end anyways.
Next we removed the bolted tie-downs from all around the base of the van so we could remove the existing vinyl. Our floor will be thin enough that these tie downs can be re-installed and used if needed. Then we began cleaning. Whoever owned the van before us seemed to really like prunes, as we found a dozen or so of them hidden behind the driver seat under the floor...gross! Removing the floor and cleaning took quite some time as the dirt never really seemed to fully disappear, but that's how cleaning works right?
Next we removed the bolted tie-downs from all around the base of the van so we could remove the existing vinyl. Our floor will be thin enough that these tie downs can be re-installed and used if needed. Then we began cleaning. Whoever owned the van before us seemed to really like prunes, as we found a dozen or so of them hidden behind the driver seat under the floor...gross! Removing the floor and cleaning took quite some time as the dirt never really seemed to fully disappear, but that's how cleaning works right?
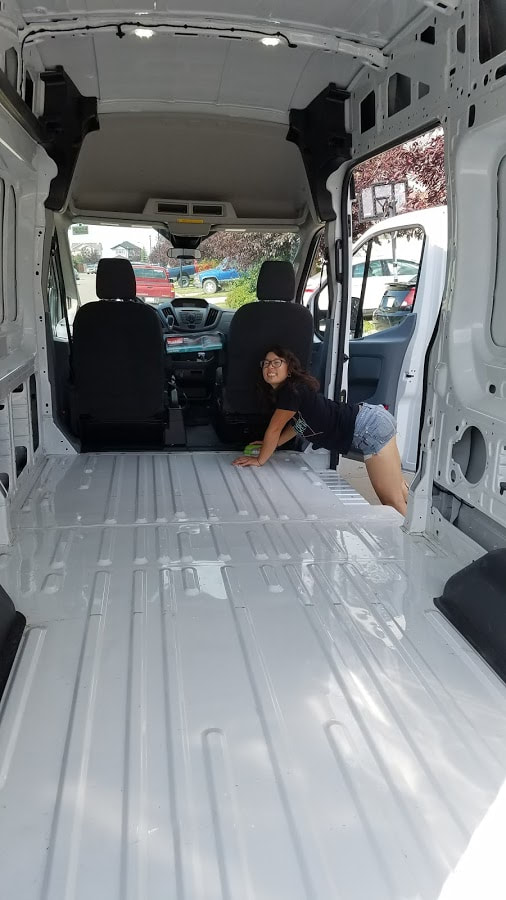
Just look at that shine!
|
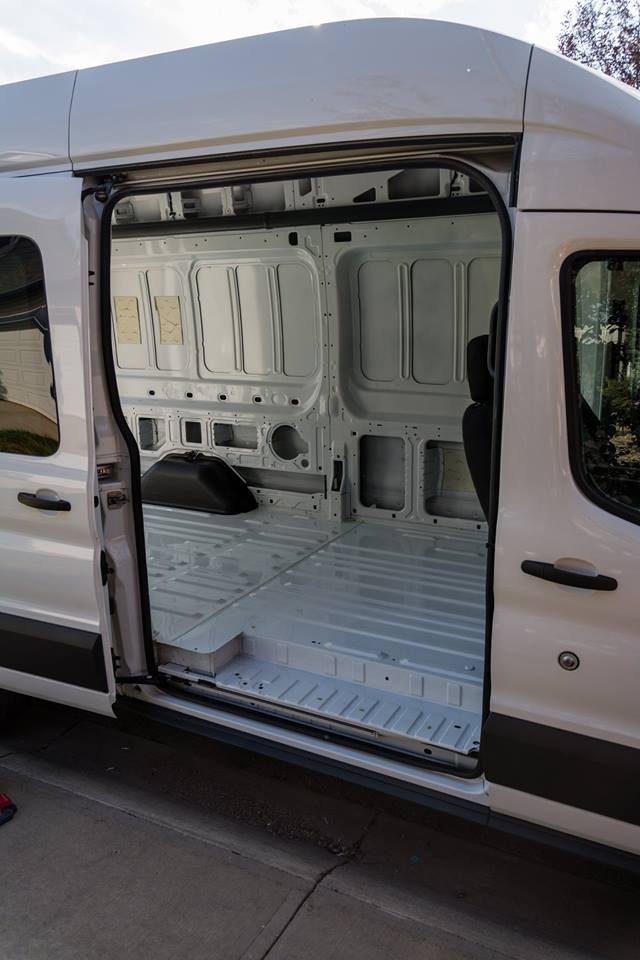
Side trim removed
|
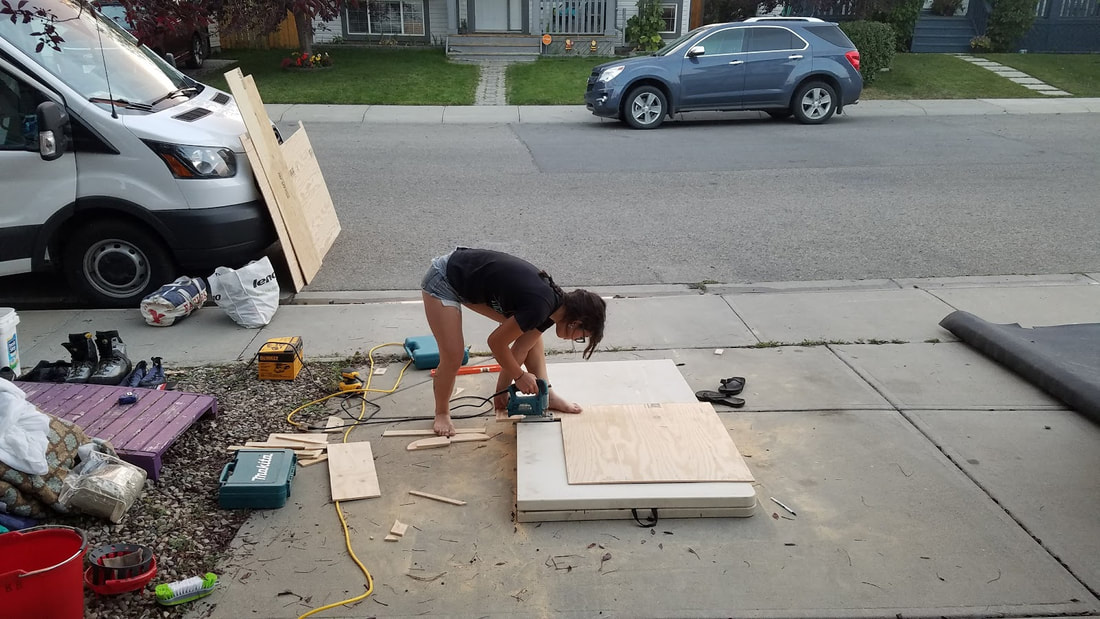
Step 2 - Trace Floor Shape on Underlay Plywood and CUT!
Luckily this step was made easy thanks to the existing floor. Since the portion of the van we are flooring is about 14 feet long by 6 feet wide, I ripped one of the plywood sheets in half lengthwise and had 2 pieces each 2' X 8' which fit perfectly alongside the other two full sheets. Then I traced the outline of the existing floor onto the plywood sheets! We wanted to make sure we had enough plywood for the strips we would need to fill the gaps in the metal floor so we maximized the extra plywood we would get. We then loaded up the jig saw and started cutting! Precision cuts were mandatory so we took our time and used a fine tooth blade.
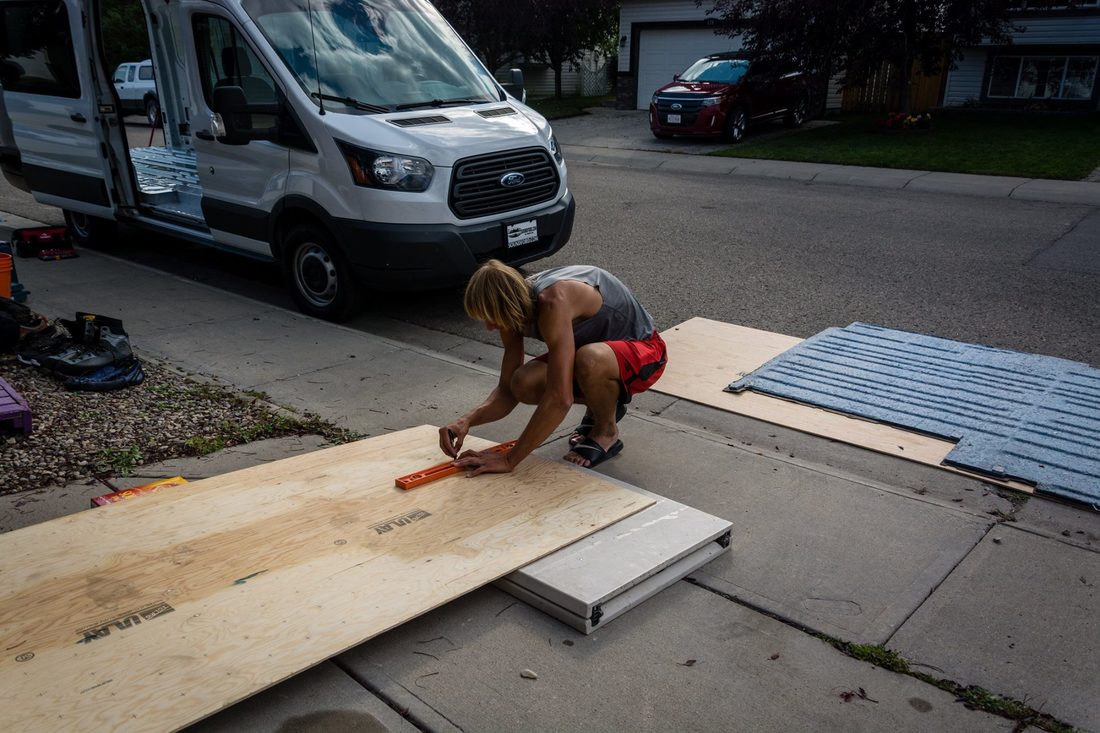
A longer straightedge would have been nice
|
Viola! The 2' X 8' pieces not shown (to be placed on left side)
|
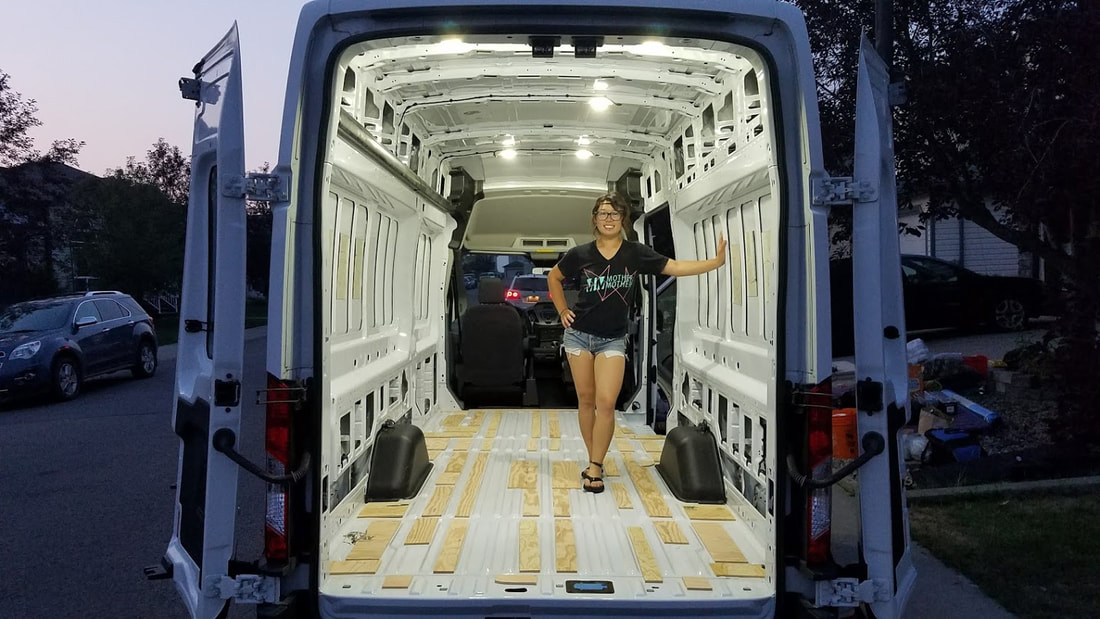
Step 3 - Cut and Glue Dozens of Filler Strips
If you have ever worked on a van conversion before, you would know about all the metal ribs running down the length of the floor that are raised exactly 7/16" above the rest of the metal van floor. Why they made them 7/16" I will never understand, but since you cannot buy 7/16" thick plywood you have to decide whether to get 3/8" and make the strips a little below the ribs, or 1/2" and make them a little above the ribs. Since we are trying to save every vertical millimeter inside the van as possible (#tallpeopleproblems), we used the rest of our 3/8" plywood sheets after cutting out the main pieces to make dozens of filler strips. We taped equal sized pieces of our 1/8" thick Taiga Stealth Foam Underlay to the top of each filler strip to make up for the remainder of the thickness. Once we filled all the gaps we began using the Marine GOOP Adhesive to glue the plywood strips to the van floor, and since the plywood strips were just a bit below the metal ribs, we had to get creative with weighting them down for the night for the glue to properly adhere. Luckily Elaine had access to ~10 five gallon drinking water jugs that would fit the bill! Loading her little car up with 50 gallons of water in the dark was a great way to end the day.
So...Much...Cutting
|
Is that enough strips??
|
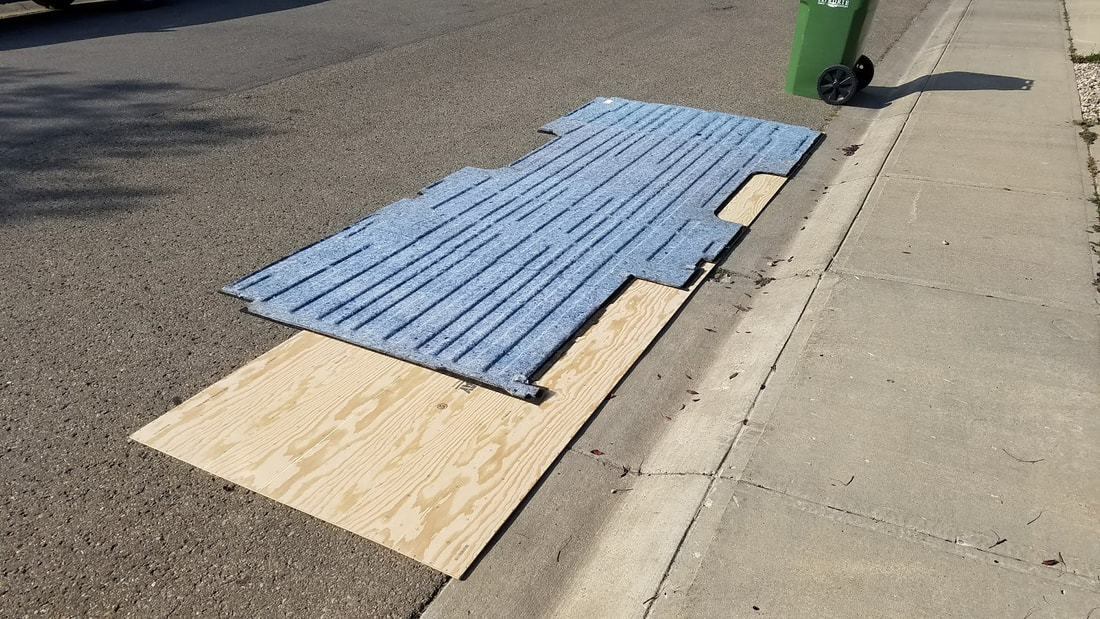
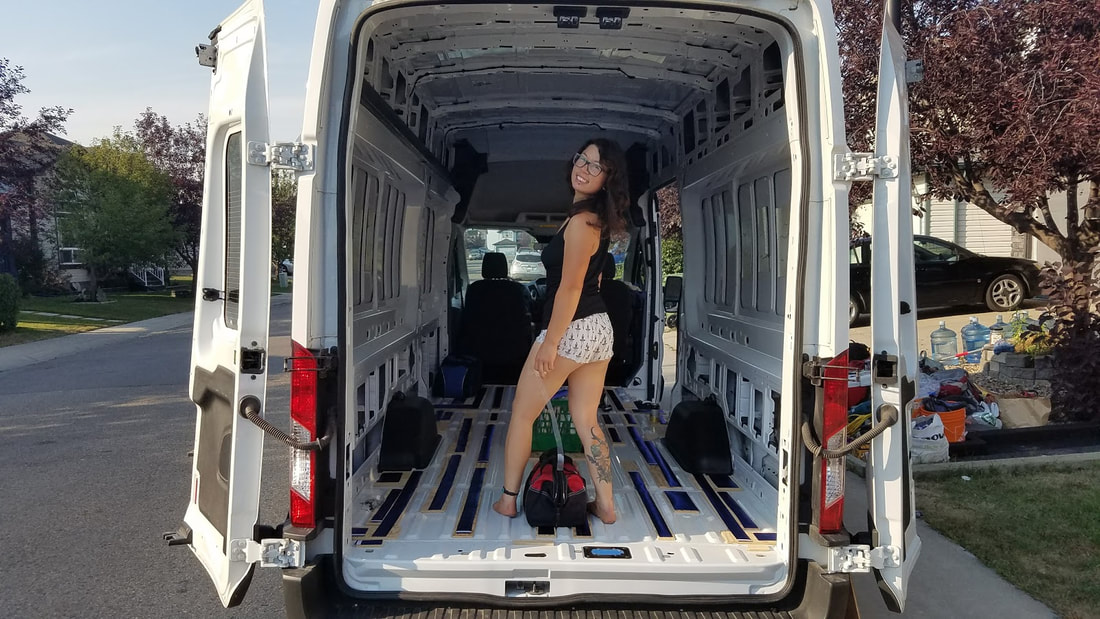
Step 4 - Installing the Foam Underlay
We decided it was best to have something between the metal floor and the plywood underlay to provide some thermal insulation and sound buffering but we wanted it to be as thin as possible. Luckily, I found a 100 square foot roll of foam underlay designed for flooring to provide exactly just that! It was only 1/8" thick which wouldn't raise our floor much at all, and can easily be cut with scissors. You can actually find many similar products at various hardware and flooring stores to fill this task, just make sure it says on the label "Thermal and Sound Barrier"
Elaine worked on taping strips of this stuff onto the top of the plywood strips that were now well adhered to the van floor (well...mostly! We had to fix a couple) while I traced out the main pieces, again, using the existing floor as a template. Only two rows were needed as the roll was 3' wide, and a built in adhesive strip allowed us to stick them together. Once Elaine had all the plywood strips covered, we installed the full piece and covered everything, trimming with the scissors as needed.
Elaine worked on taping strips of this stuff onto the top of the plywood strips that were now well adhered to the van floor (well...mostly! We had to fix a couple) while I traced out the main pieces, again, using the existing floor as a template. Only two rows were needed as the roll was 3' wide, and a built in adhesive strip allowed us to stick them together. Once Elaine had all the plywood strips covered, we installed the full piece and covered everything, trimming with the scissors as needed.
Taping this foam stuff down was harder than we thought! Nothing wanted to stick to it
|
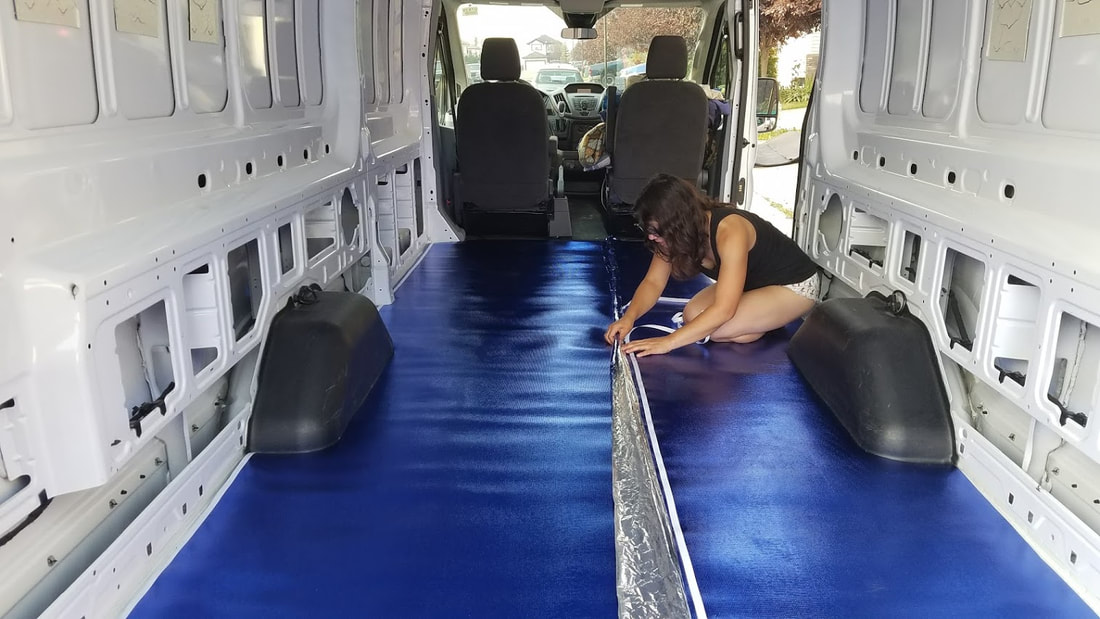
Connecting the two pieces with the built-in adhesive strip
|
Step 5 - Installing the Plywood Underlay
This was when we finally felt like we were making progress! We would finally be able to walk around without having to tip-toe around the strips and metal ribs once we got the plywood sheets in. Before we did anything, I took noted as to where all the plywood strips were located so I knew where to screw into. We test fitted the first piece, trimmed with the jig saw as needed until it fit, then started screwing it in. We pilot drilled and countersunk every hole before putting a 5/8" screw in. Since the plywood sheets were a little warped and bowed (thin plywood can do that!), we used dozens of screws for each of the 4 sheets. Having two drills was nice, although 3 would have been ideal (one for the drill bit, one for the countersink and one for the screw drive). We then repeated with the remaining sheets until we had each one installed, and we made sure to leave a 1/2" gap surrounding the van walls, which we filled with the Great Stuff Gaps and Cracks spray foam, let it dry for 25 minutes or so, then cut the excess off flush with the plywood with a knife...a dull. plastic. plain. knife. Lastly we filled the gaps between the plywood sheets, and any knots with wood filler, sanded flush and thoroughly cleaned all sawdust off the plywood to prepare for the vinyl plank installation.
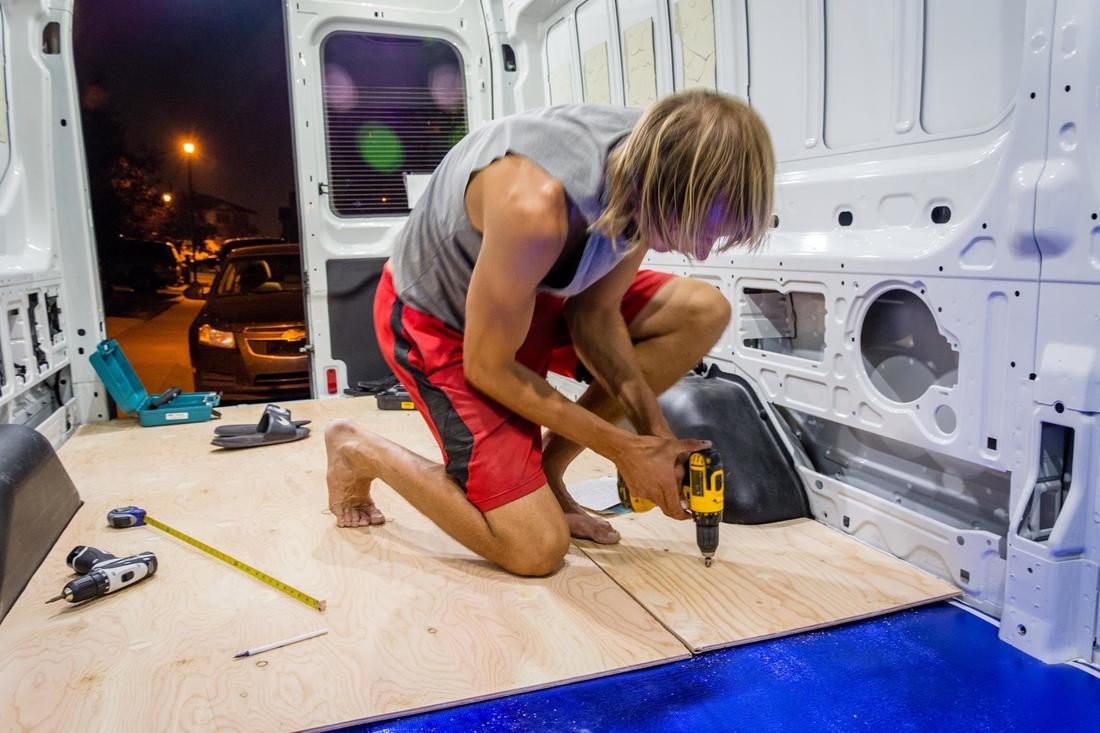
Screwing the plywood sheets into the strips below (many, many screws!)

Close up of the flush screws, and the spray foam
|
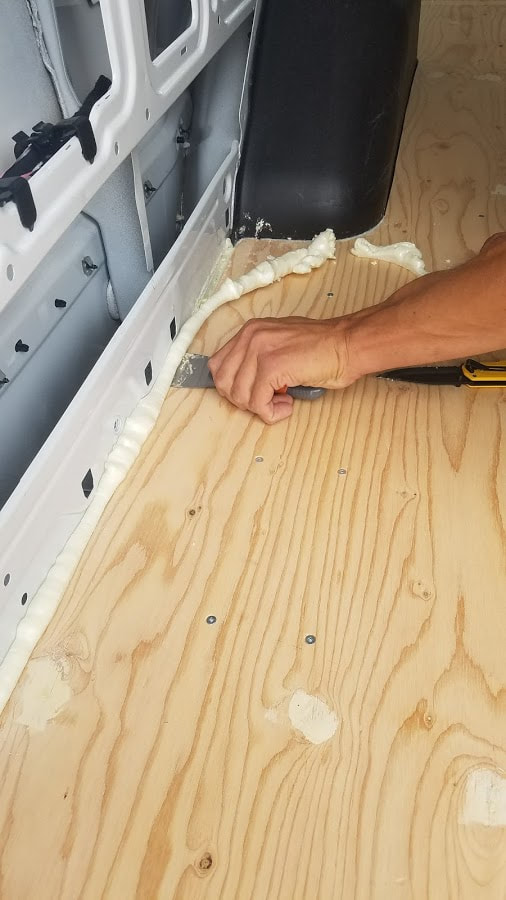
Removing excess spray foam
|
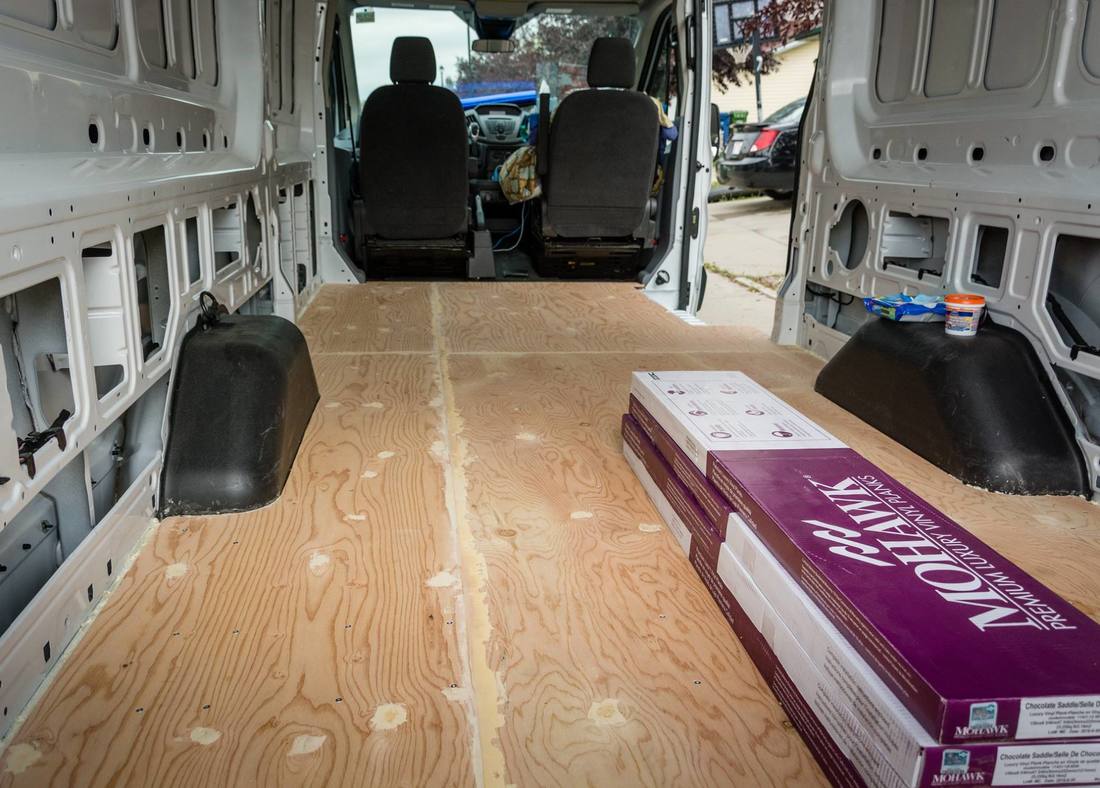
We are ready for the vinyl planks!
Step 6 - Installing the Vinyl Planks!!
With the plywood underlay complete, we were finally ready to install the vinyl planks. We opened up the first box and started at the rear driver side corner of the van. We would start on the first row along the length of the driver side, cutting each piece individually to fit. Since each piece is 4' long, it would take slightly over 3 pieces for each row. We used the jig saw again for making all the cuts to each plank. The instructions say to use a scoring knife, however at 5mm thick, the planks were hard to cut. Plus, with all the small trims and hairline cuts we had to make to get everything to fit perfectly, the jig saw with a fine tooth blade worked much better. Slowly, we fit each piece on the first row, cutting out segments for the wheel well and corners. Once the first row was done we could simply connect the pieces together, making sure we got them as tight as possible. To do this, Elaine would keep the short end flush while I pushed the longer end up against the previous plank. With some trial and error, we got each piece in. Laying them in the sun helped soften them up! We made sure to also stagger the seams, ensuring there was never 4 corners all in one place.

The first piece! Notice the cut for both the corner, and part of the wheel well
|
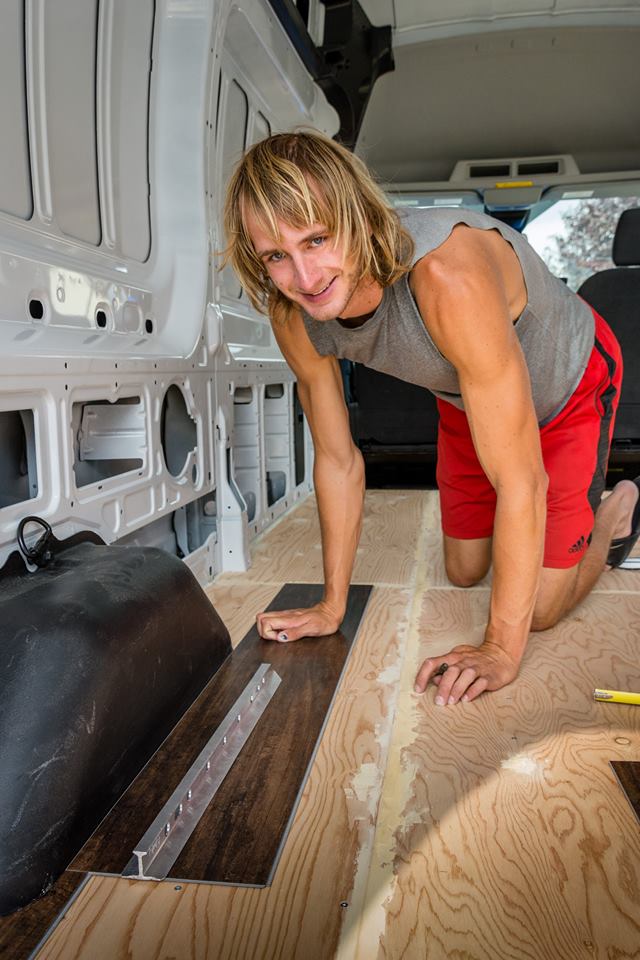
Yes I was using a picket as a straightedge... Total climbing bum!
|

Making progress!
|
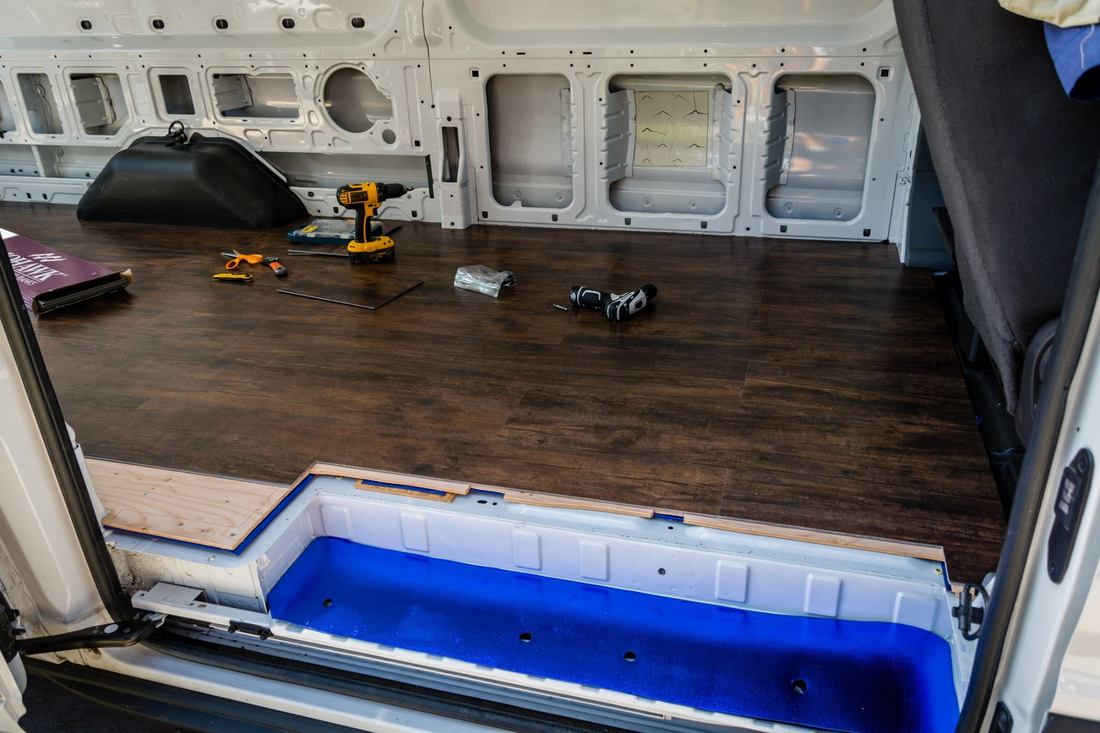
Once we got to the passenger side, we once again had to custom cut each piece, again, going around the wheel well and the side step. With some tweaking, we were able to overlap the side trim piece atop the vinyl planks, and kept it flush by screwing 3 small black screws at each corner into the vinyl. For the rear trim, we super glued pieces of 1/4" plywood between the ribs at the far back end of the metal floor that we did not cover with plywood. These would act as an elevated platform for the rear trim piece to rest on to both keep the trim level, and have it sit flush with the vinyl. This trim piece also covered up the only place we put screws through the vinyl into the plywood underlay, along the back of the van to anchor one side of the otherwise "floating" floor.
More foam underlay for the side step
|

Completed floor with side trip replaced! (minus the black screws for the corners)
|
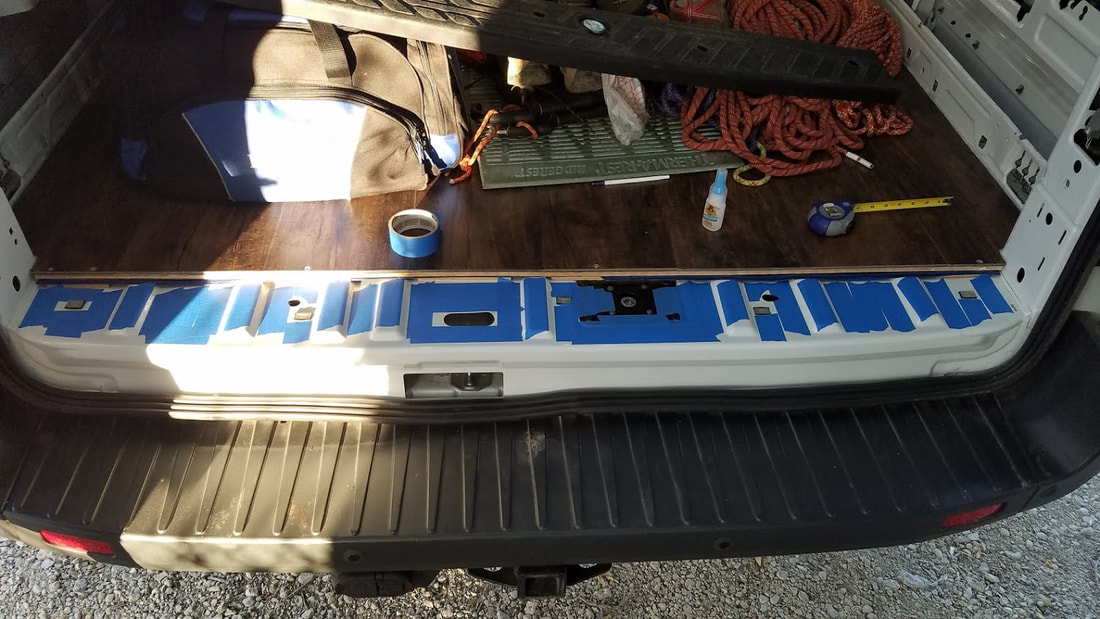
Super glued 1/4" plywood pieces to the blue masking tape for the rear trim (glue sticks to the tape better than paint). Also notice the screws through the vinyl at the end to be covered by the trim.
|

Beers are a must
|

The back trim re-installed, covering the screws, level, and sitting flush over the vinyl
|
Step 7 - Apply Silicone
Once all the vinyl planks were installed, we applied clear GE Silicone II around all the edges to help seal the floor against a milk incident. We used a standard caulking gun to make a nice bead of silicone all around the floor, including the wheel wells. Then we finished with the rear trim and bolted that back in place.

Woohoo! We have a floor
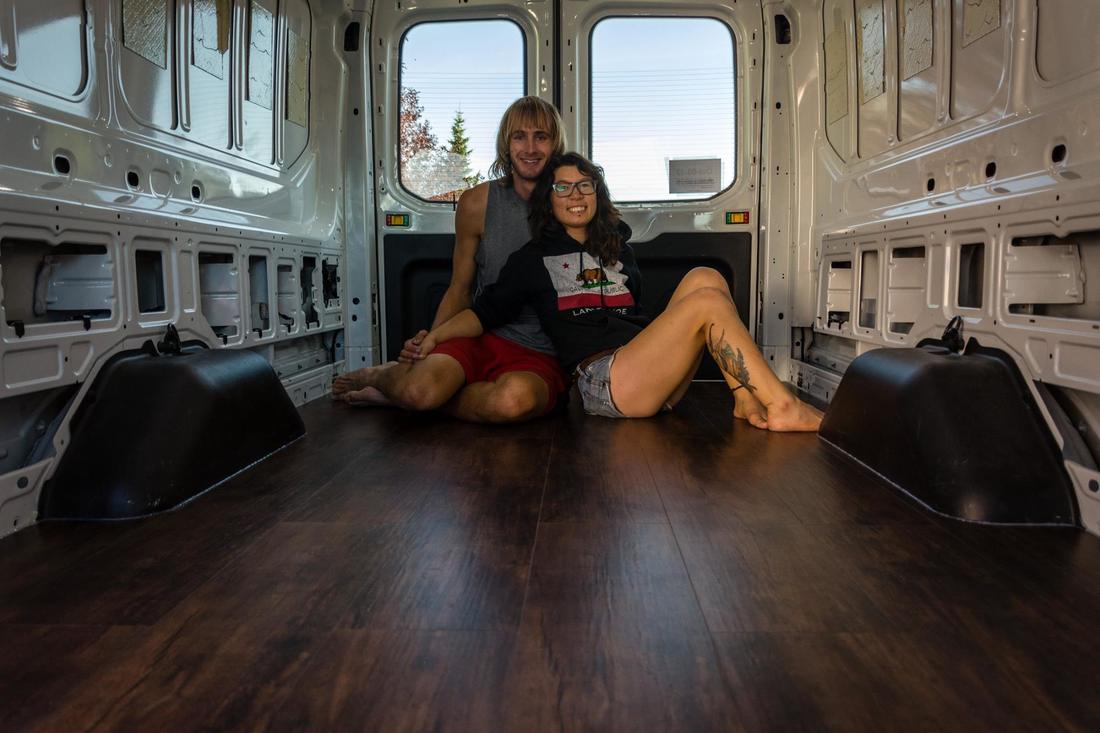
One happy couple!