shenanigans canyon & leprechaun canyon - 3A for both
May 2011
MY LEPRECHAUN CANYON PAGE ON SP
Leprechaun Canyon Overview
Leprechaun Canyon is a short and sweet technical canyon located just to the northeast of Utah Highway 95. The canyon has two forks; the west and east fork both of which have their perks. The West fork is a narrow squeeze pretty much the whole way where the east fork is a little wider and has more opportunity for some interesting canyoneering moves and down climbs. The east fork also has better opportunities for some very nice slot canyon photography. Most of the photos on this page were taken in the east fork.
Both of these forks can be done in a couple hours each plus approach time. They are also very close to a highway which makes them great canyons to do on the go. Great camping spots can be found at the mouth of Leprechaun Canyon just off the highway but they can fill up in the peak spring and fall seasons.
Getting There

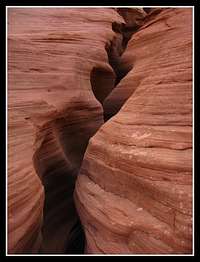
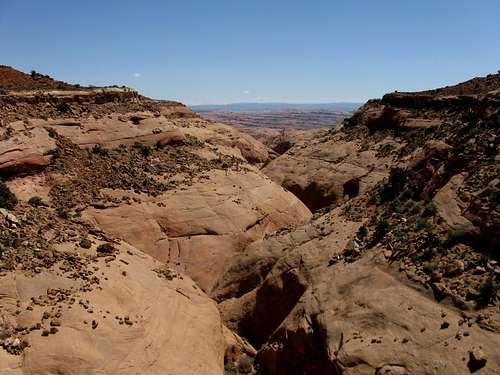
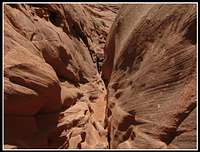
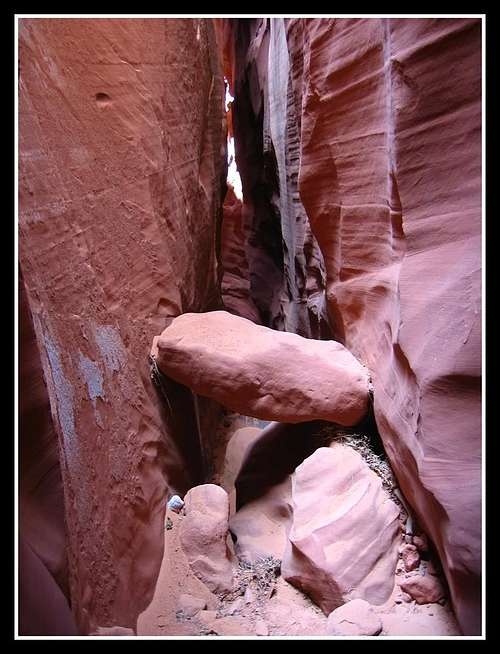
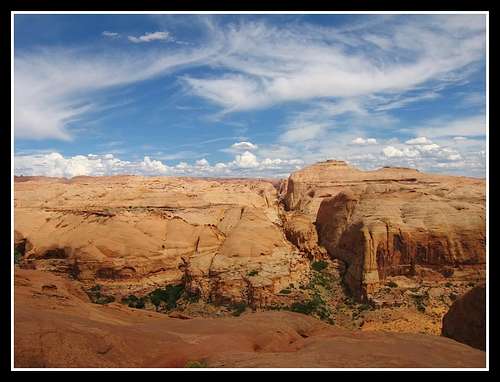
Main fork of Leprechaun Canyon
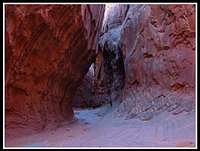
Main fork of Leprechaun Canyon
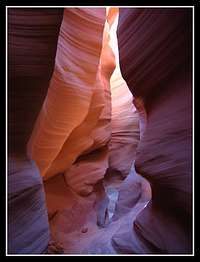
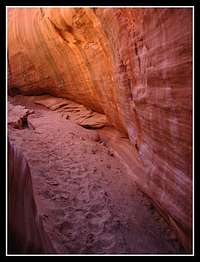
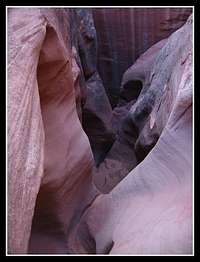
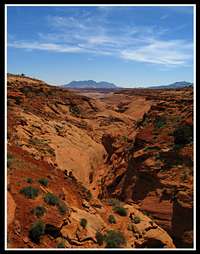
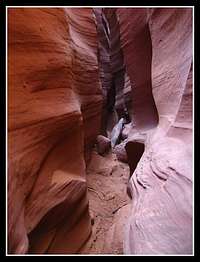
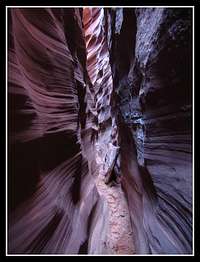
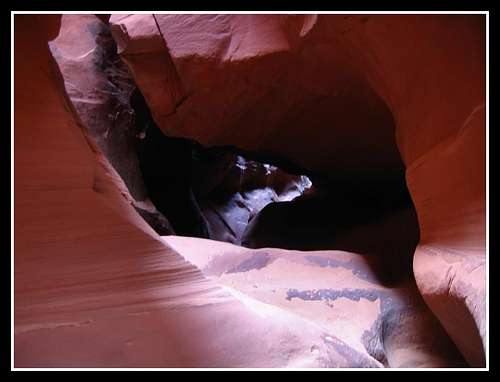
Leprechaun Canyon
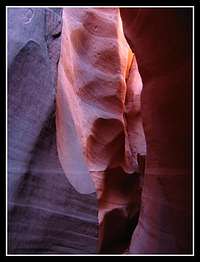
Leprechaun Canyon
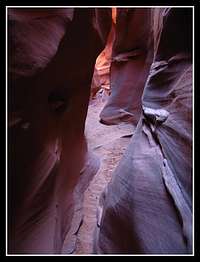
Leprechaun Canyon

Leprechaun Canyon
Leprechaun Canyon can be done two ways. The easy way is to park just off the highway and walk up the canyon until you can't go any further. The Main fork is a wide open easy walk but the slightly more adventurous can get about halfway up the west fork from the bottom before getting to a wall that can't be up climbed. The easy fork can't be climbed up at all from the bottom as a rappel at the end guards it.
To complete one of the forks drive north in highway 95 and turn right (east) onto the Cedar Point Road about .8 miles north of the Highway 276 junction. This road has been degrading and is difficult for low clearance vehicles but doable. Drive 3.5 miles on this road and park. From where you park generally head south until you see Leprechaun Canyon. It's easy to spot each fork and you can rim walk around one or the other depending on which you choose to do. To do the west fork, drop onto the Navajo Sandstone and you will enter the canyon with a short rappel or down climb depending on your comfort level.

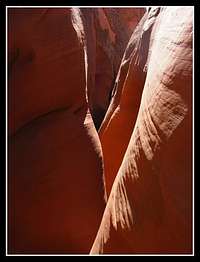
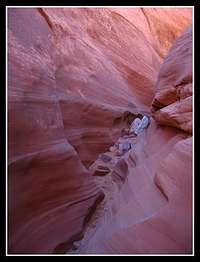
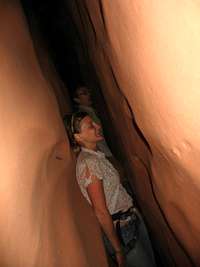
East Fork Leprechaun Canyon
To do the east fork, drop onto the Navajo Sandstone on the east side and you will enter the canyon with a short rappel or down climb depending on your comfort level. Once in the canyon continue down working your way around some obstacles and drops that are all pretty easy. Another short rappel is passed but this one can also be down climbed. You'll pass through a small open area in the canyon before coming to the last rappel that drops into the Main Fork. This rappel is also down climbable but it's best to rappel. Once in the Main Fork walk down and pass the tiny slot that you can choose to walk around if you wish. Just past that start climbing up the steep Navajo Sandstone on the right (west) side of the canyon and continue climbing up at the path of least resistance until you top out at the rim. From the rim you can walk north along it back to the road where your car is.

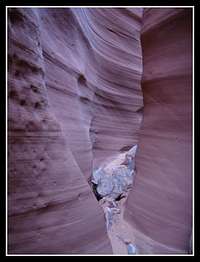
West Fork of Leprechaun Canyon
To do the west fork, park in the same spot as described above and head cross country but instead drop into the West fork instead of the east. One rappel is done at the very top to drop in. Past that the west fork is a half mile long narrow slot, often slanted with no real other difficulty. It is always dark in this slot and I have failed every time to get good photos here. Once you get into the Main fork follow the same return route. It is advised you be pretty thin to tackle this slot canyon.
Red Tape
Both of these slots are easier than they have been described to be but that doesn't mean you can descend them without the proper gear and experience. Be very careful in these canyons. Although they may be simple technical canyons and close to the highway...they still pose all the same dangers any other slot would. Be sure you have a 60 meter rope, harnesses and a belay device such as an ATC. Blue jeans are also very helpful to keep your knees from getting scarred up on the rough canyon walls.
The climb out the canyon to the rim on the west side can also be torturous in the summer heat. Bring lots of water. These canyons have no red tape but please leave no trace and DO NOT scratch the canyon walls. I was very disappointed to have seen this when I descended the East fork.
External Links
See Michael Kelsey's Technical Canyoneering Guide to the Colorado Plateau for a great description of the canyon. Note that he calls this canyon 28.1 Mile canyon as it is locates at mile marker 28.1 on Highway 95.
My Shenanigans Canyon Page on SP
Overview
Shenanigans Canyon is a technical canyon that drains into the West fork of Butler Wash located in the southern part of Robbers Roost Country. It drains into North Wash which then drains into Lake Powell. This canyon isn't for the claustrophobic or the faint of heart. At it's narrowest the canyon is merely 110 inches wide and even I, being 6 foot 9 inches tall and only weighing 180 pounds had trouble getting through the narrowest part. This canyon requires at least a 60 meter rope for the rappels. The canyon can be divided into three sections. The upper section is fun to practice your down climbing, chimneying and stemming skills as the canyon isn't very deep but the bottom is a pain to walk directly on. The walls in the upper part concave nicely for easy canyoneering moves. The middle portion is a mixture of very narrow slots and more open canyoneering. Many drops need to be down climbed or slid down in this section. The last part is the most difficult and consists of a 150 foot section of extreme narrows where you'd better be very skinny or you aren't going to make it. The canyon dumps into Butler Wash with two 14 meter rappels into a pool of water where swimming can be avoided. There is an entry/exit point and a large open area between each of the three sections that can be used in emergency situations.

Getting There
Getting to Shenanigans Canyon is actually pretty easy. To do the whole Canyon you must do a loop hike and there are many places to park to start and end your loop. The place I'd recommend you park is 4 miles out on the Cedar Point Road which heads east off Utah Highway 95 about .8 miles north on the Highway 276 junction. The entire loop will take at least 5 hours for the skilled canyoneer and up to 8 hours or more for larger groups and amateurs. The Cedar Point road has been recently degrading and as of May 2011, it would have been difficult for low clearance cars to go much further than a mile, though still doable if driven carefully. To get to the starting point drive four miles east on the Cedar Point Road where you will find a small road heading off to the right. This road goes maybe a half mile and ends. This is where you'll park and you will see a panoramic view overlooking Butler Wash. If you are nestled into a wash bottom you took the wrong spur road. Make sure you check the mileage on your car when you first turn off Highway 95.
 North Wash Canyons
Shenanigans Canyon Part 1
Assuming you start from the place described above, you can walk the spur road back to the main dirt road and head about another mile up the road until you see a small pull off where you then can hike cross country due east towards the upper end of Shenanigans. This is the long way though. I'd recommend walking up the spur road about 500 feet and then veer right off the road and head cross country in a northwestern direction near the rim of Butler Wash. Stay high and back far enough from the rim so that you aren't going up and down the many small washes in the lower member of the red colored Carmel Formation. The more orange colored upper member is much gentler.You will find yourself along the rim of the West Fork of Butler. Walk along this rim until you get to the very upper reaches of the west fork and then cross the drainage and head over the ridge separating the West and Middle Fork. Shenanigans Canyon is the same as the Middle Fork of West Butler. The Middle Fork is considerably longer than the west so you'll have to head further north after rounding the west fork.When you get to the first drop into the Middle Fork walk around to the east side and down climb some steps to the ledge below where you will find a rappel anchor around a pile of rocks. You can either rappel down the chute here or walk around to the east side and find a route down the steep Navajo Sandstone. This down climb isn't very easy and is exposed but is doable for an amateur canyoneer to avoid rappelling. Once at the canyon bottom head down stream where you will find perfect canyon walls for stemming and bridging. It is actually very annoying to walk the bottom of the canyon in the upper part. You'll come to a narrow chute about 15 feet high that you'll have to friction slide down using the canyon walls. I'd recommend you wear jeans. Once you pass this slide down there is no escape until the first exit. You can rest here and exit if you need to. If you are not equipped with rappelling gear and you down climbed all the drops in the upper third it would be wise to exit here although it is possible that the second part of the canyon be down climbed if you are very experienced.
 |
 |
 |
 |
Shenanigans Canyon Part 2
As quickly as the canyon opened up it begins to slot again and there was one small pothole of water to work around. This was the only water we saw in the slot and was pretty east to stem across. Continue working through some very photogenic narrows and some twisty curves in the canyon before getting to a long right slanted section of extreme narrows averaging about a foot wide. This spot is about 200 feet long and slanted at about 15-20 degrees to the right. It took awhile to get through and this was the darkest part of the canyon. After passing through the slanted section it got a little easier. There were decent sized drops over chalkstones here and there, all of which were easily down climbed using a little friction sliding action. The Canyon then opens up a second time and offers another escape route. It is here that you must exit if you aren't equipped with rappelling gear no matter how good you are. If you found any difficulty whatsoever squeezing through the slanted section I'd advise exiting because the narrows in the last part are two inches narrower which is a big difference.
 |
 |
 Narrow slanted section Narrow slanted section |
 |
 |
Shenanigans Canyon Part 3
The canyon slots up again and the third part begins with a few drops and some relatively easy narrows before getting to an interesting feature. A large 25 foot drop appears but the rappelling anchor is located on the other side of a small ledge that is seen on the right side of the canyon. You must belly crawl on this ledge as there is rock above you. Stay as close to the wall as you can and be sure you don't roll over and down into the drop to the left. Once on the other side of the ledge, you can set up the rappel and head down.Shortly after this rappel is the extreme narrows that average 10 inches wide. I found myself in very strange positions getting through this part. The most memorable being twisted completely sideways with my knees on the ground and one hand on the ground leading me. The other arm was positioned straight up and my head turned looking at the ground as I slithered through. If you are over 200 pounds you will not make it unless you are over 6 feet and 6 inches tall however even at that height and taller, you'd probably want to be less than 200 pounds. You won't be able to just force yourself through this section. You'll have to scout around for the areas that are slightly wider and move up and down to those areas. Many times these are at the very bottom. If you manage to get stuck, don't panic! Thats all I can say. If you are unable to make it through you'll have to backtrack which can be very hard to do as there was the rappel and belly crawl you came down.
 Shenanigans Canyon Narrows Shenanigans Canyon Narrows |
 Shenanigans Canyon Narrows Shenanigans Canyon Narrows |
 This is the ledge you'll need to crawl on to get to the anchor
After the extreme narrows, it widens slightly and eventually comes to the final two rappels where you will find slings around some chalkstones. The first can be down climbed by an experienced canyoneer but everyone will have to rappel the second drop. If you have a 60 meter rope you'll have to do the rappels separately as there is a 10 foot ledge between them. At the bottom of the second drop there will always be a pool of water however you can avoid swimming by carefully wading at ankle deep on a ledge on the left side of the pool.
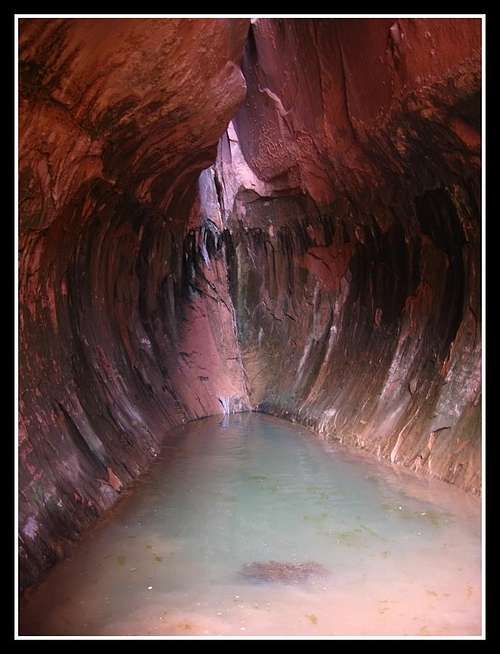 Bottom of last rappel and the pool of water
Butler Wash Exit
Once across the pool, head down stream n the wide open Butler Wash. In May when we went everything was bright green and beautiful. Keep an eye out for the large arch high on the walls on Butler Canyon as you walk.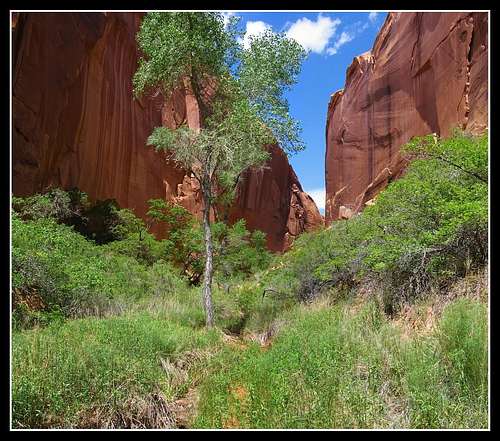 Butler Wash
After nearly a mile of easy walking locate a fault line canyon that heads up to the right. This is your exit route. The hardest part of the climb is the first move. Continue steeply on semi-loose rock until you get about 2/3 the way up and you'll see a cairn that directs you to the right. Head around to the right on Navajo Sandstone following cairns until you get to the rim. Once at the rim your car will be visible about a third of a mile away.
 Views climbing out of Butler Wash
Camping/Red Tape/Map
There are great campsites with fire rings just off Highway 95 near the mouth of Leprechaun Canyon. There is also many spur roads leading off the Cedar Point Road to secluded campsites. All camping in the area is free. There is no red tape and this canyon lies on wild BLM lands. Please avoid stepping on the crypto soil if travelling cross country and leave no trace.
 Map showing the routes and starting points for Shenanigans Canyon
External Links
See Michael Kelsey's book Technical Canyoneering guide to the Colorado Plateau for a great description of the canyon. Also check out Tom's site about the canyon here: Shenanigans Canyon