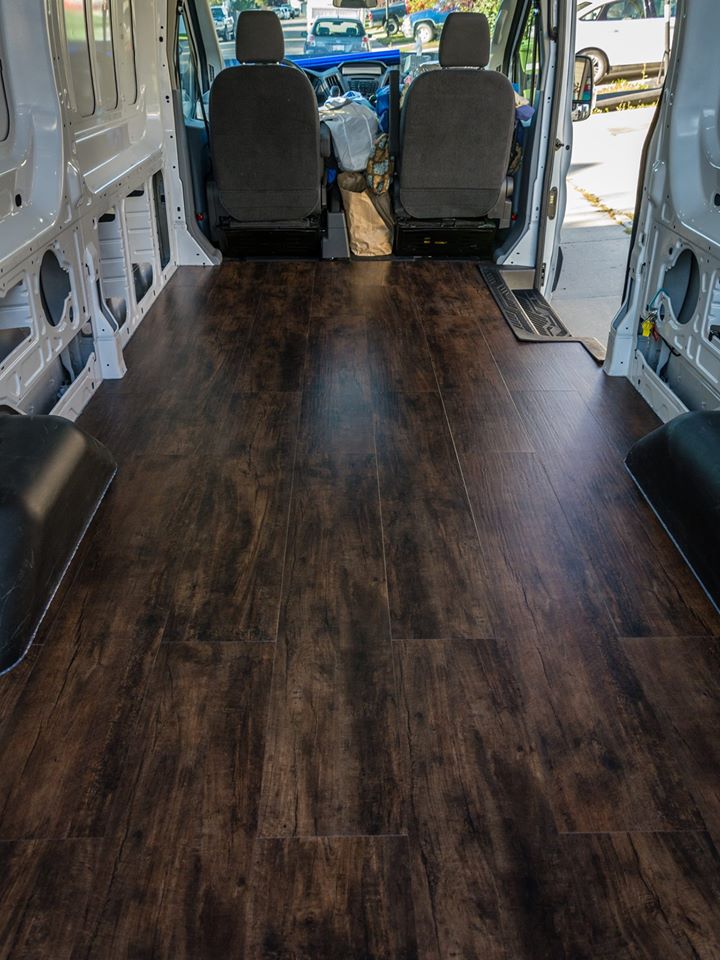
Floor Installation - Luxury Vinyl Planks
September 1st - 4th 2017
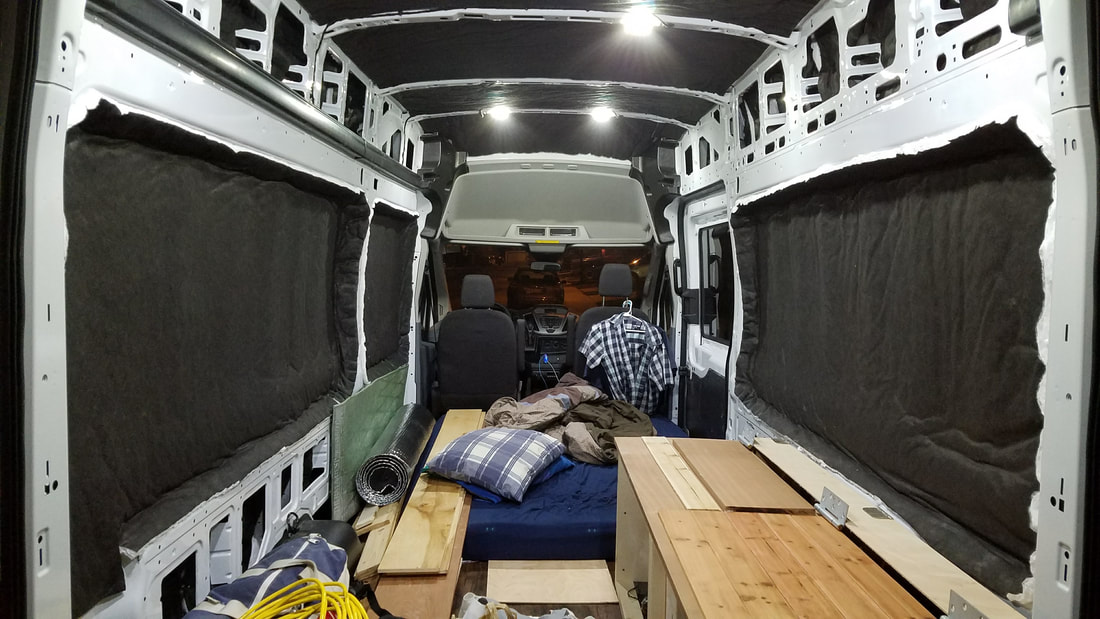
With our new 2015 Ford Transit now in Alberta, Elaine and I decided there is no better place to start than the floor! Over the long Labor Day weekend, our initial plans of climbing in the Bugaboos were foiled when intense wildfires forced the total shutdown of all National and Provincial parks in southeastern BC, including all crown lands. Basically all public lands were closed and the smoke was so bad we weren't too thrilled about climbing anyways so we figured it was a great time to start working on the van. Check out the full article to see how we did it!
2020 Update - It turns out these floors scratch easily, so I wouldn't necessairly recommend them for rough van goers, but with routine floor cleaning and a careful eye to not let rocks or dirt get on the floor, I was able to keep the floor looking nice.
Folding Bed Installation
Part 1 - Supports - September 16th 2017
With the insulation ordered, and waiting at home in WA (could not reasonably ship to Canada), we are somewhat limited with what we can install, since we need to wait until our insulation is installed before doing much more. However I realized we could install the supports for the folding bed since they will not cover any of the openings where insulation will go. This I actually had to do solo, since Elaine was busy with work down in southern Alberta. One nice thing about Edmonton is you can buy almost anything you want if you know which store to go to. Since I am trying to minimize ordering stuff online (mainly since I don't have a stable address), getting everything we need in person is quite nice. A lot of thought went in to building these supports as I had to account for many moving parts, as well as having large enough gaps in the correct places for the future installation of the insulation and walls to fit nice and flush. Read more for details.
With the insulation ordered, and waiting at home in WA (could not reasonably ship to Canada), we are somewhat limited with what we can install, since we need to wait until our insulation is installed before doing much more. However I realized we could install the supports for the folding bed since they will not cover any of the openings where insulation will go. This I actually had to do solo, since Elaine was busy with work down in southern Alberta. One nice thing about Edmonton is you can buy almost anything you want if you know which store to go to. Since I am trying to minimize ordering stuff online (mainly since I don't have a stable address), getting everything we need in person is quite nice. A lot of thought went in to building these supports as I had to account for many moving parts, as well as having large enough gaps in the correct places for the future installation of the insulation and walls to fit nice and flush. Read more for details.

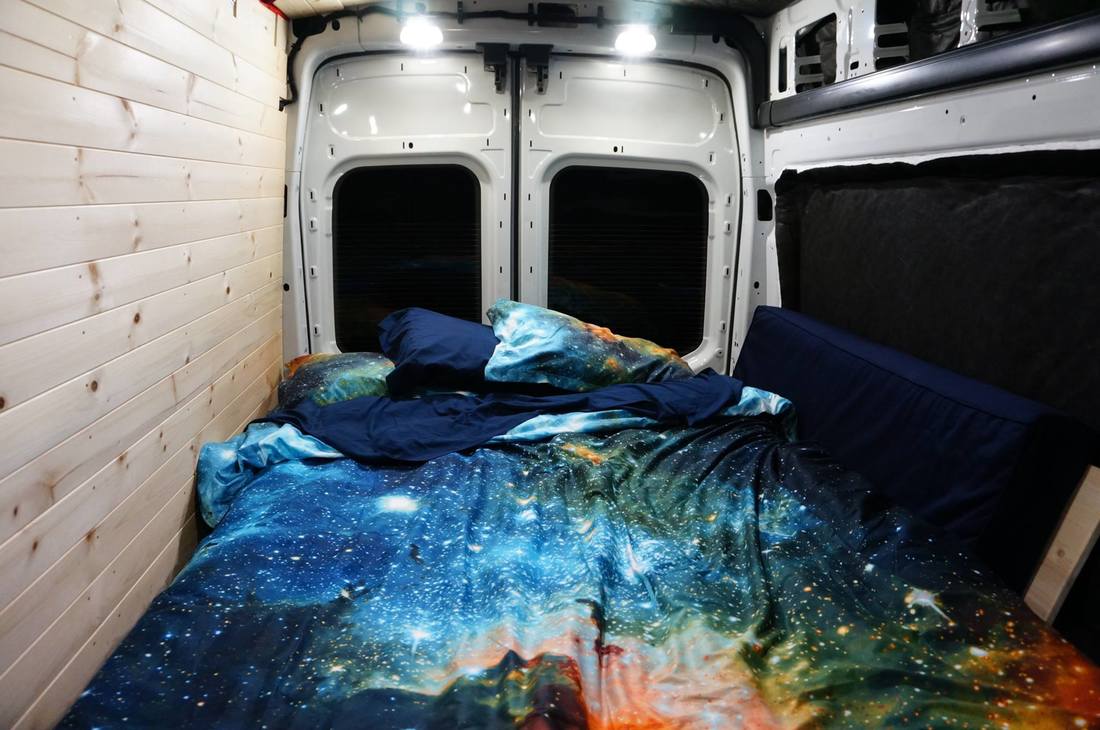
Part 2 - Bed Platform - December 2017
Upon leaving Alberta, and returning back to WA for the holidays with Elaine in our van, we finally were able to finish the bed platform that will connect to the supports I built in September (see above), and when down, be supported by the table and couch. I had the materials already purchased, and was simply waiting to return to WA to finish. We used some of the ipe wood my dad had left over from a deck replacement to provide stiffness for the bed platform, and topped it with 1/2 inch birch plywood the mattress would sit on.
Upon leaving Alberta, and returning back to WA for the holidays with Elaine in our van, we finally were able to finish the bed platform that will connect to the supports I built in September (see above), and when down, be supported by the table and couch. I had the materials already purchased, and was simply waiting to return to WA to finish. We used some of the ipe wood my dad had left over from a deck replacement to provide stiffness for the bed platform, and topped it with 1/2 inch birch plywood the mattress would sit on.
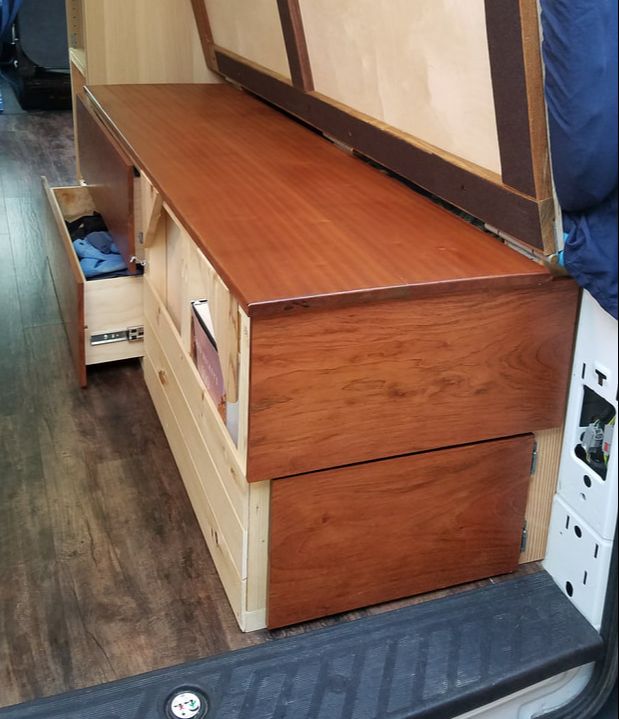
Coffee Table
September-October 2017
As described at the end of the previous article, we are building a coffee table directly adjacent to the folding bed supports that will have many purposes, which include acting as one of the primary supports for the bed, drawers for storage of clothing and gear, and a nice table surface for everyday living. Constructing this was fairly straightforward, with the most difficult probably making the hardwood table surface, and building the drawers.
As described at the end of the previous article, we are building a coffee table directly adjacent to the folding bed supports that will have many purposes, which include acting as one of the primary supports for the bed, drawers for storage of clothing and gear, and a nice table surface for everyday living. Constructing this was fairly straightforward, with the most difficult probably making the hardwood table surface, and building the drawers.
Thinsulate Installation
October 8th 2017
Now that we had our insulation, we were able to continue making solid progress on our conversion. We decided to use a combination of Thinsulate and Reflectix as our insulation, which should hopefully keep our van comfortable, and energy efficient. Elaine and I had lots of fun piecing a bunch of insulation pieces into the side and ceiling panels.
Now that we had our insulation, we were able to continue making solid progress on our conversion. We decided to use a combination of Thinsulate and Reflectix as our insulation, which should hopefully keep our van comfortable, and energy efficient. Elaine and I had lots of fun piecing a bunch of insulation pieces into the side and ceiling panels.
The Couch
October 21-22nd 2017
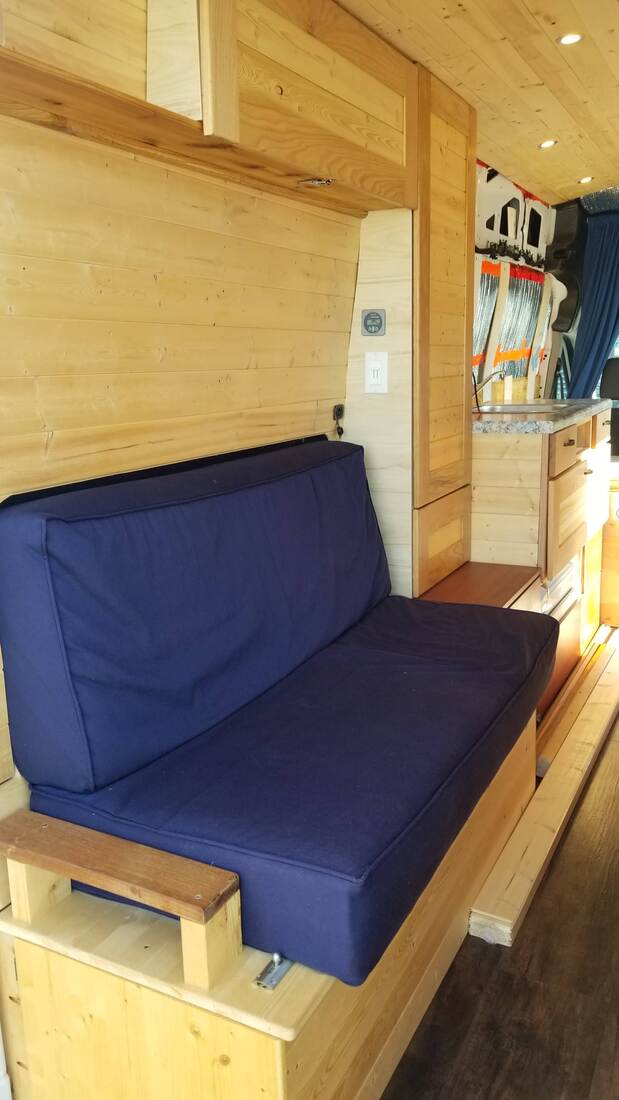
With the coffee table mostly done, the next step was to build our couch, which would serve as our primary sitting area while living in the van. We wanted to make sure this was done as well as possible, since it would be such an integral part of our vanlife living. In addition to being a critical component for comfort, it will also serve as the other primary support for the folding bed (along with the coffee table). We opted for cheaper pine wood when constructing the frame and sitting base since it would be mostly hidden, however we plan to really go with quality when it comes to our couch cushions, which we will make from scratch. Additionally, there will be a plethora of storage space under the couch, with access both from the top and the back end where we plan to store our water tank, showering equipment, and other winter gear.
With the coffee table mostly done, the next step was to build our couch, which would serve as our primary sitting area while living in the van. We wanted to make sure this was done as well as possible, since it would be such an integral part of our vanlife living. In addition to being a critical component for comfort, it will also serve as the other primary support for the folding bed (along with the coffee table). We opted for cheaper pine wood when constructing the frame and sitting base since it would be mostly hidden, however we plan to really go with quality when it comes to our couch cushions, which we will make from scratch. Additionally, there will be a plethora of storage space under the couch, with access both from the top and the back end where we plan to store our water tank, showering equipment, and other winter gear.
The Wardrobe
December 26-31st 2017
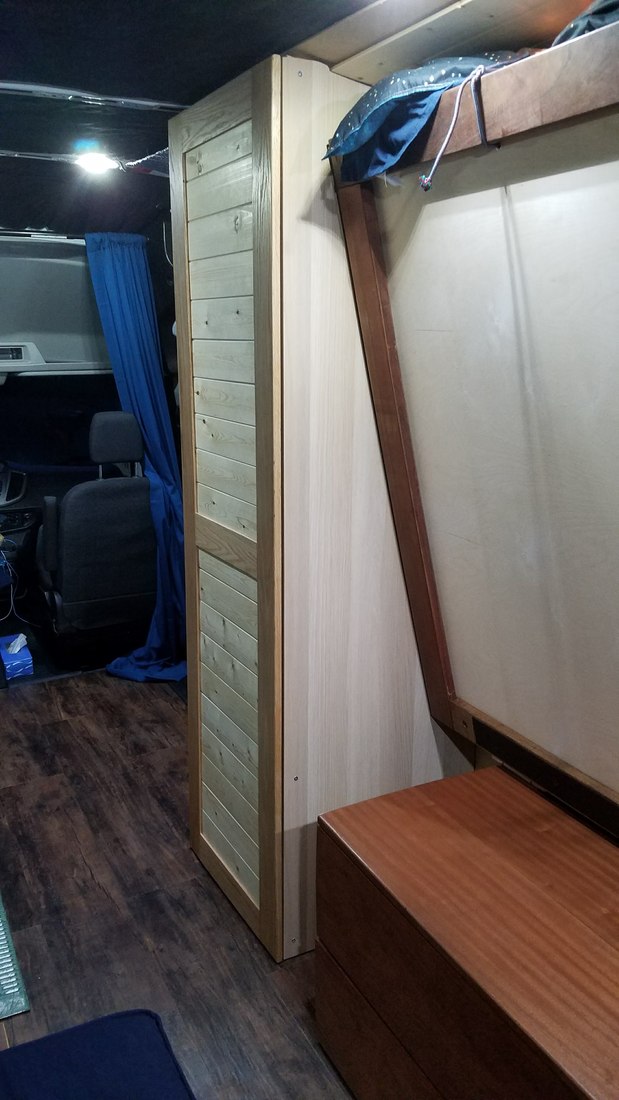
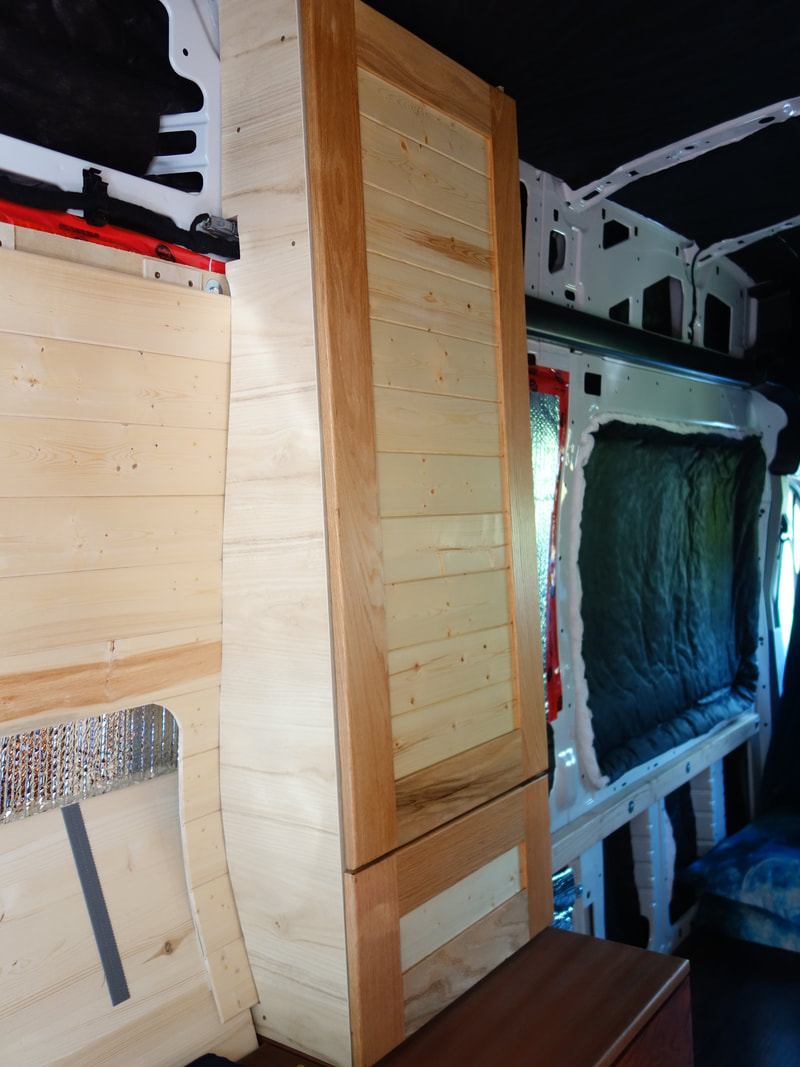
To our amazement, we got the whole rear of the van completed before the end of the year! Our bed also worked out very well on our trip to Red Rocks. Now that I have some time in WA visiting my family for the holidays, I have time to continue building featured for our van. With Elaine in Europe visiting her family for about 10 days, I built the wardrobe for our van conversion mostly on my own. I bought a cheap wardrobe from Ikea, which I cannibalized, and partially used, but also built the main door and shelves on my own from scratch. I also built an entire frame that is securely attached to the van, and will not move, creak, slide or otherwise show any glaring weakness.
To our amazement, we got the whole rear of the van completed before the end of the year! Our bed also worked out very well on our trip to Red Rocks. Now that I have some time in WA visiting my family for the holidays, I have time to continue building featured for our van. With Elaine in Europe visiting her family for about 10 days, I built the wardrobe for our van conversion mostly on my own. I bought a cheap wardrobe from Ikea, which I cannibalized, and partially used, but also built the main door and shelves on my own from scratch. I also built an entire frame that is securely attached to the van, and will not move, creak, slide or otherwise show any glaring weakness.
The Bookshelf
January - May 2018
After completing the wardrobe at years' end, I was able to begin building a small overhead storage cabinet above the side door to store all my climbing guidebooks. In early January before Elaine and I left for our 4 month South America trip, I was able to build the frame for this small cabinet, but couldn't complete it until we returned in May. Now that it's done, I can say it works perfectly for all my books and maps.
After completing the wardrobe at years' end, I was able to begin building a small overhead storage cabinet above the side door to store all my climbing guidebooks. In early January before Elaine and I left for our 4 month South America trip, I was able to build the frame for this small cabinet, but couldn't complete it until we returned in May. Now that it's done, I can say it works perfectly for all my books and maps.
Water System and Kitchen
May 2018 - February 2020
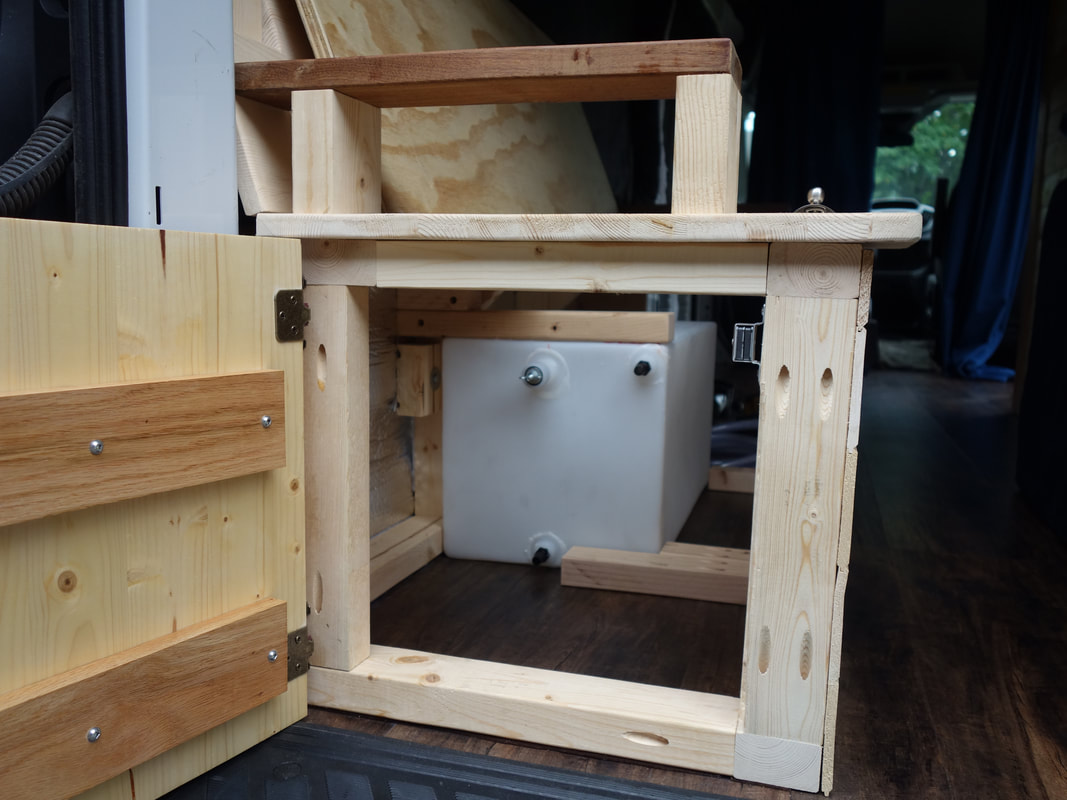
Now we are really getting somewhere! Finally I could start installing my first system, and with the couch complete I now had all the space underneath it for a water tank, among other things. With my water demands being fairly limited to only cooking, dishes and occasionally drinking I decided to go for a modest 15 gallon water tank (will likely have a different water source for showering if needed). This whole section of the build took a long time due to long gaps in building due to bust schedule with travelling and working.
Now we are really getting somewhere! Finally I could start installing my first system, and with the couch complete I now had all the space underneath it for a water tank, among other things. With my water demands being fairly limited to only cooking, dishes and occasionally drinking I decided to go for a modest 15 gallon water tank (will likely have a different water source for showering if needed). This whole section of the build took a long time due to long gaps in building due to bust schedule with travelling and working.
Electrical System Installation
Constantly getting worked on
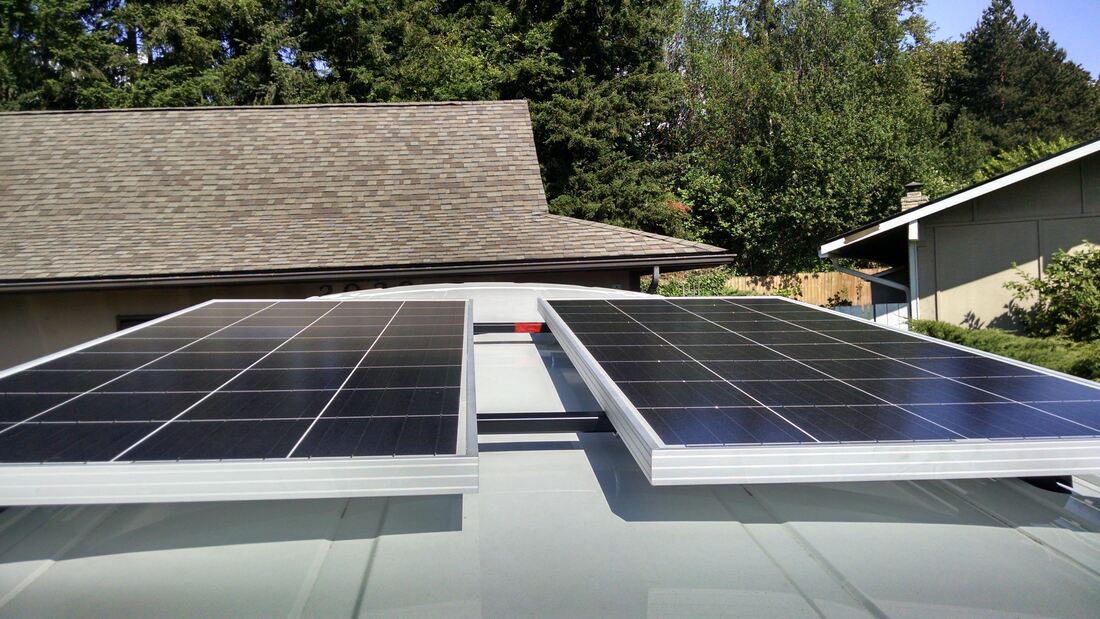
Pretty self explanatory here! Since I will have very modest electrical requirements I went with a simple 12 Volt, 100Ah AGM house battery bank that I will use a combination of Solar Panels, and the existing van battery/alternator to keep the house battery charged. This section required the most research and learning for me to complete. All devices requiring electric power will run on 12 volts, and I will save money by avoiding the need for an inverter.
** Update: I decided to get a 1000W pure sine wave inverter in February 2020, and was able to also add 110V power.
The Pantry
May 2018
Food is something I need a lot of, so I needed to build a special cabinet just for it. There is quite a bit of space adjacent to the couch, and right on top of the electrical cabinet I utilized to build a similar cabinet to the wardrobe, just a bit smaller. The main door was built the same way as per the wardrobe to match. With plenty of shelving space I should be able to store a plethora of food!
Food is something I need a lot of, so I needed to build a special cabinet just for it. There is quite a bit of space adjacent to the couch, and right on top of the electrical cabinet I utilized to build a similar cabinet to the wardrobe, just a bit smaller. The main door was built the same way as per the wardrobe to match. With plenty of shelving space I should be able to store a plethora of food!
The refrigerator
February 2020
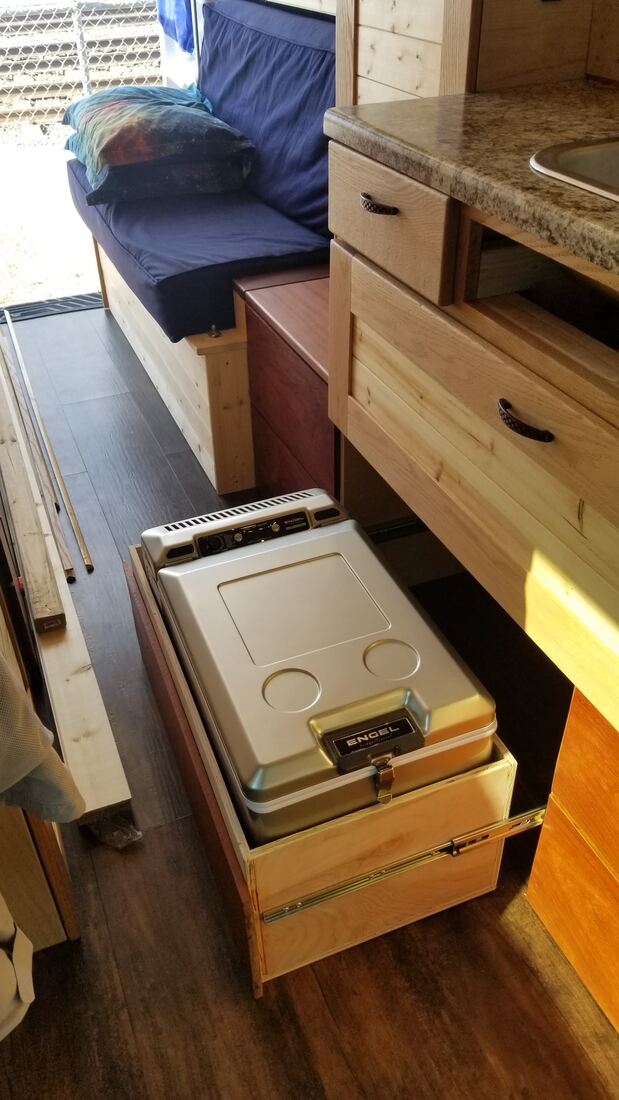
I finally decided on a fridge that would fit perfectly in a great spot directly adjacent to the electrical cabinet as part of the kitchen cabinetry. I decided to purchase an Engel brand cooler, since they are insanely efficient and opened from the top, which allowed me to design a drawer system for the fridge, keeping it out of the way. Simply pull out the drawer the fridge sits in, and open the door from the top!
I finally decided on a fridge that would fit perfectly in a great spot directly adjacent to the electrical cabinet as part of the kitchen cabinetry. I decided to purchase an Engel brand cooler, since they are insanely efficient and opened from the top, which allowed me to design a drawer system for the fridge, keeping it out of the way. Simply pull out the drawer the fridge sits in, and open the door from the top!
Tire Upgrade
February 2020
The factory tires on all the Ford Transit vans really stink in the snow or even on wet grass! Find out which tires I chose to upgrade to below.
The factory tires on all the Ford Transit vans really stink in the snow or even on wet grass! Find out which tires I chose to upgrade to below.

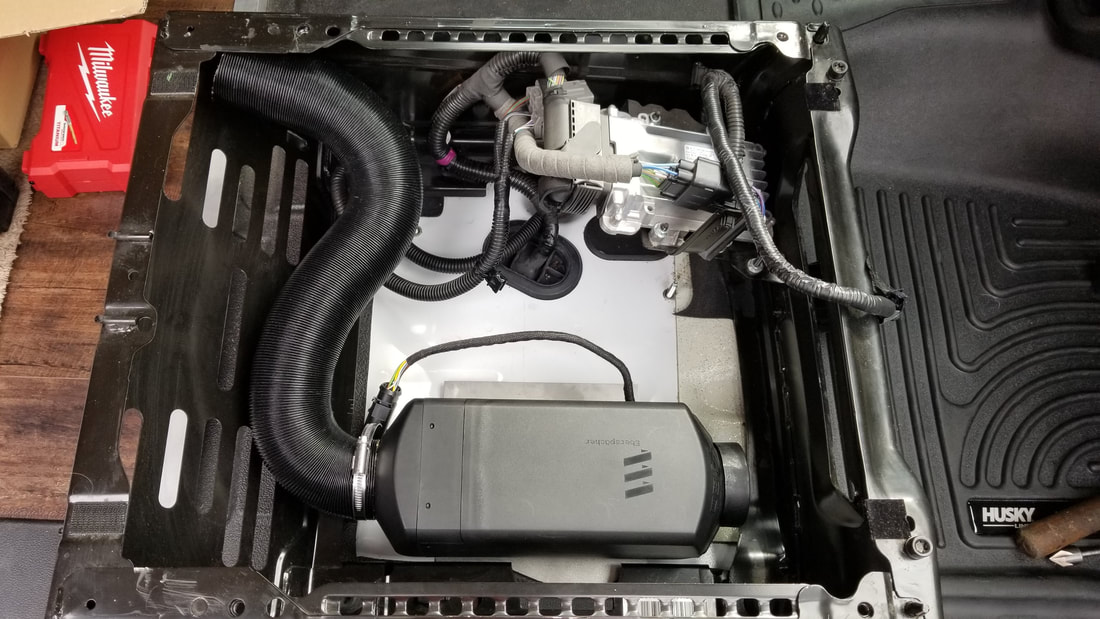
Heating System
April 2020
This was one of the last things I installed in the van, and I actually never got to use the heater before I sold it!
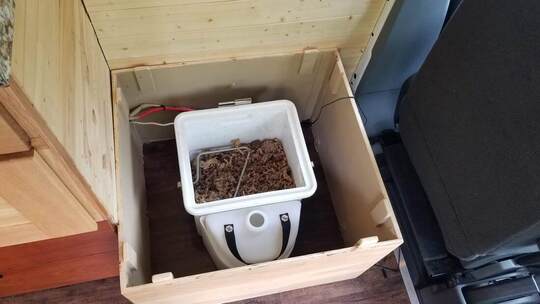
Composting Toilet
April 2020
At the request of my friends who were going to purchase the van, I installed a Natures Head composting toilet in the compartment built behind the driver seat.