Introduction
Having a comfortable place to sit was one of the most important things we wanted in our van conversion, and no better way to do that than to build an actual couch (loveseat would probably be the better word to describe it). Although I can in fact stand up inside the van, I would still prefer to sit when doing things like eating, working on the computer, reading etc, and Elaine also agrees. However we needed to make this couch more than just a place to sit. We also want it to serve as a primary support for the folding bed, and a large storage area. We believe we have successfully done this, and we cannot wait to finish it!
Materials Used
- Five (5) 2" X 3" X 8' Long Spruce Studs ($2.59 Each at Home Depot)
- One (1) 50 pack box of 2.5" Long Kreg Screws ($6.22 at Home Depot)
- One (1) 3/4" X 20" X 72" Long Pine Project Panel ($41.97 at Home Depot)
- One (1) 18mm Thick by 2' X 4' Extra Strong Plywood ($27.53 at Home Depot)
- One (1) 2" X 4" X 8' Long Spruce Stud ($3.55 at Home Depot)
- One (1) 2" X 4" X 10' Long Spruce Stud ($8.12 at Home Depot)
- One (1) Six pack of 8' Long by 5/16" Thick Knotty Pine Tongue and Groove Panels ($20.51 at Home Depot)
- Two (2) Barrel Latches ($11.48 Each at Home Depot)
- One (1) Double Magnet Cabinet Door Stop ($2.49 at Lowes)
- One (1) Bottle of Lepage Wood Glue (Purchased Earlier)
- One (1) 3' Long Flange Hinge ($4.99 at Home Depot)
- Two (2) Standard Cabinet Door Self Closing Hinges ($3.48 Each at Home Depot)
- Four (4) 1/4"-20 Rivet Nuts (Purchased Earlier)
- Four (4) 1/4"-20 2.5" Long Bolts ($0.50 Each at Home Depot
- Two Pieces of Custom Cut Foam ($220 at Foam King)
- Many other Fasteners
Total Material Cost: $380 Canadian Dollars
Tools Used
- Chop Saw (Borrowed from Neighbor in Edmonton)
- Jig Saw
- Drill with Bits and Screw Drives
- Router with Rounding Bit
- Palm Sander with Various Grit Sandpaper
- 4" C-Clamp
- Kreg Pocket Hole Jig and Corresponding Screws
- Table Saw (Borrowed from Neighbor in Edmonton)
- Straightedges
- Carpenters Square
- Measuring Tape and Pen
- Vice Grips and Box Wrenches (For Installing Rivet Nuts)
Time Spent on Job: 15 Hours
Step 1 - Cut and Assemble the 2" X 3" Studs for the Lower Frame
First off, before I did any cutting, since this was going to be a bit more challenging to plan than the coffee table, I actually spent some time one night prior to building thinking everything through, and determining how everything was going to fit together. I even made a sketch to organize all the ideas on paper and better visualize each piece we would need. The design ended up being pretty simple, with a box frame that we secured to the van wall with rivet nuts (see this article for more information about these), and a plywood seat with hinge for access to storage below. The overall dimensions we decided on were highly dictated by where the folding bed was going to be, as we needed to integrate the support for it. Since the bottom of the frame of the folding bed platform will be 21 5/8" above the floor (same height as the top of the coffee table) we had to make the seat platform low enough to ensure the top of the couch cushions would not extend above the supports we would include on the couch ends. We decided to make the seat 16 inches above the floor, which would allow us to fit 5" thick cushions. The length of the seat platform we decided to make 4' long, with 4 inches added to either end for the bed supports, for a total length of 56 inches. For the depth, we decided 24 inches was a good compromise, as that didn't make the walkway between the couch and coffee table too narrow.
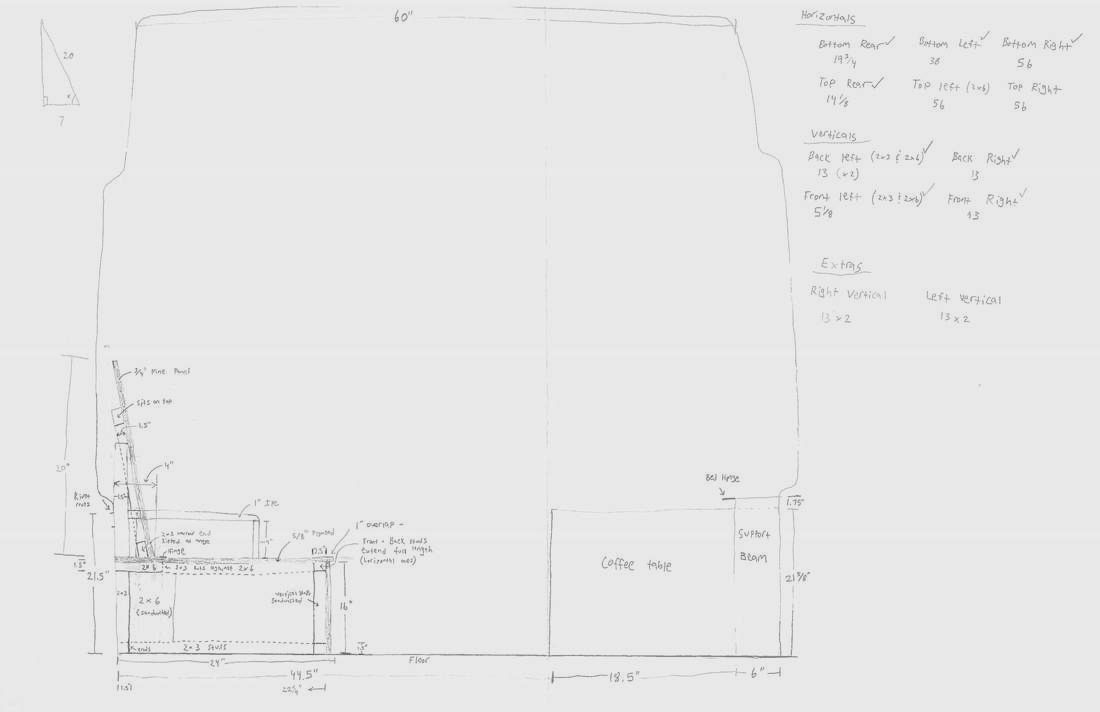
The sketch I made - side view of the couch as seen from the back of the van
Using the sketch I made, I listed out all the frame pieces I would need, measured, and cut each one with the chop saw utilizing the 2X3 studs. This saw is a must have for any type of building as it gives perfectly square cuts. Next, we used the Kreg pocket hole jig with a C-clamp to drill two pocket holes on each end of any frame piece that would butt up against another. This involved many holes! Once each piece was ready for assembly, we started by assembling the front of the couch frame first (right side in sketch above), which involved two 56" long horizontal pieces and four 13" pieces. Glue was used on all the joints for the front.
We then set this frame piece aside and began assembling the back of the frame. This was a bit more challenging as we had to work around the wheel well, however we figured it would be easiest to get as much of the back frame built outside before securing it to the van. We assembled one 56" horizontal piece, three 13" vertical pieces, and a 20 inch piece that would go along the bottom side right by the back doors. We then added the 2" X 6" pieces to each side that would be the horizontal hinge support for the seat platform. The pieces on the far side are very short because they rest on top of the wheel well. We also added small triangle pieces that the horizontal support bean can also rest on.
Then, Elaine cut and glued some felt to the bottom and back sides of the frame where it would rest against the floor or against the van walls while I installed 4 rivet nuts. We used the hanger bolts with sharp end pointing out in each rivet nut to locate the exact spot to drill a 5/16" hole, and secured the frame to the van using 2.5 inch long hex bolts (2.5" needed to go through the 1.5" thick studs). We didn't put the bolts through the vertical frame pieces but rather through an added 4" X 4" square we added in the upper corner. See photo below
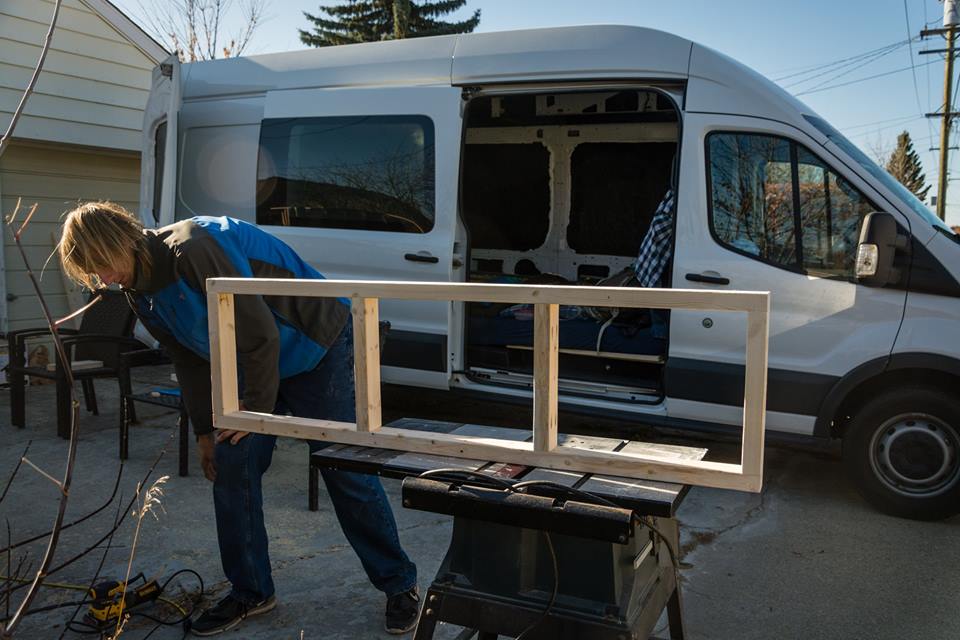
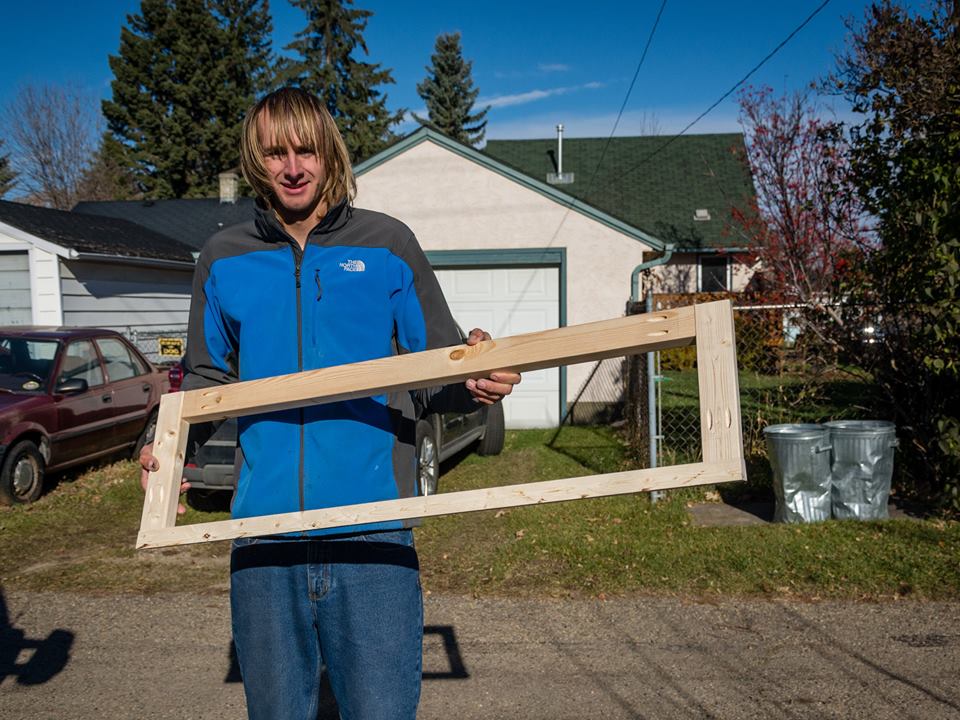
Front part of the frame assembled
Back part of frame secured to the van with rivet nuts and bolts. Notice two small added squares where the bolt is placed (one in middle and one up front above the wheel).
Before we actually bolted the frame to the van, we added some Reflectix insulation behind the area the couch would occupy along the van wall, pushing it through the hanger bolts and taping it down using Tuct Tape. We cut it just above the top of the frame and plan to simply overlap and tape additional Reflectix on the rest of the wall at a later date, when we are ready to build the final wall on the driver side of the van.
With the back part of the frame now completed, we added individual pieces of the frame, such as the 2" X 6" by 56" long horizontal support beam, and the remaining horizontal pieces connecting the back and front halves of the frame. When everything was secure, we then attached the front of the frame (which we assembled earlier) in one piece, and viola! The frame was completed! It strikingly resembled a box haha. To test its strength, we placed the 2' X 4' piece of plywood that would be the seat platform on top and sat on it. Seemed plenty strong enough! At this point it was dark and we decided to go for beers. |
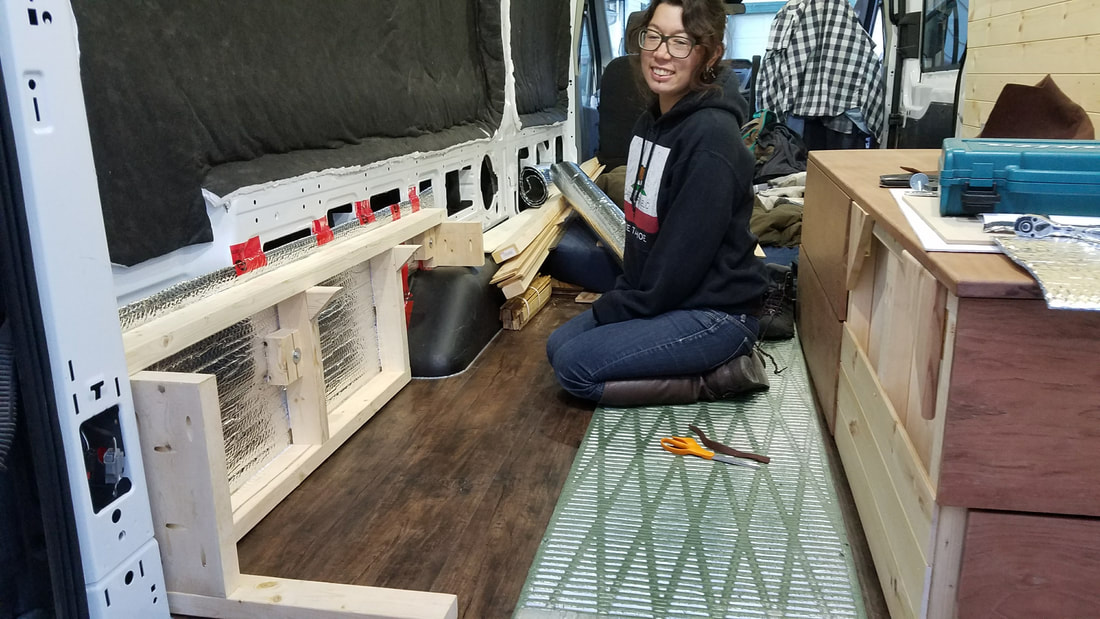
Back part of the frame undergoing assembly
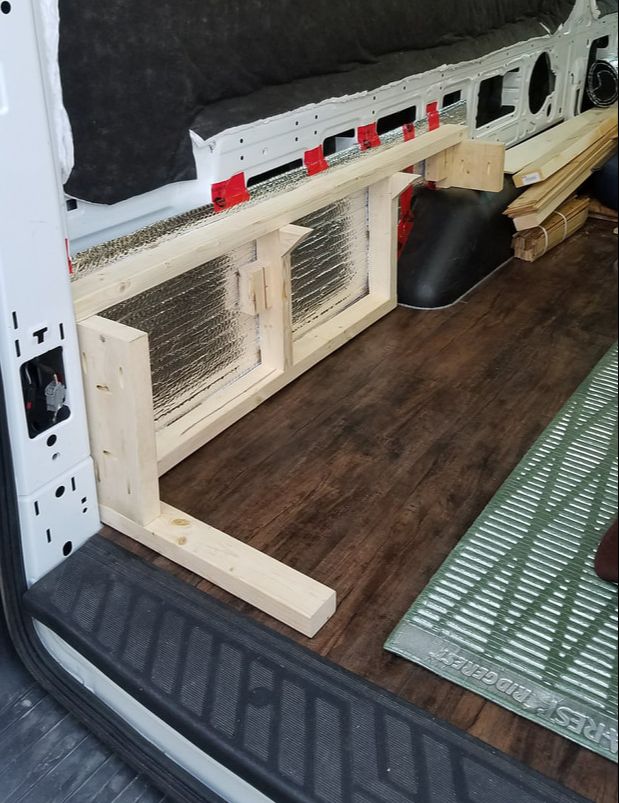
Another photo of the back part of the frame. Notice the Reflectix insulation against the van wall behind the frame.
|

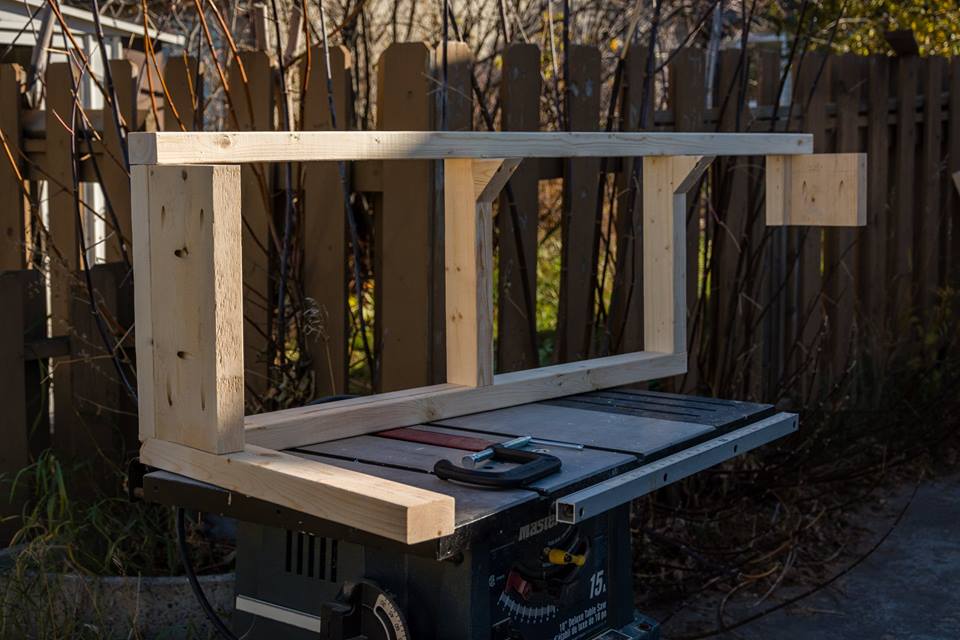
Frame completed, with seat platform resting on top for strength test.
Step 2 - Cut and Assemble the Backrest Frame
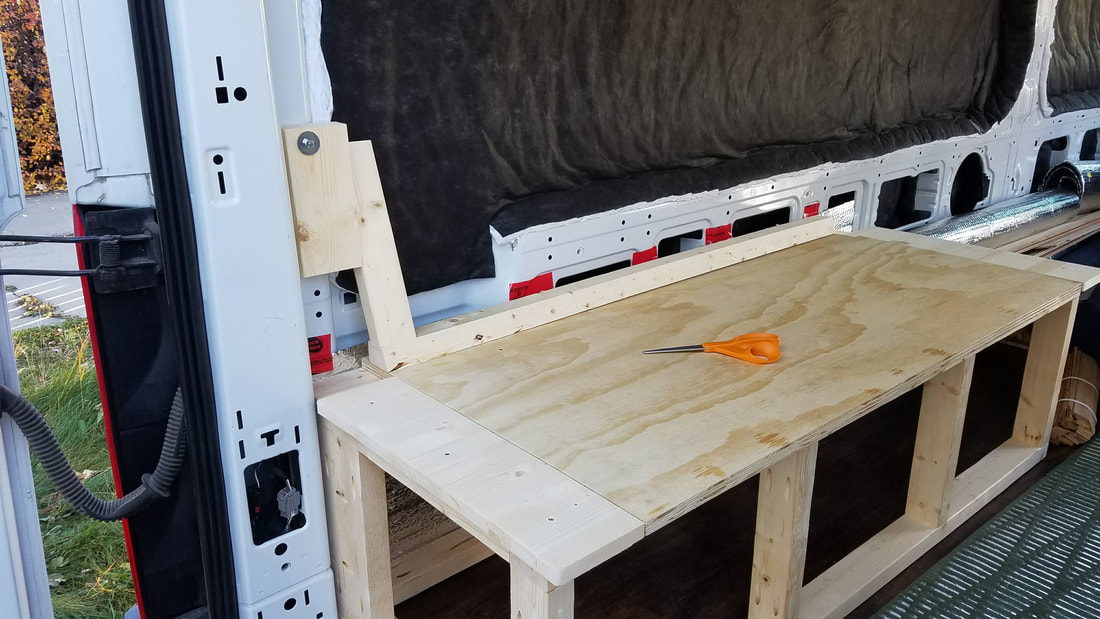
The next morning, I realized we needed to get a few things at Home Depot, and since the table saw we were using quit working, I was hoping we could get a couple pieces cut there that we couldn't do without a table saw. We needed to rip one of the 2" X 3" studs at a 19 degree angle to make the base of the frame piece that the back rest would attach to. Only a table saw with a tilted blade could do this, and amazingly the guy at the rental department let me use one in the back room. Score! The way I determined the 19 degree angle was simple trigonometry. Knowing that the backrest for the couch was going to be 20 inches tall, and the horizontal distance from the point the backrest meets the seat, to the edge of the insulation was 7 inches, I gave a half inch buffer and used 6.5 inches, then did the inverse cosine of (6.5/20) to get an angle of 71 degrees. When subtracted from 90 that gives 19 degrees that the blade of the saw needed to be tilted. We also ripped 5.5" off the seat platform piece of plywood, since it would be re-connected with the long hinge to give access to the storage below. The 5.5" wide piece was screwed onto the back of the frame, along with a 4 3/4" wide piece of nice pine on each side. We left small gaps between each piece to allow for the wood to expand without interfering with one another and potentially causing squeaks.
Next, we began to assemble the frame for the backrest. We used the chop saw with the table rotated 19 degrees to cut the ends of two pieces so they would sit flush on the piece we ripped earlier, and added a top piece to form more or less a rectangle. We used the Kreg pocket hole jig and glue with screws to secure each point. We then attached it directly to the back of the frame, with 3" long screws. To provide additional horizontal support I added a 2' X 4" block to the corner of the van and bolted it on with a rivet nut. Then with a 4" screw I connected the side of the backrest frame into this block. This provides additional support and prevents the backrest from bending back too much, however after only a half inch of flex it will hit the side panel of the van and cannot move further so we weren't too worried. We will have to find a way to integrate this backrest into the wall later on though.
Next, we began to assemble the frame for the backrest. We used the chop saw with the table rotated 19 degrees to cut the ends of two pieces so they would sit flush on the piece we ripped earlier, and added a top piece to form more or less a rectangle. We used the Kreg pocket hole jig and glue with screws to secure each point. We then attached it directly to the back of the frame, with 3" long screws. To provide additional horizontal support I added a 2' X 4" block to the corner of the van and bolted it on with a rivet nut. Then with a 4" screw I connected the side of the backrest frame into this block. This provides additional support and prevents the backrest from bending back too much, however after only a half inch of flex it will hit the side panel of the van and cannot move further so we weren't too worried. We will have to find a way to integrate this backrest into the wall later on though.
Assembled backrest frame. It's hard to see but the bottom piece is ripped at a 19 degree angle from the vertical
Added a small block to the corner of the van the backrest frame can screw into
|
Test fitting the angled piece that will make the bottom of the backrest frame

Backrest frame installed!
|
Step 3 - Install the Seat Platform, Backrest and Wood Paneling
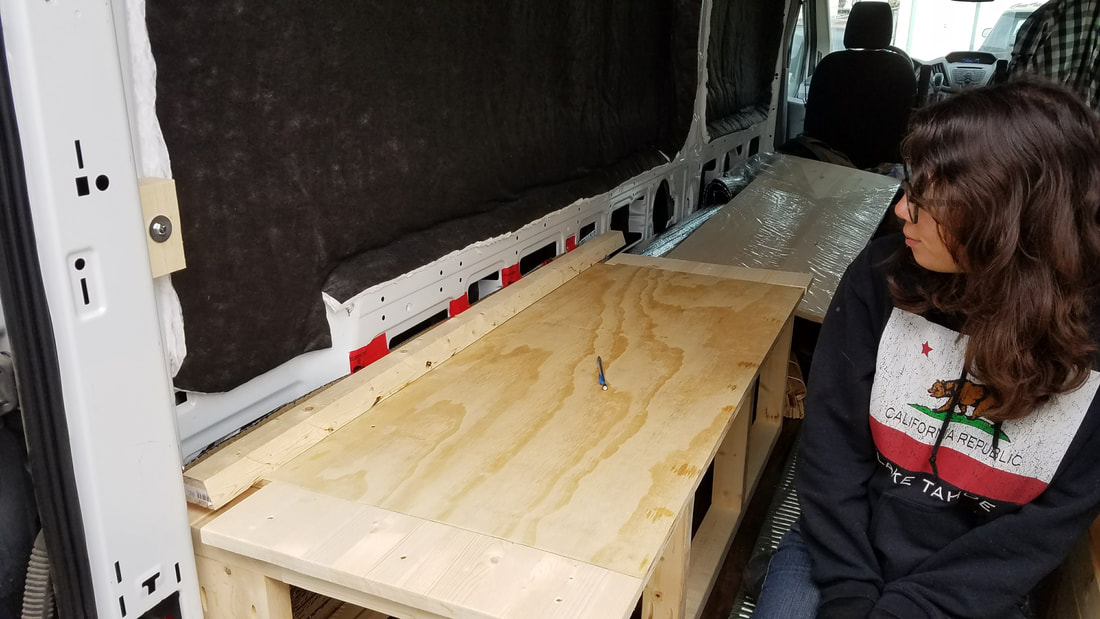
Once the backrest frame was complete, we placed the seat platform, and installed its hinge. The hinge we used was a 3' long flange hinge held down with 32 screws, making the open and closing of the large piece of plywood fairly smooth. We then cut the 20" wide pine project panel to length using the jig saw, and aggressively sanded the whole thing with 220 grit sandpaper. I also took a router with a rounding bit to the top and sides of the backrest, and sanded the edges even more to make them smooth and round. Lastly, we cut a piece out of the upper left corner so it would slide around the corner of the van. We secured it to the back rest frame with only 3 screws for the time being, until we are ready to fully install it. However that will not be until the overhead cabinets and wall are ready to be built.
Once done with the backrest, we installed tongue and groove pine 5/16" thick wood paneling that we got at Home Depot to the front of the couch using small brass screws. These are the same wood panels we will use for all the walls. Later on, we will add a small door for the side of the couch, that would also allow access to the underneath storage from the back of the van.
Once done with the backrest, we installed tongue and groove pine 5/16" thick wood paneling that we got at Home Depot to the front of the couch using small brass screws. These are the same wood panels we will use for all the walls. Later on, we will add a small door for the side of the couch, that would also allow access to the underneath storage from the back of the van.
Backrest installed! Also notice the long hinge at the back of the seat platform, and the wood panels on the front.
|
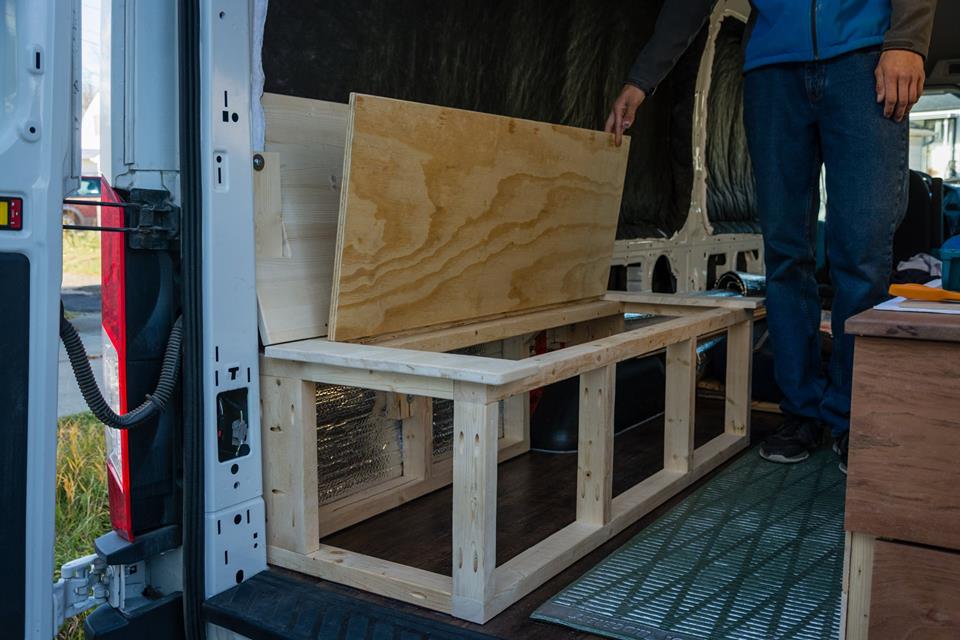
Opens to provide access inside when the couch cushions are removed
|
Step 4 - Add the Folding Bed Supports
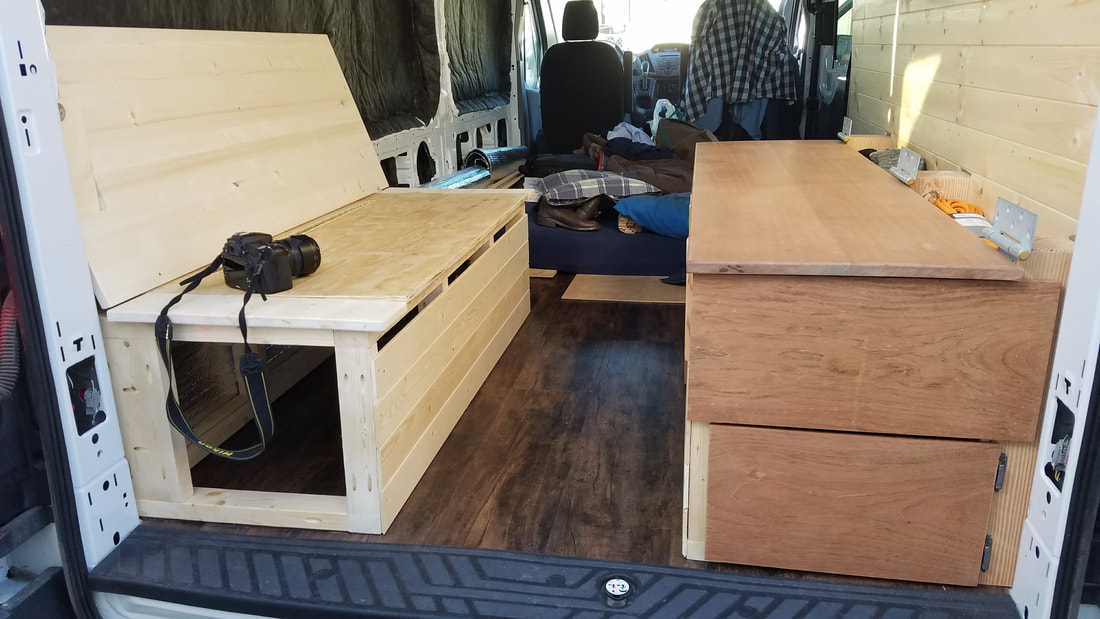
To mitigate having the folding bed resting directly atop of the couch foam, we added some supports to both the front and rear ends of the couch, at the exact perfect height to make the bed level, and allow it to rest squarely on both the table, and the supports adjacent to the couch. This was fairly easy to do, as we simply cut 4 small pieces of 2 X 4 all the same length (I think it was about 3.75 inches...whatever was required to match the height of the table top), and screwed two of them on each side of the foam with long screws from the frame stud. Then, we cut a piece of the Ipe board and screwed one to each side atop these 2 X 4 pieces. The top of these two supports matches exactly the height of the table, and sits just 1/2" below the foam cushion. Therefore when the bed is down, most of the weight sits on these supports and the table, where a small amount also rests on the foam.

Notice the side support for the bed
Step 4 - Make the Couch Cushion Covers
Elaine worked very hard to sew the covers for the custom cut foam pieces we bought. She got some very nice blue fabric, and hand made the covers which also included the nice piping around the edges. We added velcro to the backside and bottom of the covers to hold the cushions to the couch frame.